Step-By-Step Workflow for a Bedroom Refresh From Mood Board to Final Setup
I have been, or can be if you click on a link and make a purchase, compensated via a cash payment, gift, or something else of value for writing this post. As an Amazon Associate, I earn from qualifying purchases. Please read my full Affiliate Disclosure for more information.
You’ll follow a clear, step-by-step workflow from mood board to final setup. Start with defining your aesthetic, choosing a cohesive color rhythm, and planning textures. Move into budgeting, sourcing core pieces, and mapping layout to prioritize the bed as the focal point. Layer textiles, lighting, and materials for depth, then fine‑tune the placement and flow. Track inventory and substitutes, add personal touches, and perform final tweaks—extra insights await as you continue.
Key Takeaways
- Define aesthetic and mood board with cohesive color palette, textures, and functional needs to guide decisions.
- Plan layout centered on the bed, test rug placement, and optimize flow with thoughtful seating and accessibility.
- Budget, timeline, and sourcing priorities for core pieces, focusing on scale, durability, and layout harmony.
- Layer textures and colors, mixing fabrics and materials while maintaining a cohesive rhythm and purposeful negative space.
- Layer lighting (ambient, task, accent), refine inventory, and finalize with touches of art, greenery, and clutter-free surfaces.
Defining Your Aesthetic: Mood Board Essentials
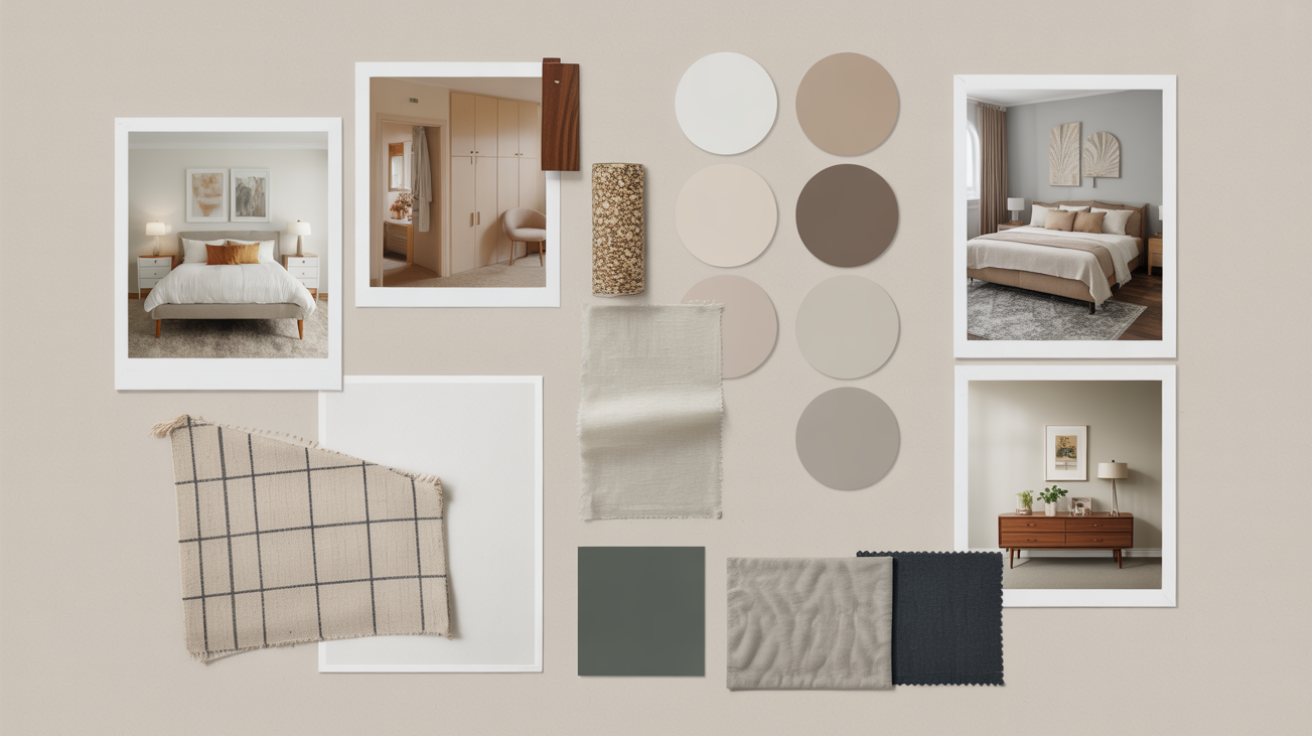
Defining your aesthetic starts with a clear mood board that translates mood, color, and texture into a tangible plan. You’ll curate decor themes and select inspirational images to establish a cohesive direction for your bedroom refresh. Focus on how elements interact: lighting, materials, and scale, then translate them into actionable choices like finishes and textures. Keep the board organized by category (color palette, furniture style, textiles) and note why each item matters. This clarity guides decisions, prevents scope creep, and aligns teammates. Revisit and refine as ideas evolve, ensuring every element serves the intended mood and functional goals.
Budgeting and Planning: Estimating Costs and Timelines
To start budgeting effectively, map out both estimated costs and a realistic timeline for each project phase, from planning and procurement to installation and finishing touches. You’ll approach budgeting with clarity: identify line items, anticipate tax and delivery fees, and set a contingency. Use budget allocation to allocate funds by priority and risk, ensuring essential elements are covered first. For timeline estimation, assign durations to planning, ordering, and setup tasks, then add buffers for delays. Track progress weekly, revise estimates as needed, and maintain a transparent record for stakeholders. This disciplined approach supports steady, predictable progress throughout your bedroom refresh.
Sourcing the Core Pieces: Furniture and Large-Scale Decisions
Choosing the right core pieces sets the tone for the room, so start by prioritizing furniture with both function and scale in mind. You’ll map flow, guarantee clear pathways, and select silhouettes that complement ceiling height and bed size. Prioritize durable frames, supportive seating, and a balanced bed-to-dresser ratio to anchor the layout. Consider vintage accents to add character without overwhelming the space. Favor eco friendly materials for sustainability and longevity. Measure doorways and clearance for doors, drawers, and movement. Finalize a focal piece, then build the rest around it to preserve proportion, cohesion, and a calm, timeless mood.
Texture and Color: Building Layers With Fabric and Materials
Think about layering textures by pairing soft fabrics with contrasting surfaces to create depth. Consider mixing fabrics and materials—such as velvet with linen or wood with metal—to balance tactile interest and visual weight. Use color depth techniques to unify the look, starting with a cohesive base and adding accent hues through textiles and finishes.
Layered Texture Pairing
Layered texture pairing combines tactile variety with color restraint to create depth without visual clutter. You’ll balance soft elements with firmer surfaces, letting each texture play a precise role. Begin with a limited color palette to preserve harmony, then layer textiles and materials that read as distinct, not busy. Prioritize textural contrast—pair plush with smooth, matte with subtle sheen—to add dimension without overwhelming the eye. Consider pattern mixing carefully: mix scale, not motifs, so motifs don’t clash. Maintain cohesion by repeating a single texture strand across layers, ensuring a calm, curated finish that supports the overall mood.
Fabric Material Mix
Fabric and material choices define the bed’s tactile footprint, so start by pairing fabrics that read as distinct yet harmonize in color. You’ll layer textures deliberately: a durable weave for the base, a soft, plush finish for comfort, and a smooth, breathable cover to balance heat. Consider textile blending to create depth without overwhelm, mixing matte and subtle sheen to reflect light softly. Factor fabric durability into maintenance—choose fibers that resist wear yet feel inviting. Keep scale and pattern restrained, letting color velocity lead. Finalize with practical hems, secure trims, and a cohesive, coherent surface that stays elegant over time.
Color Depth Techniques
Color depth in textiles comes from thoughtful layering of texture, color, and finish to create a tactile and visual hierarchy. You build depth by combining fabrics with varied weaves, weights, and sheens, then adjust color intensity through strategic color contrast. Start with a neutral base to anchor the palette, then add accent tones that differ in value or saturation to push elements forward or recede. Balance hue harmony across textiles—rug, curtains, throw, and bedding—so the eye moves smoothly. This technique prevents flatness, adds interest, and reinforces mood without overpowering the room.
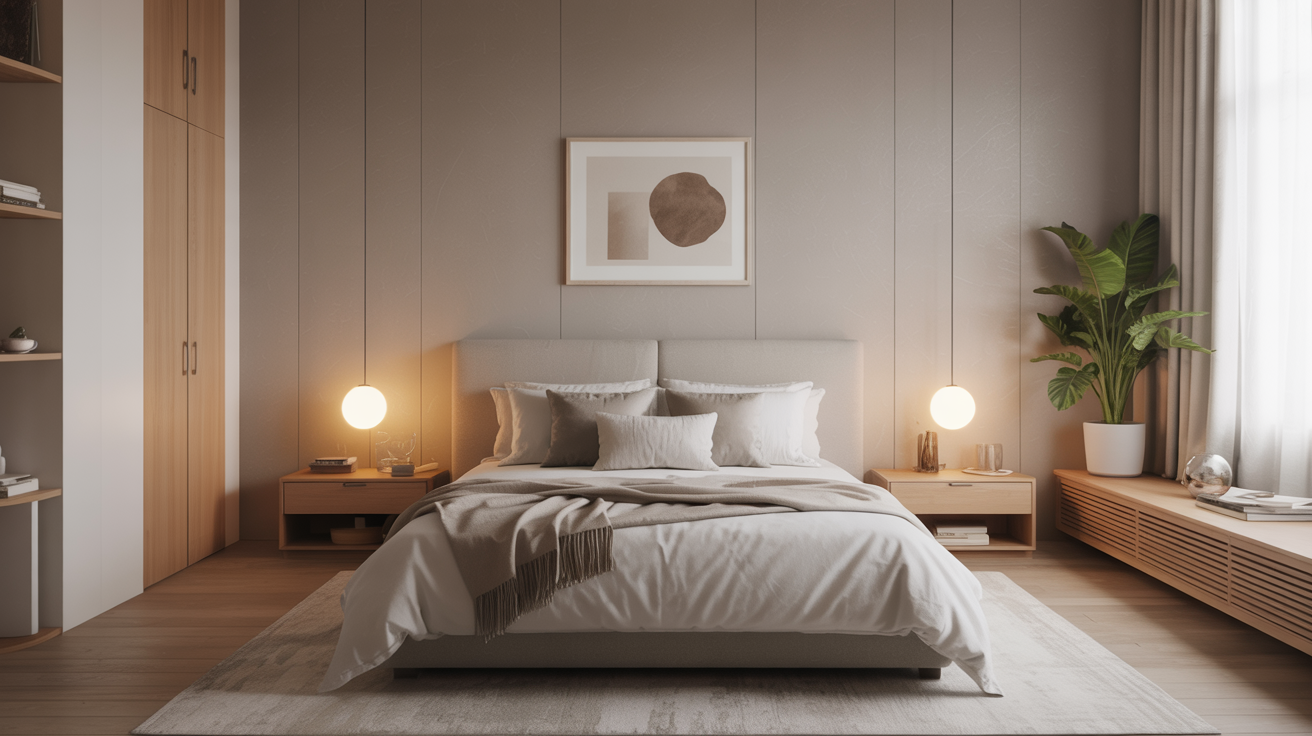
Lighting and Ambiance: Layering Light for Mood and Function
Effective bedroom lighting blends function with mood, so you can read, relax, and sleep comfortably. You’ll layer light to create depth: ambient lighting softly fills the room, task illumination focuses where you need precision, and accent notes highlight texture. Start with a dimmable overhead or wall sconces for general brightness control. Add a bedside lamp for reading, ensuring it’s positioned for easy reach without glare. Consider warm color temperatures to soothe evenings, cooler tones for workflow moments. Balance all sources to avoid harsh shadows; keep cables tucked. Reassess after layout changes to maintain consistent, inviting ambiance.
Layout and Space Planning: Maximizing Flow and Comfort
To maximize flow and comfort, start with a clear room map that prioritizes easy movement around key zones—sleep, dressing, and relaxation—without clutter. Layout decisions should align with doorways, windows, and built-ins, ensuring a natural path from entry to bed. Position the bed to anchor sightlines and reserve space for bedside tasks, seating, and a functional dresser. Consider vertical storage to reduce floor clutter, and maintain clear zones for movement. Integrate bedroom lighting and window treatments to modify mood and privacy without crowding pathways. Test circulation by walking the route and adjusting furniture for effortless flow and comfort.
Shopping List and Inventory: Tracking Purchases and Substitutes
You’ll want a clear system for Track Purchases and Substitute Inventory to prevent overbuying and stockouts. Start by logging each item as you buy it and flag substitutes when your preferred option isn’t available. This foundation supports efficient reordering and helps you compare alternatives quickly.
Track Purchases
Track purchases by maintaining a simple shopping list linked to your current inventory. You’ll record items as you decide, noting quantity, price, and expected delivery. Check each entry against your mood board and measured spaces to prevent overbuying. Update the list after purchases to reflect real stock, remaining needs, and any delays. Prioritize sustainable materials and durable finishes to extend lifespan, reducing replacements. When alternatives arise, compare impact, cost, and compatibility before finalizing. Use a clear naming system and organize by category (soft goods, hard surfaces, decor). This habit supports mindful, efficient project progress and reduces waste. vintage finds.
Substitute Inventory
Substitute Inventory helps you adapt your shopping list when ideal items aren’t available, while still keeping your overall project on track. You’ll track purchases and substitutes so decisions stay transparent and aligned with your mood board. This approach minimizes delays and preserves your design intent.
- Update the list with acceptable substitutions for decorative accents and storage solutions.
- Note price differences, delivery times, and compatibility with existing pieces.
- Create a quick review step to confirm substitutions support overall balance and budget.
Final Styling: Arranging, Tweaks, and Personal Touches
To finalize the bedroom refresh, start by arranging key elements with purpose: the bed as the focal point, a balanced mix of textures, and functional surfaces that read clean and intentional. Then add subtle tweaks to refine balance: adjust lighting levels, test rug placement, and make certain seating supports flow. Introduce personal touches with intention, selecting art and accents that reflect your style without clutter. Integrate artificial plants for a touch of greenery without maintenance, and place wall art where it anchors rather than competes with the bed. Finalize with a cohesive color rhythm and purposeful negative space.
Conclusion
You’ve defined your aesthetic, nailed the budget, and chosen core pieces, then layered texture, light, and color to shape mood. With a thoughtful layout and a precise shopping log, you’ve built a cohesive foundation. Now, add the final styling touches: personal photos, subtle greenery, and any preferred accents. Step back, tweak as needed, and revel in the refreshed space that feels intentional, calm, and true to you. Your bedroom is ready for rest, work, and everyday moments.