I have been, or can be if you click on a link and make a purchase, compensated via a cash payment, gift, or something else of value for writing this post. As an Amazon Associate, I earn from qualifying purchases. Please read my full Affiliate Disclosure for more information.
Imagine opening your pantry and feeling an immediate sense of order and calm—that’s the magic of a well-organized space! Pantry ideas are popular because they turn a usually cluttered area into a functional, visually pleasing haven where everything is within easy reach. A beautifully arranged pantry not only saves time but also makes cooking and shopping more enjoyable.
In this article, you’ll uncover a variety of creative and practical ideas to transform your pantry into an efficient workspace. From clever storage solutions to stylish displays, these tips will inspire you to optimize your space and bring a fresh, organized vibe to your home. Get ready to turn chaos into harmony with ideas that suit any style and budget!
1. Install Adjustable Wire Shelving for Flexible Storage
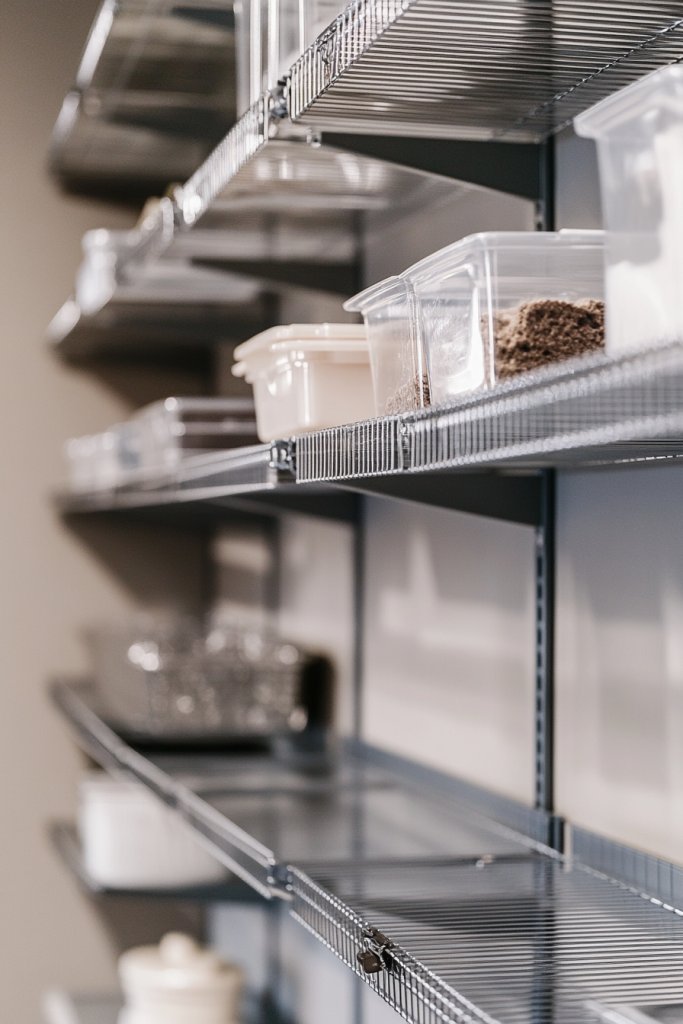
Ever feel like your pantry is a jumbled mess where finding what you need feels like searching for a needle in a haystack? The chaos can turn meal prep into a daily treasure hunt. You want a solution that adapts as your collection of snacks and ingredients grows. The idea of adjustable shelving promises a tidy, customizable space without the hassle.
Imagine sleek metal wire shelves stretching vertically, with each tier holding neatly organized cans, jars, and boxes. The open design allows you to see everything at a glance, reducing clutter. The adjustable feature lets you move shelves to fit tall bottles or small spice jars effortlessly. Think of a clean, airy look with everything in its perfect place, making your pantry feel like a well-oiled machine.
Choose galvanized steel for a modern, industrial vibe, or opt for coated wire for a softer, matte finish that blends with farmhouse decor. You can install these shelves in a small apartment pantry or a spacious walk-in closet. During holidays, you might add colorful bins or decorative labels to make it festive. For a kid-friendly pantry, lower shelves can be customized for easy access.
Start by measuring your space and selecting adjustable wire shelving units that fit your dimensions. Use a level and drill to securely mount brackets to your walls. Adjust the shelves to accommodate different item heights—large cereal boxes or tall bottles. Use clips or separators to keep groups of items from tipping over. Regularly check stability and clean the shelves to maintain that sleek look. No fancy tools required—just a bit of patience.
Personalize your shelving with colorful labels or clips that categorize snacks, baking supplies, or canned goods. Add small decorative elements like patterned liners or textured shelf liners to soften the industrial feel. Consider installing under-shelf lighting for better visibility or using decorative hooks for hanging utensils or small baskets. The goal is a functional yet personalized space that sparks joy every time you open it.
Adjustable wire shelving transforms chaos into harmony and makes your daily routine more efficient. Plus, it’s a budget-friendly upgrade that can be DIY-installed with minimal fuss. Once set up, you’ll wonder how you ever managed without this flexible system. Get ready to enjoy a clutter-free, stylish pantry that’s as adaptable as your life demands.
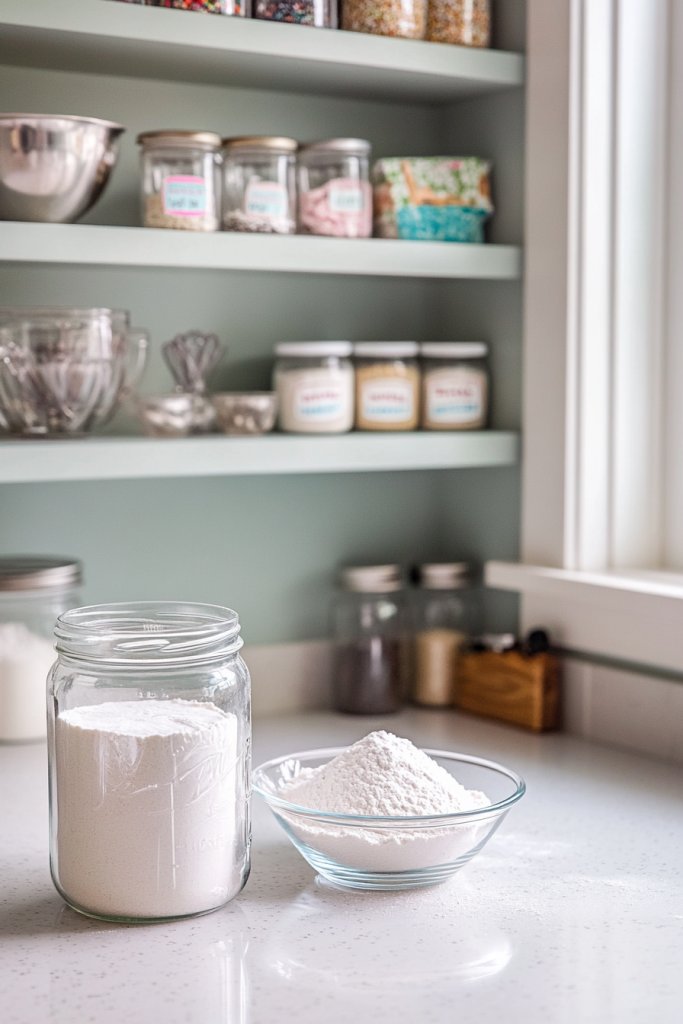
2. Use Clear Airtight Containers for Food Storage
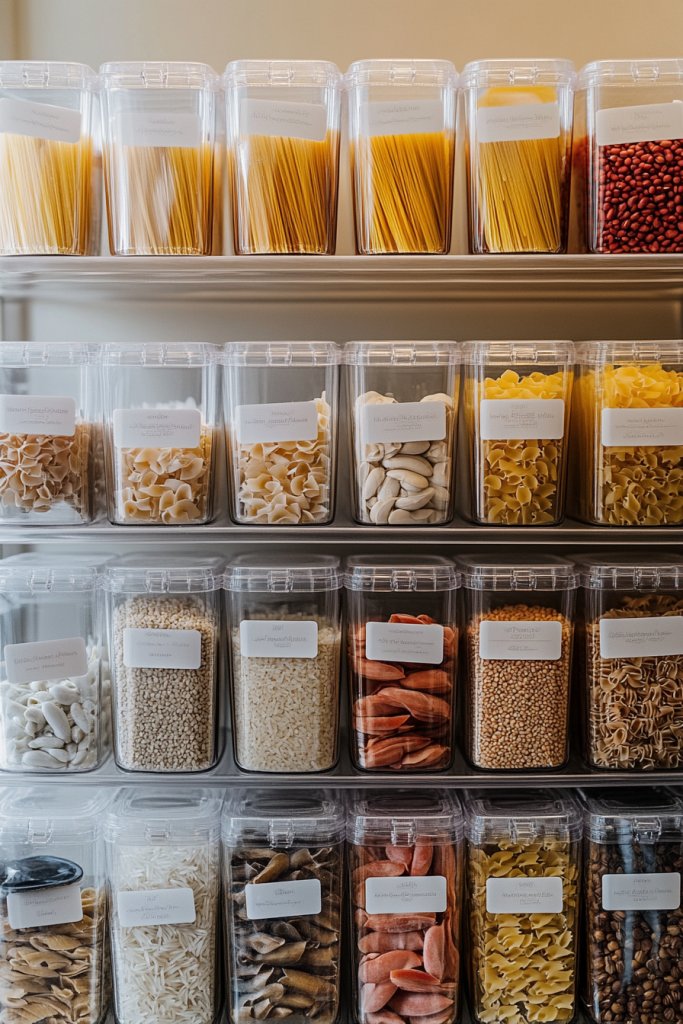
Ever open your pantry and feel overwhelmed by a sea of mismatched packages and unlabeled bags? It’s a common frustration that makes meal planning more stressful than it needs to be. You want a solution that keeps food fresh, looks organized, and saves time. Clear airtight containers tick all those boxes and then some.
Picture uniform, transparent containers lined up on shelves, their contents visible at a glance. The airtight seals prevent crumbs, moisture, and pests from invading your goodies. Labeled with sleek tags or stickers, each container clearly states what’s inside—no more guessing games. The clean, minimalist look elevates your pantry from cluttered to curated, transforming chaos into calm.
Opt for BPA-free plastic for lightweight, budget-friendly options or glass for a more premium, eco-friendly feel. Use color-coded labels for different categories—baking, snacks, grains—to add a touch of fun. In small kitchens, stackable containers maximize vertical space, while in larger pantries, oversized jars can hold bulk staples. Seasonal decor, like holiday-themed labels, can add a festive touch during special times.
Start by sorting your pantry items and choosing containers that fit your needs. Clean and dry each container thoroughly before filling. Use a funnel for powders like flour or sugar to prevent spills. Label each container with a chalk marker or printable sticker for easy updates. Store frequently used items at eye level, and stack or nest containers to save space. Regularly reassess and rotate stock for freshness.
Add decorative touches by choosing containers with unique shapes or textured surfaces. Use colorful or themed labels to match your kitchen decor or personality. Incorporate small risers or tiered trays inside containers to organize different varieties or flavors. For a fun twist, use chalkboard labels you can erase and rewrite for different seasons or recipes. The goal is a seamless blend of function and style.
Clear containers make it easy to see when supplies are running low, preventing last-minute grocery runs. They also give your pantry a polished, professional look—like a boutique store. Plus, they help keep food fresher longer, saving you money and reducing waste. Once you see how neat and accessible everything becomes, you’ll wonder why you waited so long to upgrade.
3. Incorporate Pull-Out Drawers and Bins
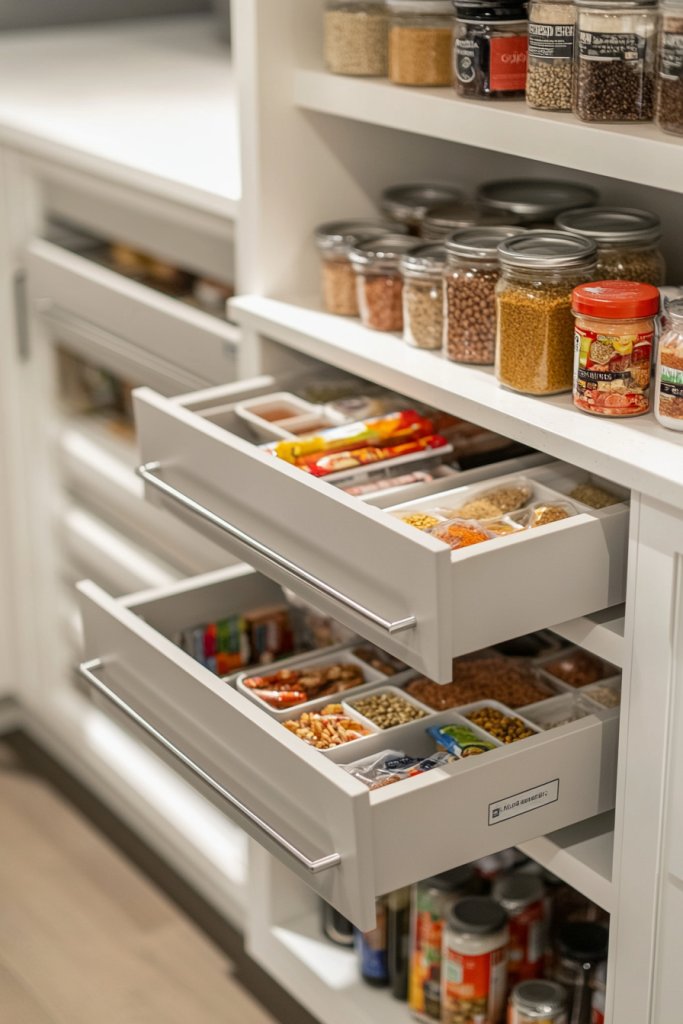
Is digging through a mountain of snack bags and spice jars every time you cook wearing you out? Cluttered pantry shelves can make even the simplest tasks feel like a chore. You need a smart, accessible solution that keeps everything in reach and organized. Pull-out drawers and bins are the game-changers for anyone tired of the mess.
Envision smooth-gliding drawers tucked into your shelves, revealing neatly stacked snacks, spices, or baking ingredients. When pulled out, everything is within arm’s reach—no more crawling on the floor or knocking things over. Bins keep similar items grouped together, with some transparent for quick identification. It’s like having a personal assistant organizing your essentials, all hidden behind sleek facades.
Choose materials matching your decor—wood for rustic charm, plastic for durability, or metal for a modern look. For small spaces, narrow pull-out units fit into tight spots, while larger drawers can accommodate bulk items. Use labeled bins for spices or baking supplies, or add dividers within drawers for utensils. During holidays, swap labels or add seasonal liners for a festive touch.
Measure your available space and select pull-out drawers that fit seamlessly into your shelves. Install with easy-to-use brackets and guides, ensuring smooth operation. Organize items by frequency of use—daily staples in front, less-used items in the back. Fill the drawers with bins or baskets, then label for quick retrieval. Regularly clean and reorganize to maintain efficiency.
Customize your drawers with colorful labels or decorative handles. Add small risers inside bins to keep things tidy or include stacking trays for different categories. Use scented drawer liners for a fresh smell or incorporate small, decorative touches like patterned or textured bins. Personal touches turn functional storage into an inviting part of your kitchen.
Pull-out drawers reduce clutter and waste, making your pantry more efficient. They also save time during busy mornings or dinner prep, boosting your confidence in your cooking space. Once organized, you’ll enjoy a neater, more enjoyable kitchen environment. Ready to make your pantry a streamlined haven? Just pull and go!
4. Create a Color-Coordinated Storage System
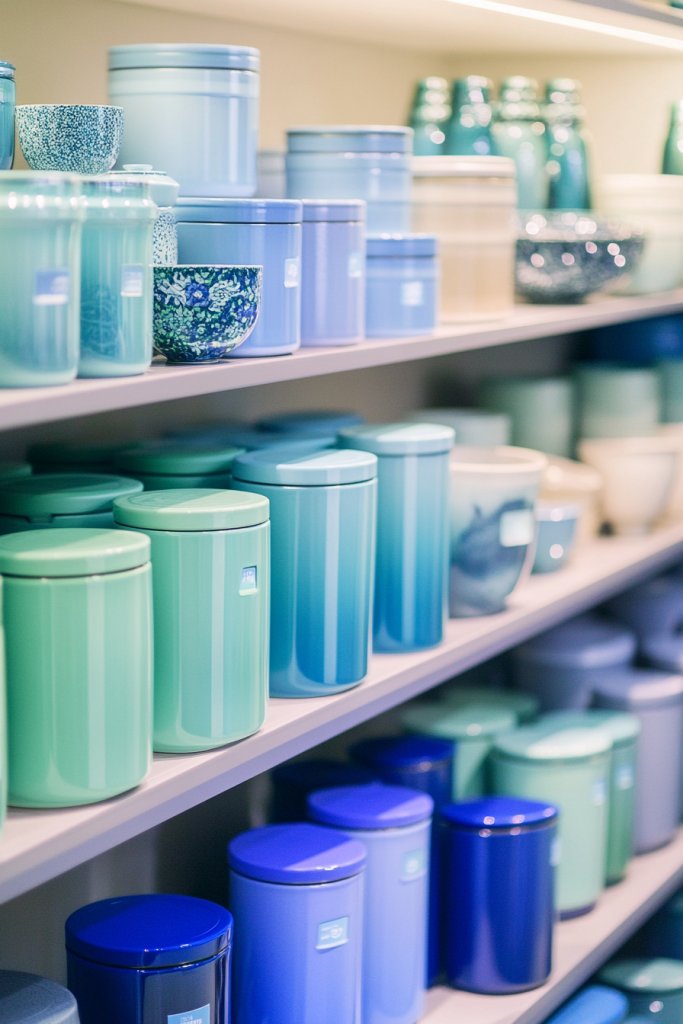
Feeling overwhelmed every time you open your pantry door? Randomly colored packaging and mismatched containers can make organization seem impossible. A coordinated color system can bring harmony and make finding what you need a breeze. Plus, it adds a pleasing aesthetic that makes you smile every time you cook.
Imagine a pantry where all baking supplies are stored in warm beige and cream-colored containers, while snacks are in vibrant reds and yellows. Spices are grouped in sleek black jars, and grains sit in soft pastel bins. The visual rhythm makes it easy to locate items instantly, turning chaos into a colorful mosaic of order. The palette creates a calming, cheerful atmosphere that invites you to cook more.
Choose a palette that fits your decor style—neutral tones for a minimalist look or bold hues for a lively vibe. For seasonal adaptation, swap out labels or containers to match holidays or themes. Small kitchen spaces benefit from uniform containers, while larger pantries can incorporate accent colors for specific categories. Mixing textures, like matte and glossy finishes, adds depth without clutter.
Start by selecting a color scheme that resonates with your style. Purchase matching containers, jars, or bins, and assign each color to a category—baking, snacks, cereals, etc. Use labels or chalk markers to add clarity and consistency. Organize items by color within shelves or compartments, creating visual cues for quick access. Maintain the scheme by reordering or replacing containers as needed.
Add decorative labels with coordinating fonts or patterns to enhance the look. Incorporate seasonal accents like festive ribbons or stickers for holidays. Use textured or patterned shelf liners underneath containers to add visual interest. For a personal touch, create custom tags or tags with inspiring quotes that match your color theme.
A color-coordinated system turns an ordinary pantry into a design statement, boosting pride and motivation. It simplifies shopping—just remember the color for each category. As your collection grows, maintaining the scheme keeps everything feeling cohesive. Your organized, vibrant pantry will become a source of inspiration daily.
5. Add Lazy Susans for Corner or Deep Shelves
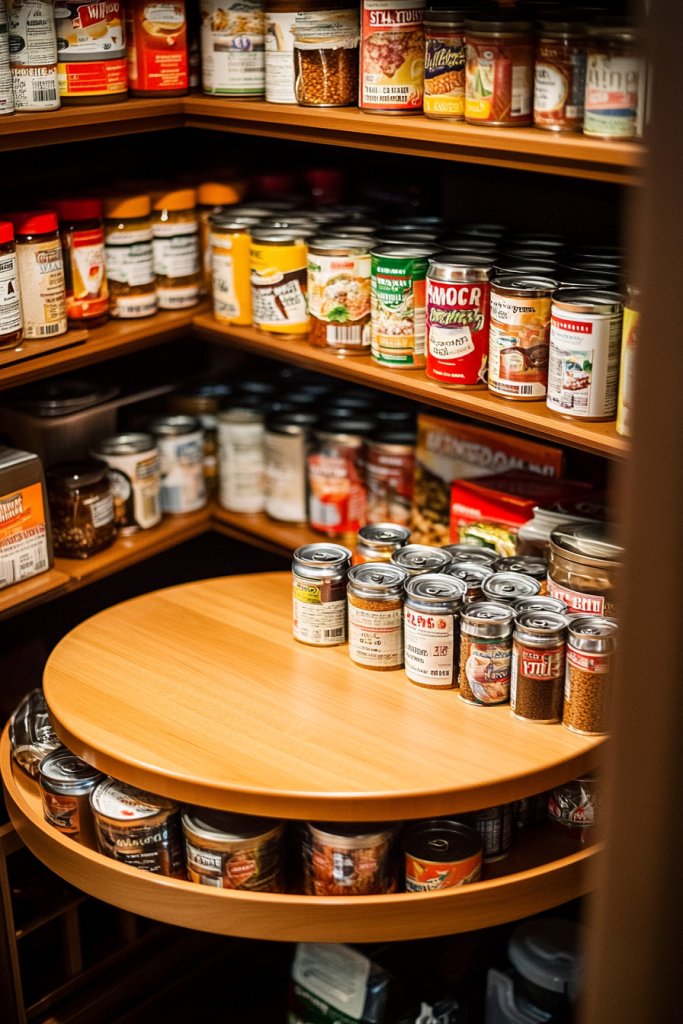
Are those hidden corner shelves turning into black holes where cans and spices disappear forever? Deep shelves often lead to frustrating rummaging and wasted space. Lazy Susans are the perfect fix to make every inch accessible and keep your pantry neat. No more digging through layers of jars—just a simple spin gets you what you need.
Visualize a round, smooth-turning tray filled with neatly arranged spices, oils, or small jars. When you spin it, everything rotates into your reach, like magic. The shelves become a mini carousel of convenience, preventing items from getting lost in the back. The sturdy base and sleek design add a touch of elegance while boosting functionality.
Choose wood for a warm, rustic look or metal for a sleek, modern vibe. Small corner spaces can host mini lazy Susans, while larger deep shelves benefit from bigger, more robust models. Use color-coded or labeled trays to categorize spices, snacks, or canned goods. During seasonal cleanups, swap out contents or add decorative liners for special occasions.
Identify deep or corner shelves that need better access. Purchase a lazy Susan with a sturdy base and smooth-spinning mechanism. Clear the shelves, then place the tray with your grouped items—cans, jars, or spices. Label sections for easy recognition, and check the spin mechanism periodically for smooth operation. Regularly rotate items to keep everything fresh and accessible.
Decorate the edges of your lazy Susans with colorful or patterned liners for extra flair. Use small baskets or dividers within the trays to organize tiny items. Incorporate matching labels or tags to keep categories clear. For a quirky touch, opt for vintage or uniquely shaped trays that reflect your personality.
Lazy Susans turn awkward, unused corners into efficient storage zones. They streamline your cooking process and reduce clutter, making your pantry more user-friendly. Once installed, you’ll wonder how you ever managed without them. It’s a simple upgrade that offers big benefits—spin your way to a more organized kitchen.
6. Install Over-the-Door Pantry Organizers
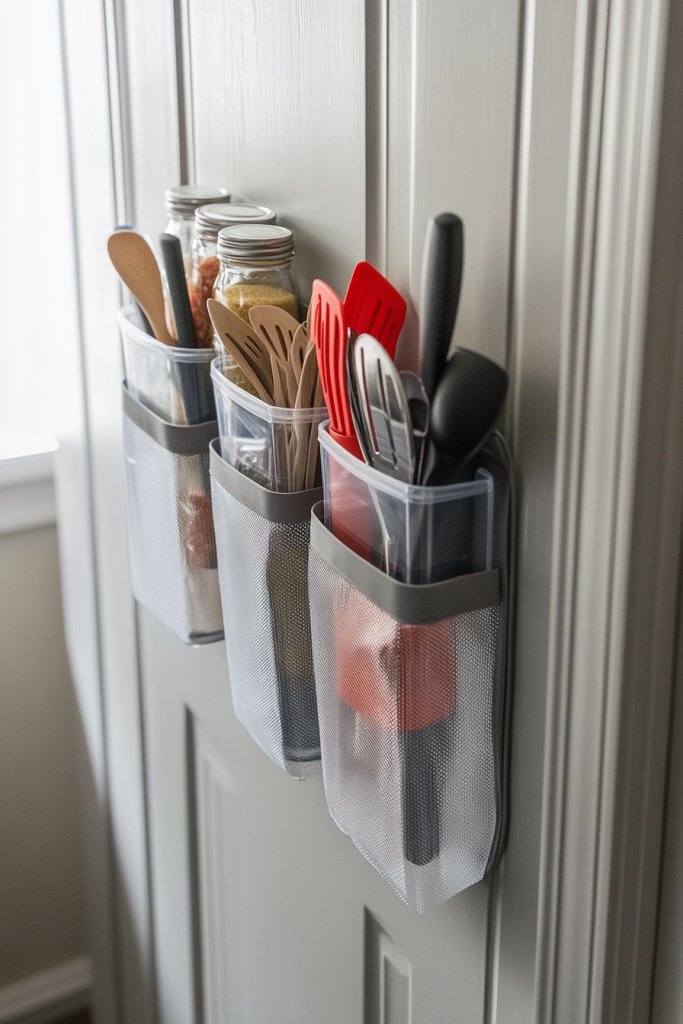
Is your pantry shelf space feeling cramped, forcing you to sacrifice valuable storage for small items? Over-the-door organizers provide a clever way to utilize unused door space effectively. They’re perfect for storing spices, snack packs, or cleaning supplies without cluttering your main shelves. Say goodbye to cluttered countertops and overstuffed shelves.
Picture a sturdy rack hanging on the inside of your pantry door, with small pockets filled with spice bottles, snack bags, or cleaning sprays. The transparent pockets make it easy to see everything at a glance. The organizer adds a vertical layer of storage, freeing up shelf space for bulkier items. It’s like having an extra wall of storage that’s both functional and discreet.
Choose clear pockets for visibility or fabric for a softer aesthetic. Smaller pockets work well for spice jars, while larger ones hold snack packs or small cleaning bottles. For a cohesive look, opt for matching colors or patterns that blend with your kitchen decor. Seasonal updates can include decorative ribbons or labels for special occasions.
Measure your door and select an organizer that fits snugly without interfering with hinges or handles. Mount the hooks or adhesive strips securely, ensuring they can handle the weight of your stored items. Fill the pockets with your chosen supplies, organizing by frequency of use. Regularly check for wear and tear—replace or reposition as needed. It’s a quick, easy upgrade that makes a big difference.
Add decorative touches like fabric liners or personalized tags to each pocket. Use color-coded or themed labels to identify contents quickly. Incorporate small hooks or clips inside pockets for utensils or reusable bags. During holidays, swap out labels or add festive decorations to keep things fun and fresh.
Over-the-door organizers maximize space and keep everything within easy reach. They’re a simple yet effective way to declutter your main shelves, making your pantry more organized and inviting. Once set up, you’ll wonder how you managed clutter before. It’s a small change with a big impact—organize smarter, not harder.
7. Incorporate Stackable Bins and Risers
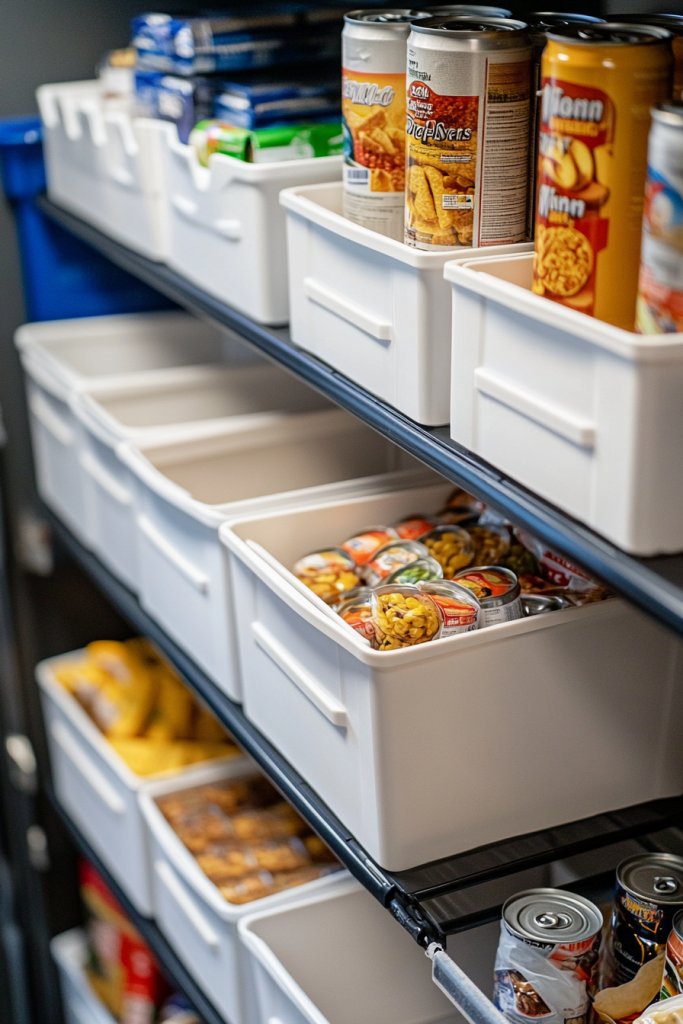
Do your canned goods and snacks get lost in the back of the shelf, forcing you to shuffle everything around? Stacking bins and risers help create multiple layers within your pantry, making every item visible and accessible. They’re perfect for maximizing vertical space and reducing clutter. No more digging through a mountain of cans—just a quick glance and grab.
Imagine neatly organized bins stacked in tiers, each holding a different category like baking supplies, canned vegetables, or snack packs. Risers lift smaller items to eye level, making it easier to find what you need. The layered setup creates an organized, visually appealing display that feels both functional and inviting. Everything has its place, and nothing gets pushed to the back.
Use clear plastic bins for easy visibility or choose decorative baskets for a softer aesthetic. Stackable options come in various sizes—small for spices, large for bulk goods—and can be arranged to fit your space. Risers can be tiered or flat, depending on your storage needs. During seasonal changes, swap out bins or add labels for special occasions.
Start by measuring your shelf space and selecting stackable bins that fit comfortably. Organize similar items together and place them in the bins, stacking where possible. Use risers to elevate smaller or frequently used items for quick access. Label each bin or riser for clarity, and keep adjusting as your collection grows. Regular tidying keeps everything in top shape.
Decorate your bins with patterned or textured liners for added style. Use colorful labels or chalkboard tags for easy updates. Incorporate small decorative elements like faux greenery or textured fabric wraps to personalize your setup. For a cohesive look, coordinate colors with your overall kitchen theme.
Stackable bins and risers turn clutter into order and make your pantry more functional. They help you see your supplies at a glance, reducing waste and duplicate purchases. Once organized, your space will feel more inviting and easier to maintain. It’s a simple tweak for a huge upgrade.
8. Design a Dedicated Baking Station
Love baking but hate digging through cluttered cabinets for flour, sugar, and sprinkles? A dedicated baking station keeps all your essentials in one spot, making baking sessions smoother and more enjoyable. It’s about creating a space where everything you need is front and center, ready to go. Plus, it adds a charming touch to your kitchen decor.
Envision a small, well-organized corner with labeled glass jars filled with flour, sugar, cocoa powder, and baking soda. Shelves hold baking pans, measuring cups, and decorating tools—all neatly arranged for quick access. Decorative canisters and a patterned backdrop give it a cozy, inviting feel. The area feels like a mini bakery, inspiring you to whip up treats anytime.
Use vintage glass jars for a rustic look or sleek, modern containers for a minimalist vibe. Incorporate a small chalkboard or label maker for easy identification. Seasonal decor, like a festive tea towel or themed container labels, can make the space fun and inviting. For small kitchens, vertical wall-mounted shelves maximize space without clutter.
Choose a corner or a small countertop space for your baking nook. Organize ingredients in clear, labeled jars or bins for a cohesive look. Hang measuring spoons and whisks on hooks for quick access. Store baking sheets, rolling pins, and decorating tools on nearby shelves or in baskets. Keep frequently used items at eye level for efficiency. Regularly tidy and restock supplies to keep it functional.
Add decorative touches like themed jars or patterned liners inside containers. Incorporate a small chalkboard for recipes or shopping lists. Use colorful or textured towels and trivets to enhance visual appeal. Personal touches like a vintage scale or baking-themed artwork can make the space uniquely yours.
A dedicated baking station simplifies the process and makes baking more fun. It encourages creativity and experimentation without the hassle of searching through cluttered cabinets. Once set, you’ll look forward to baking days with a sense of pride. It’s a small investment in joy and efficiency that pays off instantly.
9. Use Stylish Labels and Tags for Easy Identification
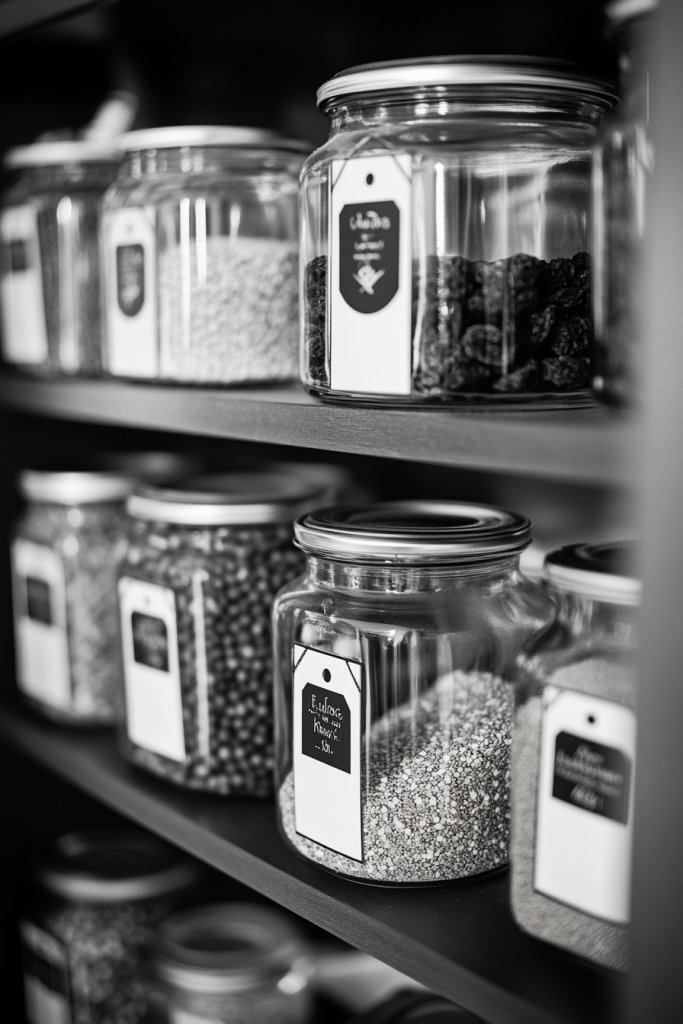
Ever open your pantry and find yourself sifting through unlabeled jars and bags, wasting precious time? Clear labels and tags turn a chaotic space into a well-organized haven. They make it easy to identify contents at a glance and add a polished, cohesive look. Who knew that a simple label could make such a difference?
Imagine sleek tags attached to glass jars, with handwritten or printed labels indicating ‘Flour,’ ‘Pasta,’ or ‘Coffee.’ The uniform appearance creates a sense of order and sophistication. Label colors and fonts can match your decor, making the pantry feel curated and intentional. It’s like having a mini store right in your kitchen, inviting you to cook with confidence.
Opt for chalkboard labels for easy updates or printed stickers for a clean look. Use decorative tags with ribbons or twine for a rustic vibe. For a modern aesthetic, choose minimalist fonts and monochrome labels. Seasonal themes can include holiday colors or motifs. Labels can also be functional, like ‘Used First’ or ‘Recycling,’ to enhance practicality.
Select durable labels suited for your containers—waterproof vinyl or chalkboard stickers work well. Use a label maker, printable sheets, or handwrite for a personal touch. Attach labels to containers, jars, or baskets, ensuring they’re easy to read. Keep extra labels handy for quick updates and replacements. Regularly check and update labels as needed to maintain clarity.
Combine labels with decorative elements like washi tape or patterned backgrounds for extra flair. Use color-coding labels for categories—red for snacks, blue for grains, etc. You can also add small icons or symbols for quick visual cues. Personalize with handwritten notes or motivational quotes to inspire your cooking.
Stylish labels turn your pantry into a functional design feature that sparks joy. They save time, reduce frustration, and make shopping easier. With everything clearly marked, you’ll feel more confident in your kitchen skills. It’s a simple upgrade that makes a big impact on daily routines.
10. Install Under-Shelf Hooks for Small Items
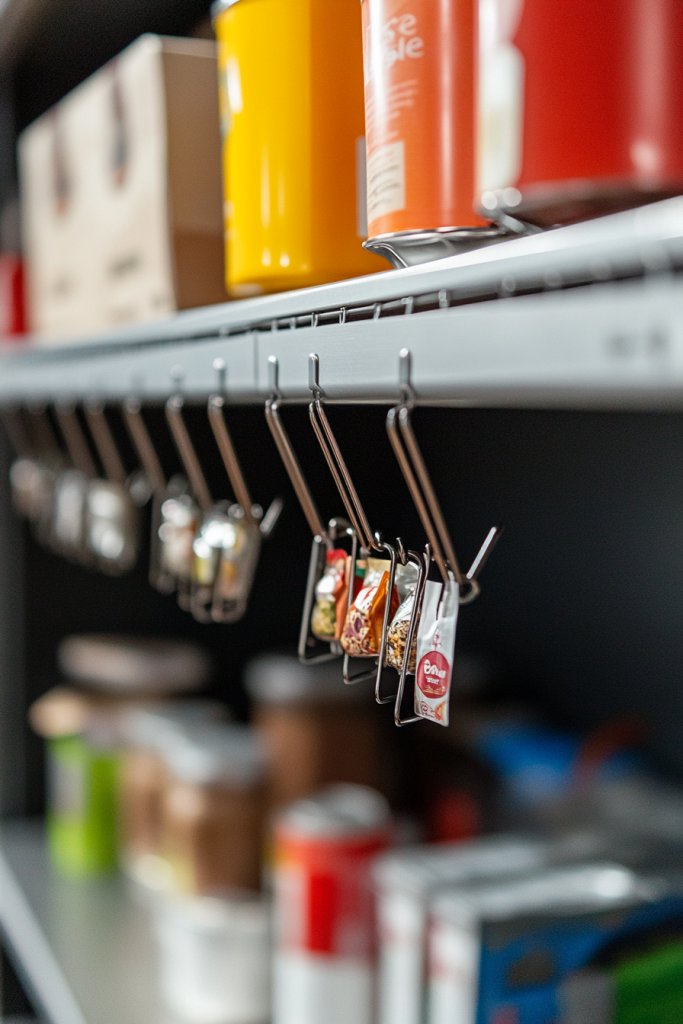
Cluttered shelves often leave small items like utensils, tea bags, or seasoning packets buried and out of reach. Under-shelf hooks offer a smart way to utilize otherwise wasted space, keeping small essentials within easy reach. This simple addition can dramatically improve your pantry’s functionality and tidiness.
Picture a sturdy hook hanging beneath a shelf, holding small baskets or clips filled with tea bags, measuring spoons, or spice packets. The organized arrangement keeps everything visible and accessible, preventing clutter from piling up. The hooks add a sleek, industrial touch to the overall design, making your pantry feel more organized and intentional.
Choose metal hooks for an industrial look or decorative hooks for a softer, vintage vibe. Use small baskets or fabric pouches to contain loose items, hanging from the hooks. For extra flair, coordinate hook finishes with other hardware in your kitchen—brushed nickel, matte black, or antique brass. Seasonal or themed hooks can be swapped out for special occasions.
Measure the space beneath your shelves and select appropriate hooks that won’t interfere with shelf stability. Install with screws or adhesive strips, depending on material and weight. Hang small baskets, clips, or utensil holders, grouping similar items together. Regularly check the hooks for stability and clean to prevent dust buildup. Reorganize periodically to keep everything fresh and functional.
Decorate hooks with colorful or patterned pouches for added personality. Use labels or tags inside baskets or pouches for quick identification. Incorporate themed or seasonal accessories, like holiday motifs or bright colors, to keep things lively. Personalize with monogrammed tags or decorative charms for a unique touch.
Under-shelf hooks maximize vertical space and declutter your counters. They make small items easy to find and grab, speeding up your cooking process. Once organized, your pantry will look cleaner and more inviting. It’s a quick, inexpensive upgrade with lasting benefits—get hooks, and get organized!
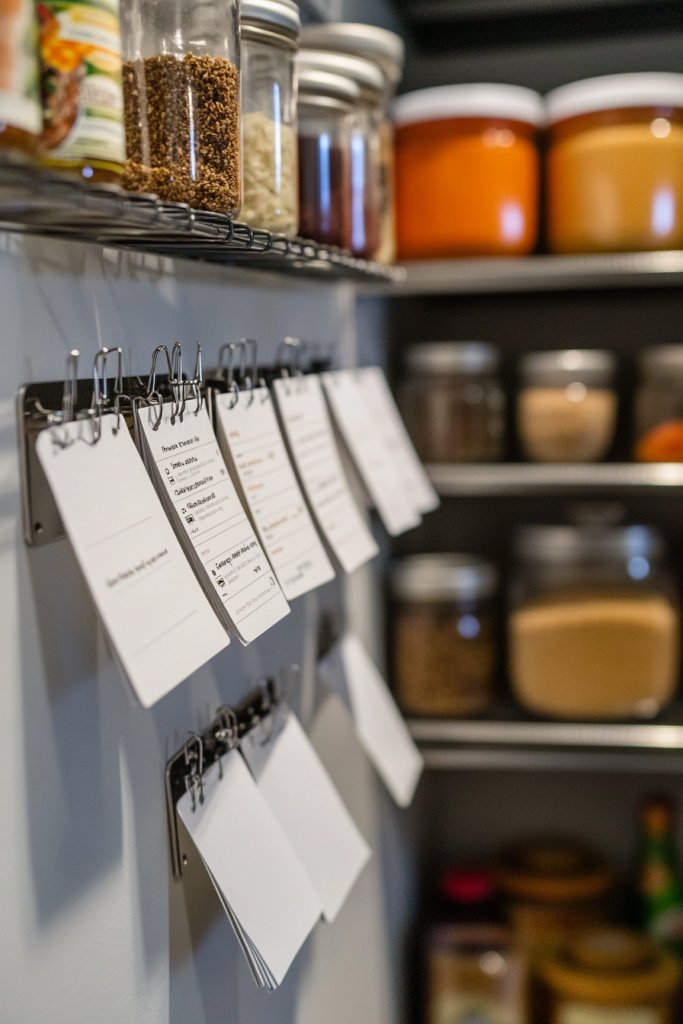
11. Incorporate a Chalkboard or Whiteboard for Inventory
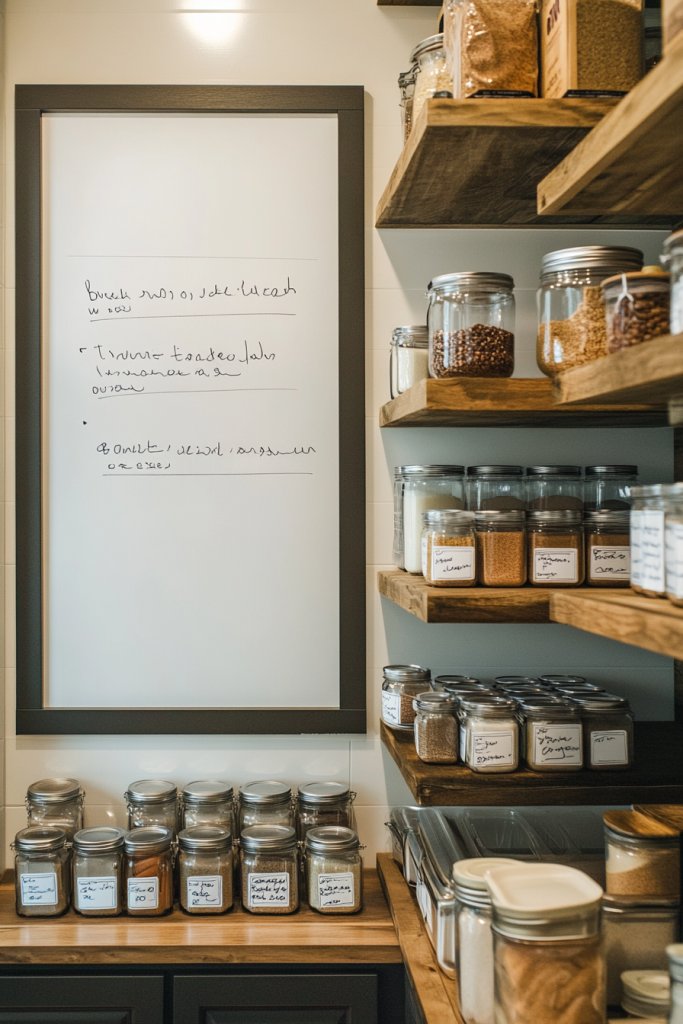
Running out of staples at the worst moment is a common kitchen frustration. Keeping track of supplies can feel like a full-time job, especially in busy households. A chalkboard or whiteboard inside your pantry turns inventory management into a simple, visual process. It’s your personal shopping assistant, always ready.
Imagine a sleek chalkboard mounted on the pantry door, with handwritten notes listing ‘Flour,’ ‘Eggs,’ or ‘Cereal’ and checkboxes for quantities. As you use items, you update the list, creating a real-time inventory. It’s like having a grocery list that updates itself, reducing unnecessary trips and last-minute runs. The clean, organized look keeps your space feeling fresh and functional.
Choose a chalkboard for a rustic or vintage vibe, or a dry-erase whiteboard for a modern look. Use colorful markers or chalks to categorize items or highlight low-stock alerts. Incorporate magnets or clips for attaching recipes, shopping lists, or notes. Seasonal themes or decorative borders can make the board more inviting and personalized.
Mount the board at eye level using screws or adhesive strips, ensuring it’s secure and accessible. Use erasable markers or chalk to write your inventory and update regularly. Create sections for different categories—baking, snacks, beverages—to keep things organized. Keep extra markers or erasers nearby for convenience. Review and update weekly for maximum efficiency.
Decorate the border with washi tape or stickers that match your decor to add personality. Use different colors for various categories or alerts—red for low stock, green for stocked items. Add motivational quotes or fun doodles to make the process enjoyable. Incorporate a small chalk holder or magnetic accessories for a tidy workspace.
A whiteboard or chalkboard keeps your pantry organized and your shopping list current. It reduces waste by alerting you to low supplies before they run out. Plus, it adds a creative, interactive element to your kitchen. Staying on top of pantry inventory has never been easier or more fun.
12. Opt for Uniform Baskets for a Cohesive Look
Cluttered, mismatched baskets and containers can make your pantry look chaotic no matter how well-organized the contents are. Opting for uniform baskets creates a clean, cohesive aesthetic that’s both pleasing to the eye and functional. It simplifies storage and gives your space a polished, intentional vibe.
Visualize matching baskets lined up on shelves, each holding similar items like snacks, baking supplies, or canned goods. The uniform size and color create a sense of order, making it easy to locate and access everything. The consistent look makes your pantry feel like a curated display rather than a catch-all storage space. It’s elegant, simple, and effective.
Choose baskets in neutral tones for a minimalist look or bright colors for a cheerful atmosphere. Incorporate different textures—woven, plastic, fabric—to add visual interest without sacrificing consistency. Use baskets with handles for easy pulls or decorative lids for a refined appearance. Seasonal or themed baskets can be swapped in during holidays or special occasions.
Select baskets that fit your shelf dimensions, prioritizing stackability and ease of access. Fill each basket with similar items, grouping like with like. Label baskets with chalkboard tags, printed stickers, or embossing for clarity. Place frequently used baskets at eye level and store seasonal or less-used items higher or lower. Maintain the look by regularly tidying and replacing worn or mismatched pieces.
Personalize baskets with painted or printed labels, or add decorative charms or tags. Mix and match textures within a uniform palette for a sophisticated look. Use patterned liners inside baskets or tie colorful ribbons around handles to add charm. Personal touches make your storage both functional and uniquely yours.
Uniform baskets turn chaos into calm, making your pantry easier to maintain and more inviting. They help you see what’s inside at a glance, reducing waste and overbuying. Once organized this way, you’ll enjoy a more streamlined, stress-free cooking environment. It’s a simple change that elevates your entire space.
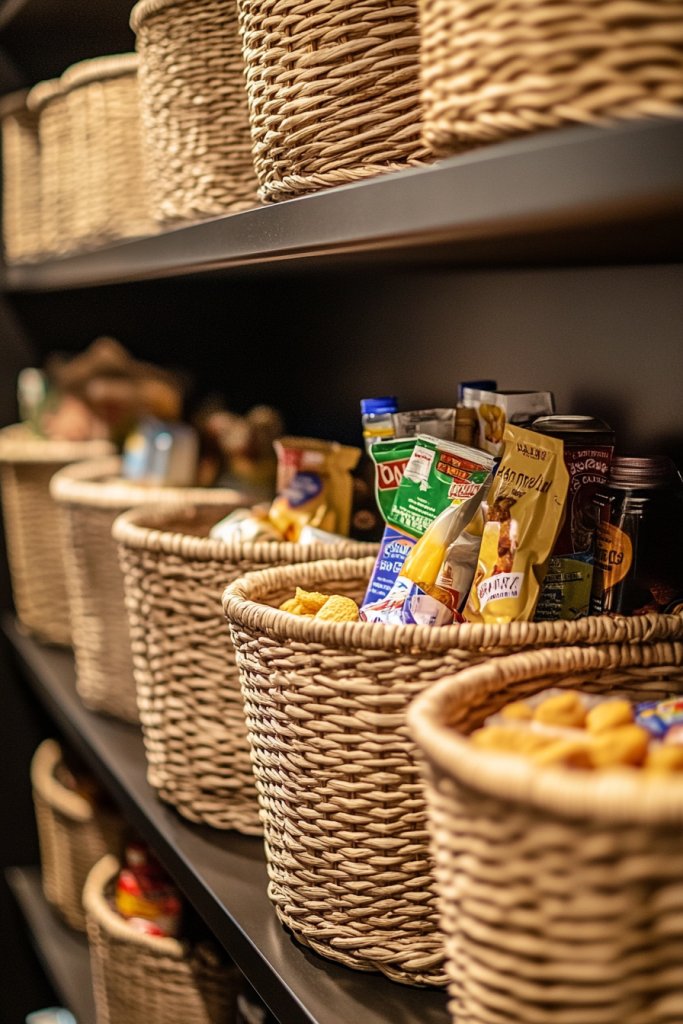
13. Create a Snack Zone with Baskets and Labels
Snacks often turn into a free-for-all, with bags and boxes scattered everywhere. A dedicated snack zone with labeled baskets simplifies access and keeps things tidy. It encourages healthy choices and makes snack time quick and stress-free—especially handy when kids or guests are involved.
Imagine open baskets labeled ‘Kids Snacks,’ ‘Healthy Nibbles,’ and ‘Sweet Treats,’ each filled with well-organized packs or containers. Clear, acrylic labels or chalk tags make it easy to identify contents at a glance. The area looks inviting, with a playful yet orderly vibe that makes grabbing a snack feel like a treat. Everything is accessible, and clutter is minimized.
Use colorful baskets for a lively look or neutral woven baskets for a more subdued style. Incorporate different sizes to accommodate various snack packages, from small chips to large granola bars. Seasonal or themed labels can add festive charm during holidays. For a minimalist approach, opt for monochrome baskets with simple labels.
Designate a specific shelf or corner as your snack zone. Fill baskets with your preferred snack packs and label each clearly. Use a label maker, chalk, or stickers for uniformity. Keep the area stocked and tidy by regularly rotating out expired or empty packages. Consider adding a small tray or bin for loose or bulk items. Reorganize as needed for maximum efficiency.
Decorate labels with fun fonts or patterns that match your personality. Mix in decorative touches like patterned liners or themed tags for holidays. Incorporate a small tray for reusable snack bags or bowls for easy serving. Personal touches turn snack storage into a cheerful, functional feature of your kitchen.
A snack zone keeps your kitchen neat and makes snack time more enjoyable. It prevents clutter from spreading across shelves and counters. It’s especially helpful during busy mornings or when entertaining guests. Organize your snack zone once, and enjoy the simplicity for months to come.
14. Use Magnets or Clips for Recipe Cards and Notes
Constantly losing or forgetting recipes and shopping notes is a common kitchen annoyance. Magnets and clips offer a handy, visible way to keep important cards and reminders in sight. They help streamline meal prep and shopping, making your kitchen more efficient and less chaotic.
Picture a magnetic strip attached to the inside of your pantry door or a metal shelf, with colorful clips holding recipe cards, shopping lists, or inspirational notes. When not in use, the cards stay neatly clipped and out of the way. During cooking, a quick flip of a clip reveals the recipe, making life easier and more organized. The setup adds a playful, interactive element to your space.
Opt for decorative clips or magnetic strips that match your kitchen decor—rustic wood, sleek metal, or colorful plastic. Use different clips for various categories—recipes, shopping lists, or reminders. Incorporate small baskets or containers for storing additional notes or index cards. Seasonal or themed clips can bring a fun twist during special occasions.
Mount a magnetic strip or clip board at a convenient height on your pantry wall or inside the door. Organize recipe cards or notes by frequency of use or meal type. Use colorful or themed clips for easy recognition. Keep extra cards and clips nearby for quick updates. Regularly review and rearrange to match your evolving meal plans.
Decorate clips with washi tape, paint, or stickers to add personality. Use themed or seasonal clip sets for holidays, birthdays, or special occasions. Incorporate a small chalkboard or label tags for quick notes or tips. Personal touches make your recipe and note system fun and uniquely yours.
Magnetic clips keep recipes and notes front and center, reducing clutter and last-minute searches. They make cooking more seamless and less stressful. Once you set up your system, you’ll enjoy a more organized and inspiring kitchen environment. It’s a small change with big practical benefits—clip and conquer!
15. Install Small Drawer Units for Spices and Condiments
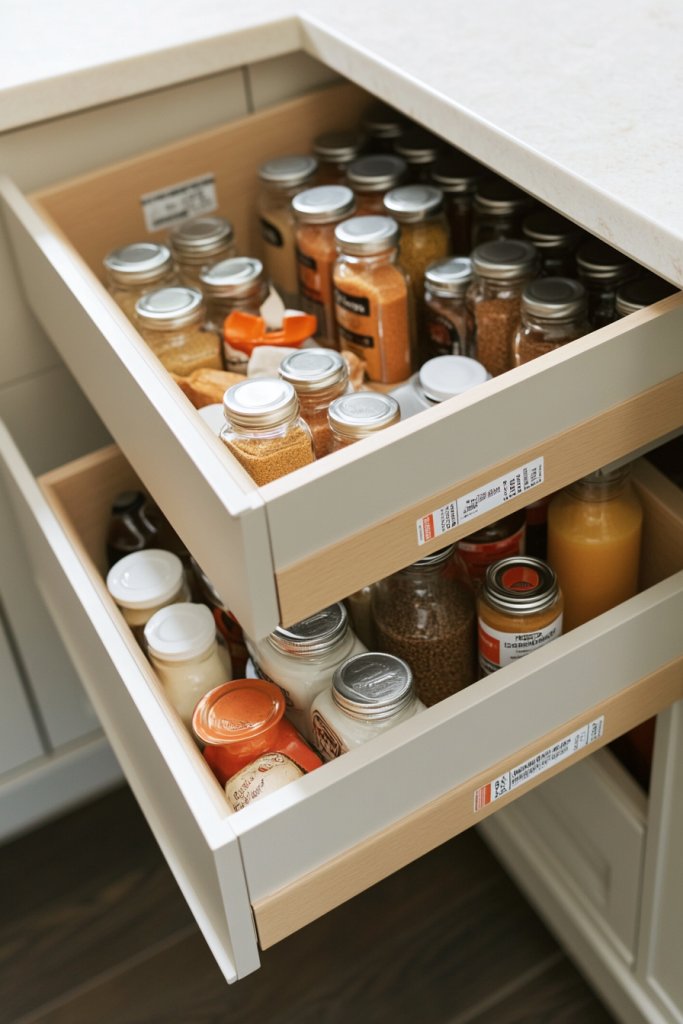
Spices and condiments can quickly turn into a jumbled mess, making cooking a frustrating puzzle. Small drawer units offer a tidy, dedicated space for these essentials, keeping them within easy reach and neatly organized. No more digging through clutter—just open, find, and cook.
Imagine a compact, multi-drawer organizer filled with neatly labeled jars, bottles, and spice packets. The drawers glide smoothly and keep everything separated, avoiding spills and chaos. When you need a pinch of oregano or a dash of soy sauce, everything is right at your fingertips. It transforms a cluttered corner into a culinary command center.
Choose wooden drawers for a warm, rustic feel or sleek plastic for a modern look. Use small dividers within drawers to separate different spices or condiments. Incorporate labels or color-coded tags for quick identification. During holidays or special meals, rearrange or add themed labels for extra flair.
Select compact drawer units that fit your space, either inside a cabinet or on a shelf. Fill each drawer with small jars, bottles, or packets, organizing by type or frequency of use. Label each drawer or individual container for clarity. Regularly review contents and discard expired items. Maintain organization by tidying up monthly.
Decorate the drawers with personalized labels or painted patterns for a custom look. Use colorful clips or ribbons to add flair. Incorporate small trays or risers inside drawers for better visibility. Personal touches make your spice and condiment storage both practical and charming.
Small drawer units turn a chaotic spice collection into a sleek, accessible system. They save time during meal prep and reduce waste by keeping everything fresh and visible. Once organized, your cooking experience becomes more enjoyable and less stressful. Just open and start cooking!
16. Incorporate a Pegboard for Utensils and Tools
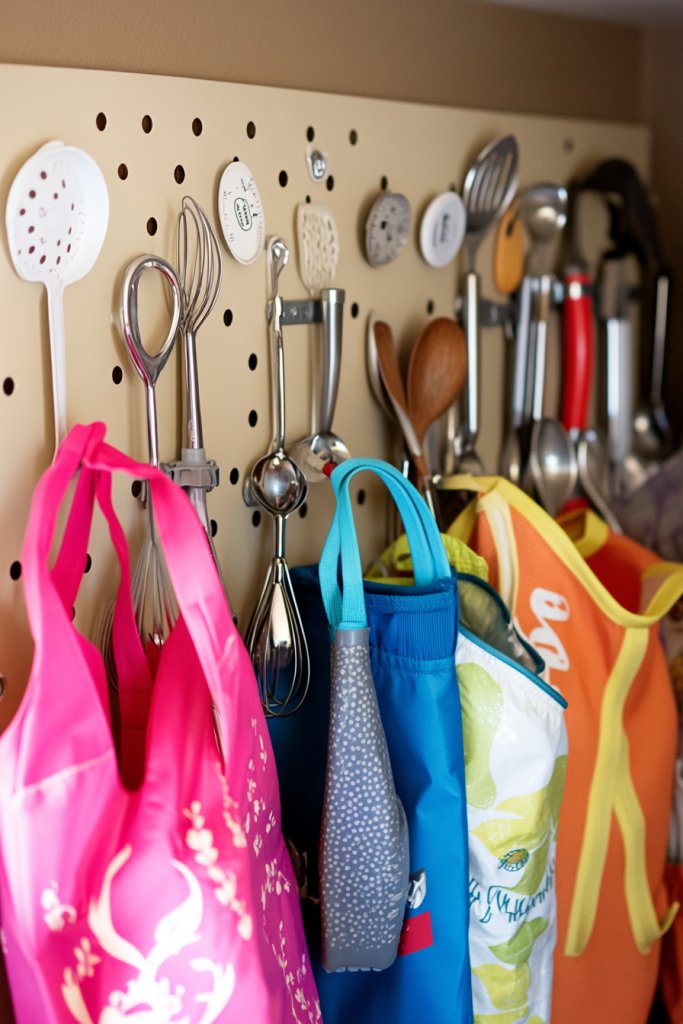
Utensils, measuring spoons, and reusable bags often clutter countertops or get lost in drawers, wasting time and causing frustration. A pegboard offers a versatile, stylish solution to hang and display these essentials. It keeps everything visible and within easy reach, making your kitchen more organized and design-forward.
Imagine a sleek pegboard mounted inside your pantry or on a wall, with hooks holding measuring spoons, spatulas, and reusable shopping bags. The open grid pattern allows you to customize and rearrange items as needed. The space feels open and airy, with a modern-industrial vibe that elevates your pantry’s look. Everything you need is at your fingertips, ready to use.
Opt for painted or natural wood pegboards to match your decor style. Use a mix of hooks, baskets, and clips for different tools or accessories. Incorporate decorative elements like string lights or small shelves for added personality. Seasonal or themed accessories can be swapped out to keep the space lively and fresh.
Mount the pegboard at a comfortable height, ensuring it’s secure and level. Organize tools by frequency of use—most-used items at the center or top. Use a variety of hooks and baskets to maximize storage options. Regularly clean and rearrange to keep the setup functional. Consider adding labels or tags for quick identification.
Paint the pegboard in your favorite color or add decorative elements for a personalized touch. Use themed hooks or labels to match seasons or special events. Incorporate small decorative accents like faux greenery or artwork (restricted content avoided) for visual appeal. Personal touches make the space uniquely yours.
A pegboard transforms cluttered tools into an organized, stylish display. It makes cooking and prep easier and more fun, boosting your confidence. Once set up, you’ll enjoy a more efficient, visually appealing kitchen. Easy to customize and update, it’s a smart, simple upgrade.
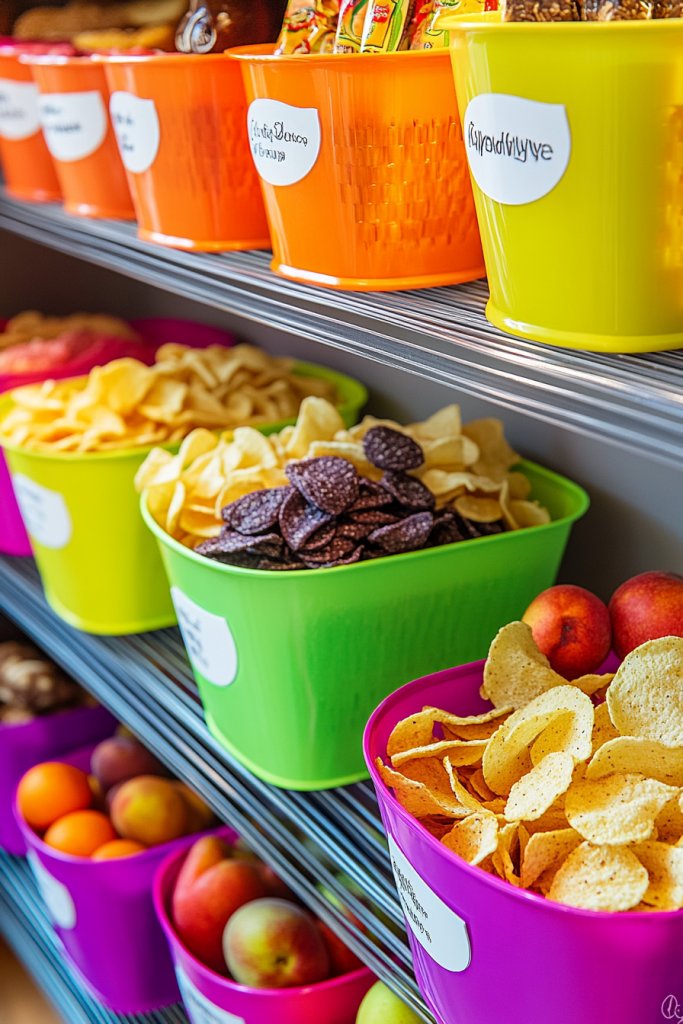
17. Add a Pop of Color with Vibrant Storage Accessories
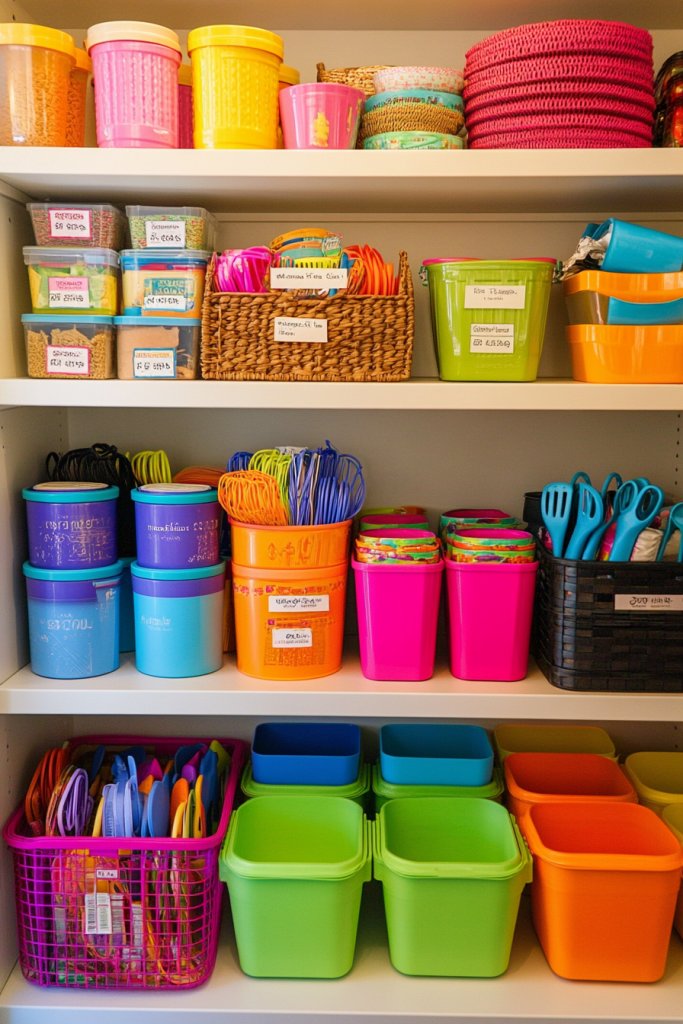
A dull, monotonous pantry can drain your motivation to cook and organize. Adding splashes of vibrant color instantly lifts the space’s mood and energy. Bright containers, baskets, or labels turn a plain pantry into a cheerful, inviting hub. Who says storage can’t be fun?
Picture a pantry filled with bright red, turquoise, and sunny yellow bins, each holding different categories—snacks, baking supplies, or cereals. The pops of color create a lively visual rhythm, making it easier to locate items quickly. The playful palette makes your space feel fresh, energetic, and welcoming, inspiring you to cook more often.
Choose colorful containers, labels, or baskets that match your decor style—bold and modern or soft and pastel. Incorporate decorative accents like patterned liners or textured materials for added depth. Seasonal or themed accessories—like festive reds and greens for holidays—can refresh the look. Use contrasting colors for a dynamic, eye-catching display.
Select storage accessories in bold hues that complement your kitchen’s overall palette. Fill baskets with similar items, grouping by category, and label them for clarity. Mix textures and shapes to add visual interest without cluttering. Regularly update or swap out accessories to keep the space lively. Keep a balance between color and harmony for an appealing look.
Add decorative elements like patterned liners or fabric wraps inside baskets. Use colored chalk or stickers for labels that stand out. Incorporate seasonal accents like holiday-themed containers or labels to keep things festive. Personalize your setup with quirky or inspiring tags that make you smile.
Vibrant storage accessories turn your pantry into a mood-lifting space that’s fun to use. They make organization feel less like a chore and more like a creative project. Once you introduce color, you’ll enjoy a brighter, more inviting kitchen environment. It’s a simple way to boost your mood and productivity every day.
Conclusion
With a mix of smart storage hacks, stylish displays, and space-maximizing solutions, these pantry ideas offer endless opportunities to elevate your organization game. Don’t hesitate to try out different approaches and tailor them to your needs—your dream pantry is within reach! Embrace these ideas and enjoy the satisfaction of a beautifully organized space that makes daily life easier and more enjoyable. Your perfectly organized pantry awaits—start transforming today!
Leave a Reply