I have been, or can be if you click on a link and make a purchase, compensated via a cash payment, gift, or something else of value for writing this post. As an Amazon Associate, I earn from qualifying purchases. Please read my full Affiliate Disclosure for more information.
Imagine transforming your outdoor space into a charming retreat with just a few simple materials—pallets! Pallet garden furniture has surged in popularity due to its eco-friendly appeal, affordability, and the charming rustic vibe it adds to any garden or patio. These versatile pieces allow DIY enthusiasts to craft unique, personalized furniture that perfectly suits their style.
In this article, you’ll explore a variety of creative pallet garden furniture ideas that combine practicality with rustic charm. From cozy seating arrangements to functional tables and decorative accents, there’s inspiration for every outdoor space. Get ready to roll up your sleeves and turn recycled pallets into beautiful, functional pieces that will make your garden the envy of all your guests!
1. Pallet Garden Bench with Reclaimed Wood Finish
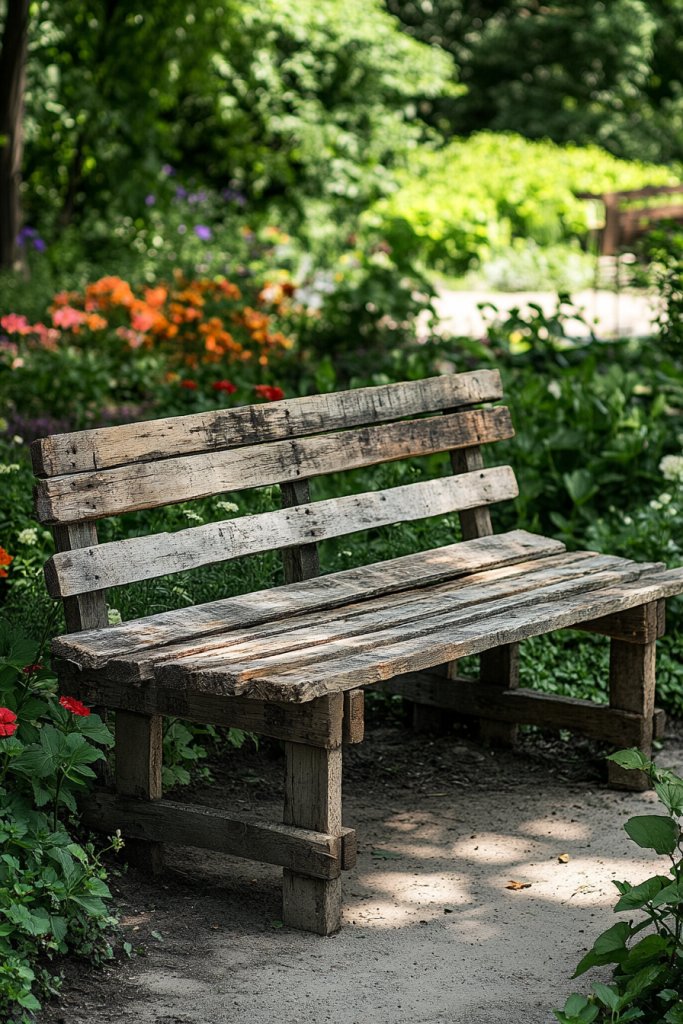
Ever wish you had a cozy spot in your garden to relax without breaking the bank? A sturdy, rustic bench crafted from pallets offers the perfect solution. It combines charm and function, transforming your outdoor space into a welcoming retreat. Plus, it’s a great way to repurpose old pallets instead of letting them pile up.
Imagine a weathered wooden pallet painted in soft pastel tones, nestled among vibrant blooms and lush greenery. The rough texture of reclaimed wood contrasts beautifully with smooth, patterned cushions. The bench’s simple design invites you to sit down with a cold drink and soak in the sunset. It feels like a piece straight out of a rustic cabin, yet fits perfectly in a modern garden.
You can customize this bench with different finishes—natural, stained, or painted—to match your decor. For small patios, opt for a compact size, or extend it with additional pallets to seat more friends. Incorporate colorful cushions or throw blankets for seasonal flair. Even in winter, add a cozy plaid or faux-fur layer for extra warmth and style.
Start by collecting sturdy pallets and cleaning them thoroughly. Sand rough edges and surfaces for safety and a smooth finish. Assemble the pallets into a bench shape using heavy-duty screws or nails. Consider adding a weatherproof sealant to protect against the elements. Decorate with cushions and perhaps a small side table made from spare pallets to complete the look.
Make it uniquely yours by painting or stenciling patterns on the wood. Attach small hooks for hanging plants, lanterns, or tools. You could also add a built-in storage compartment underneath for gardening supplies. Personal touches like engraved initials or family photos etched into the wood elevate the rustic charm.
Building this pallet bench is a budget-friendly project that boosts your confidence in DIY. It gives your garden a handcrafted feel that friends will admire. Plus, it’s versatile enough to serve as a focal point or a functional seating area. Ready to turn old pallets into your favorite outdoor spot?
2. DIY Pallet Planter Box with Built-in Seating
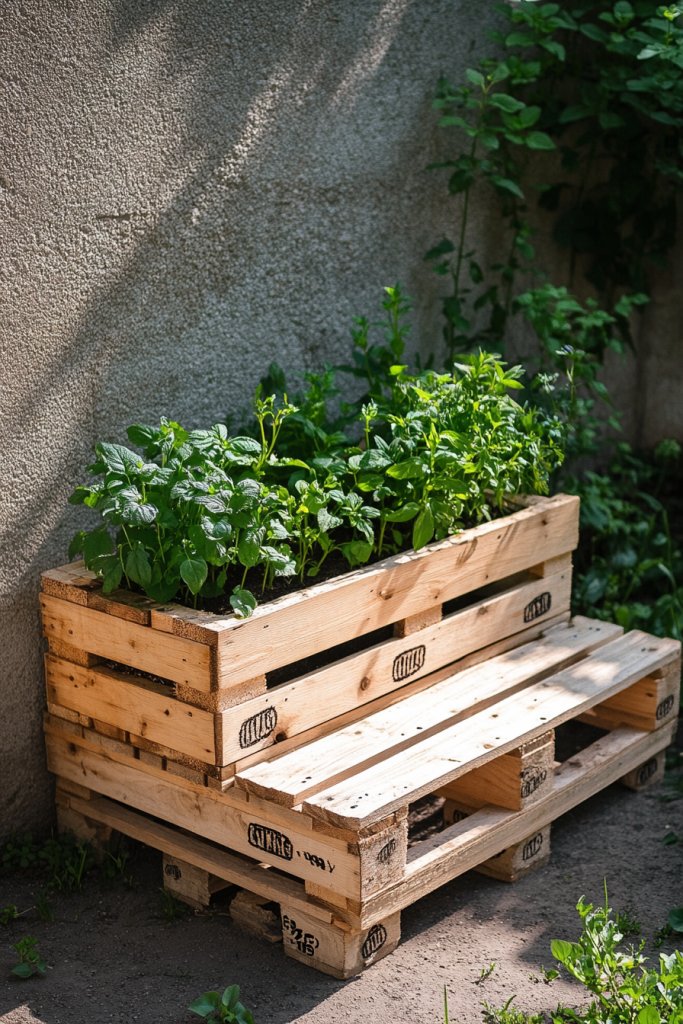
Tired of your garden looking plain or cluttered? Combining flower displays with seating creates a multifunctional space that’s both beautiful and practical. A pallet planter with a built-in seat provides fresh herbs and blooms while offering a place to sit. It’s like bringing together nature and comfort in one clever piece.
Picture a long, low pallet box filled with vibrant petunias and fragrant herbs, topped with a simple wooden seat. The weathered wood adds rustic charm, while colorful plants spill over the edges, attracting butterflies and bees. The seat, made from matching pallets, invites you to linger and enjoy your garden. The combination makes your outdoor area inviting and lively.
Adjust the size of the planter to fit your space—long and narrow for small balconies or a wider version for larger gardens. You can paint or stain the wood to match your aesthetic, from bright and cheerful to muted and vintage. For added comfort, toss on cushions or fabric covers. Incorporate vertical elements like trellises or stacked pallets for climbing plants.
Gather weather-resistant pallets and clean them thoroughly. Construct the planter by stacking and fixing pallets to form a box with drainage holes at the bottom. Line the interior with landscape fabric to prevent soil leakage. Attach a sturdy seat on top, either by securing it directly or creating a separate, removable piece. Fill the planter with quality soil and your favorite plants, then enjoy!
Decorate the planter with painted patterns or stenciled designs to match your style. Add small hooks or shelves for garden tools or decorative accents. Personalize the seat with a cushion or fabric slipcover. For seasonal updates, swap out plants or add fairy lights along the edges for evening ambiance.
Creating this combo piece is a fun way to add greenery and seating without extra furniture. It encourages creativity and resourcefulness, transforming pallets into a garden centerpiece. Imagine having fresh herbs at your fingertips while relaxing outdoors—talk about convenience. Get started and watch your garden bloom with personality!
3. Pallet Coffee Table with Vintage Castor Wheels
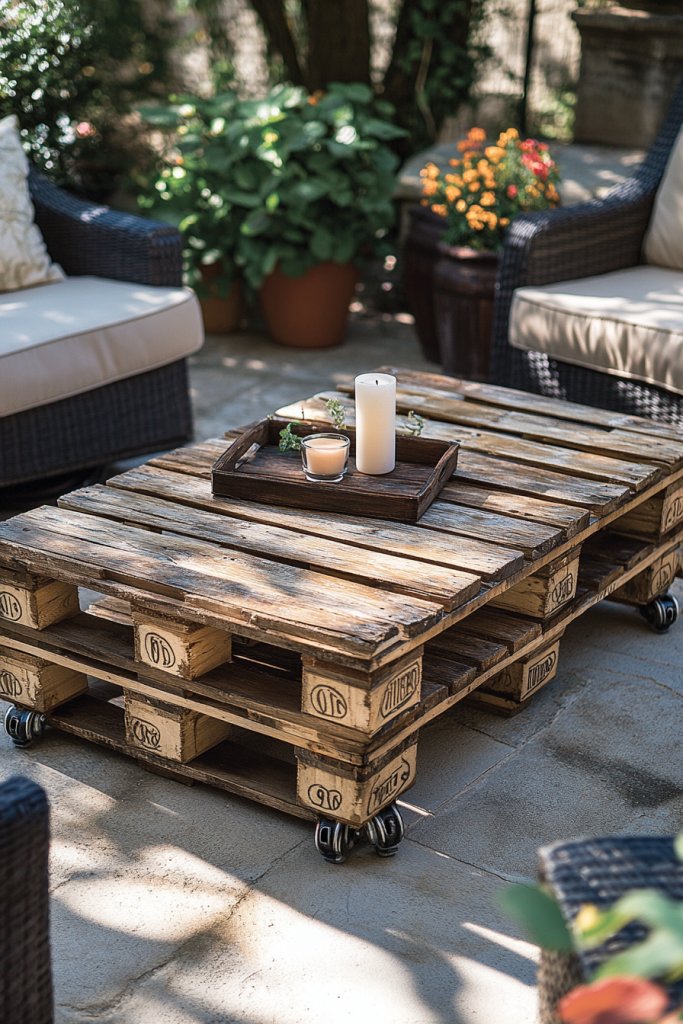
Looking for a charming, rustic coffee table that’s as functional as it is stylish? A pallet-based table with vintage castor wheels combines old-world charm with mobility. It’s perfect for outdoor patios where flexibility and aesthetic matter. Plus, it’s a budget-friendly DIY project that can elevate your entire garden lounge.
Envision a sturdy pallet with a distressed paint finish, sitting on antique castor wheels that allow easy movement. The surface is wide enough to hold drinks, snacks, or a decorative tray, while the rough texture adds character. Surround it with worn leather chairs or a cozy outdoor sofa to complete the rustic vibe. The wheels lend a vintage industrial touch that’s hard to beat.
You can paint the pallet in contrasting colors, stain it for a rich wood tone, or leave it natural for a weathered look. For a more refined style, add a glass top or a weatherproof resin coating. Wheels come in various styles, so choose antique brass or black castors based on your decor. This table adapts well to both small balconies and larger patios.
Start by selecting a solid pallet and cleaning it thoroughly. Sand rough edges and consider applying a weatherproof sealant to extend its lifespan. Attach vintage castor wheels at each corner using heavy-duty screws, ensuring they swivel smoothly. For added stability, reinforce the structure with corner braces or metal fittings. Finish with a protective coating if desired, then top with a tray or glass for a sleek surface.
Personalize with painted or stenciled accents on the pallet surface. Add a small shelf underneath for extra storage or decorative items. Use cushions or throws around the table area to create a cozy atmosphere. For seasonal flair, incorporate fairy lights or lanterns nearby for evening gatherings.
This project proves you don’t need fancy furniture to make a statement. It’s a practical, stylish upgrade that’s easy to move around and customize. Your outdoor space instantly becomes more inviting and functional. Time to roll out your DIY skills and craft a vintage-inspired gem!
4. Vertical Pallet Herb Garden Wall
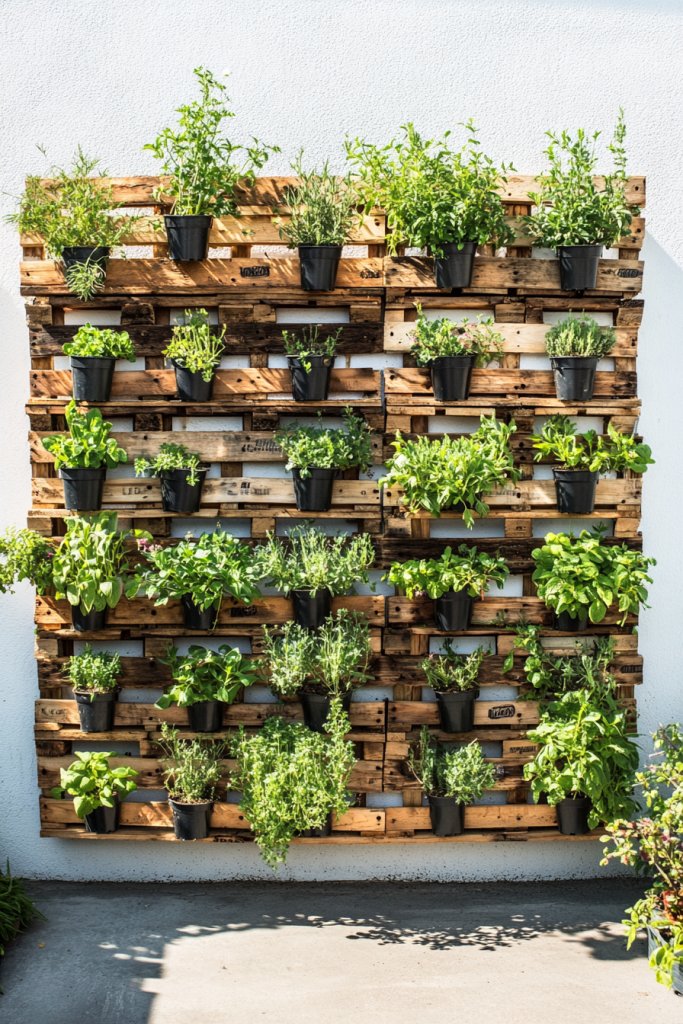
Ever struggle with limited space but still want a lush, green garden? A vertical pallet herb garden wall offers a smart solution. It maximizes your wall area for fresh herbs and greens while keeping things neat. Plus, it adds a touch of greenery without sacrificing precious ground space—fantastic for small patios or balconies.
Imagine a weathered pallet mounted vertically, with small pockets or containers filled with fragrant herbs like basil, mint, and thyme. The lush green leaves spill over the edges, filling the air with fresh scents. The pallet’s rustic wood complements the lush foliage, creating a vibrant, natural focal point. It feels like a secret garden right on your wall, inviting you to pluck fresh herbs anytime.
Choose from fabric pockets, metal planters, or plastic containers to suit your style and needs. Paint or stain the pallet to match your outdoor decor, or leave it natural for a more organic look. For added visual interest, arrange the pockets in a geometric pattern or staggered rows. You can also incorporate small hooks for garden tools or decorative elements.
Start with a sturdy pallet and clean it thoroughly. Secure it to a wall using heavy-duty brackets or hooks, ensuring it’s level and stable. Attach small containers or pockets using brackets, screws, or zip ties—whatever suits your material preference. Fill each pocket with well-draining soil and your chosen herbs. Water regularly, and enjoy fresh herbs right at your fingertips.
Decorate the pallet with painted borders or stenciled labels for each herb. Add small decorative stones or pebbles on top of the soil for a finished look. For a seasonal touch, swap out herbs or add colorful fabric wraps to the pockets. Incorporate solar-powered fairy lights around the edges for evening charm.
This vertical garden is a beginner-friendly project that yields big results. It’s a conversation starter and a source of pride to grow your own herbs. Plus, it’s a space-saver that makes your outdoor area feel lush and vibrant. Dive in and watch your wall transform into a mini jungle!
5. Pallet Swing or Adirondack Chair
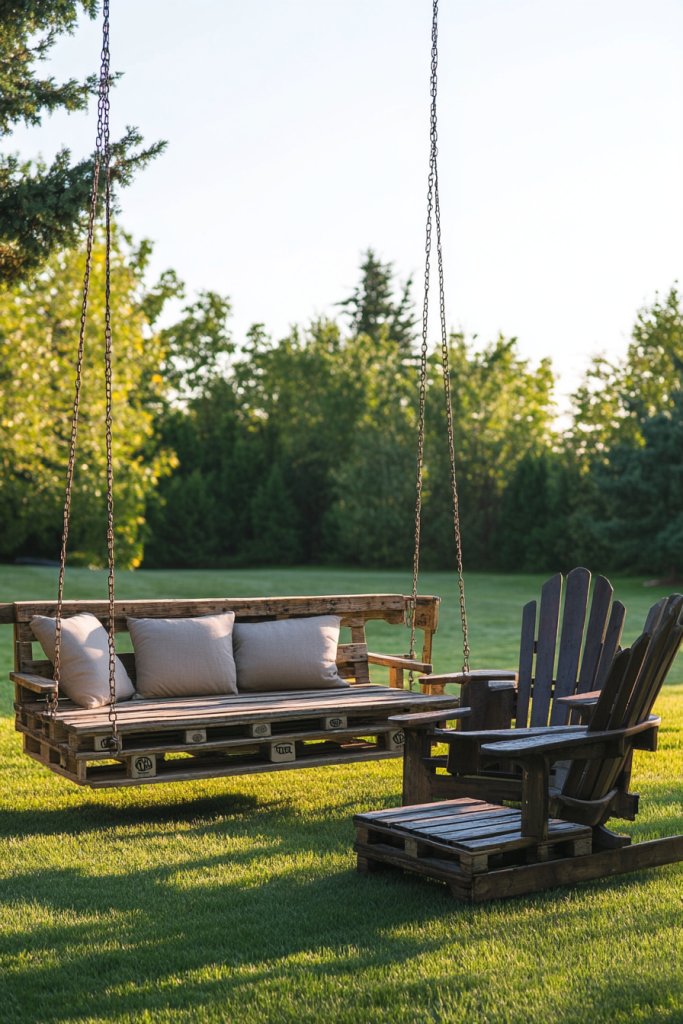
Craving a cozy spot to unwind outdoors? A pallet swing or Adirondack chair offers rustic charm and ultimate relaxation. It’s the perfect addition for lazy afternoons or sunset chats. And the best part? Making your own saves money and adds a personal touch to your garden.
Picture a sturdy pallet transformed into a comfy swing with thick cushions, hanging from a sturdy overhead beam or tree branch. Alternatively, a classic Adirondack chair built from pallets rests on a gravel path, inviting you to kick back. The rough wood, combined with soft textiles, creates a laid-back, inviting vibe. Surround it with potted plants and fairy lights for a magical atmosphere.
Paint or stain the wood to match your outdoor decor—bright colors for a playful look or natural tones for rustic elegance. Add weather-resistant cushions for comfort and style. For a swing, install durable ropes or chains, and ensure the pallet is reinforced to support weight. You can also craft a small side table from spare pallets to hold drinks or books.
Gather a sturdy pallet and sand it smooth to avoid splinters. Reinforce with additional support beams if needed. For a swing, attach strong ropes or chains to the pallet and secure them to a sturdy overhead support—consider consulting a pro for safety. For chairs, cut and assemble the pallets into the classic Adirondack shape, then sand and finish. Seal the wood to withstand weather, and add cushions for extra comfort.
Decorate with colorful cushions, patterned throws, or even painted designs. Hang some outdoor lanterns or string lights nearby. For a personal touch, carve or stencil a quote or name onto the wood. Seasonal accents like faux fur throws or floral garlands make it versatile and inviting.
Building your own outdoor swing or chair is easier than you think and adds serious charm. It’s a rewarding project that transforms your yard into a relaxing oasis. Plus, it’s a great way to showcase your DIY skills and make your outdoor space uniquely yours. Time to swing into action!
6. Multi-level Pallet Patio Dining Set
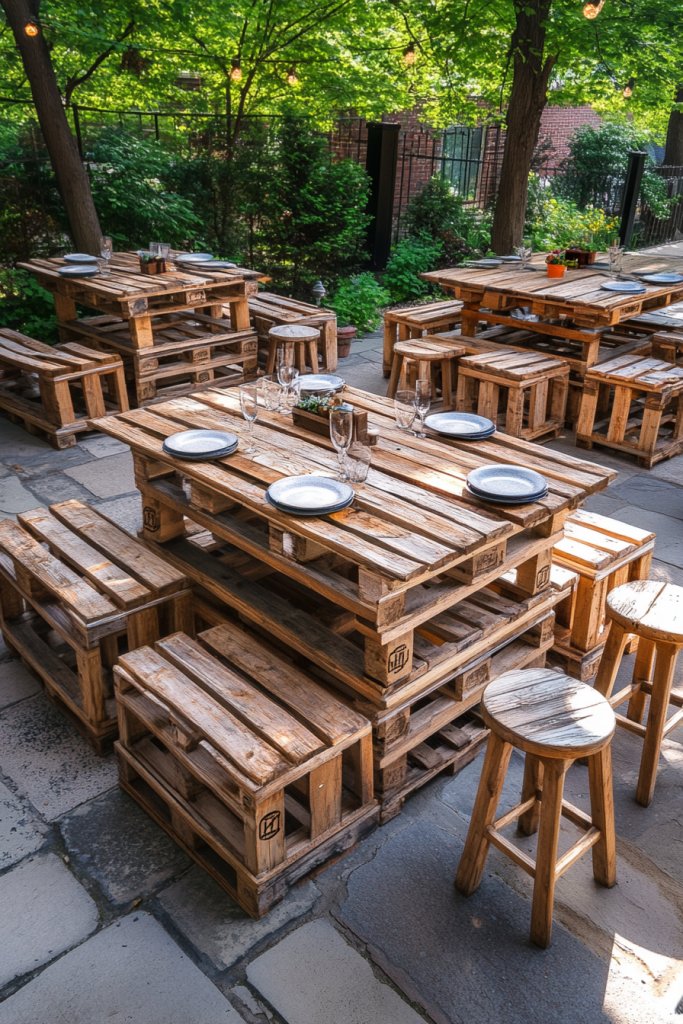
Ever wanted a charming outdoor dining area that doesn’t look like every other patio? A multi-level pallet dining set combines rustic warmth with practicality. It creates a cozy spot for family meals or entertaining friends, all on a budget. Plus, it’s customizable to fit your space and style.
Visualize a sturdy pallet table with a weathered finish, flanked by matching benches of varying heights. The multi-tiered design adds visual interest and allows for layered decor—like string lights or lanterns. Surround it with potted plants and a textured rug for a complete outdoor dining oasis. The mix of natural wood tones and greenery creates a welcoming, earthy vibe.
Adjust the size and height of the table and benches to suit your outdoor space. Paint or stain the pallets to match your aesthetic—beachy whites, deep stains, or vibrant hues. Add cushions or seat pads for comfort. For a more refined look, seal the wood with outdoor-grade protective coating. Incorporate additional elements like side tables or storage benches.
Select durable pallets and clean them thoroughly. Construct the table by stacking pallets to create a multi-level surface, securing with screws. Build matching benches with appropriate height and support. Sand all surfaces smoothly and apply weatherproof sealant. Assemble the set on a level surface, and consider adding non-slip pads underneath for stability. Decorate with tableware and textiles for a finished look.
Paint or stencil designs on the pallets for added personality. Incorporate removable cushions with seasonal covers. Hang string lights or install a retractable canopy for shade. Use decorative items like vintage lanterns or ceramic accents to elevate the aesthetic. Personal touches turn a simple set into a family heirloom.
This DIY dining set proves that rustic charm and functionality can go hand in hand. It’s a project that’s scalable and adaptable, perfect for any outdoor space. You’ll love gathering around your custom creation for meals and memories. Get creative and enjoy the process!
7. Pallet Lounge Daybed with Cushions
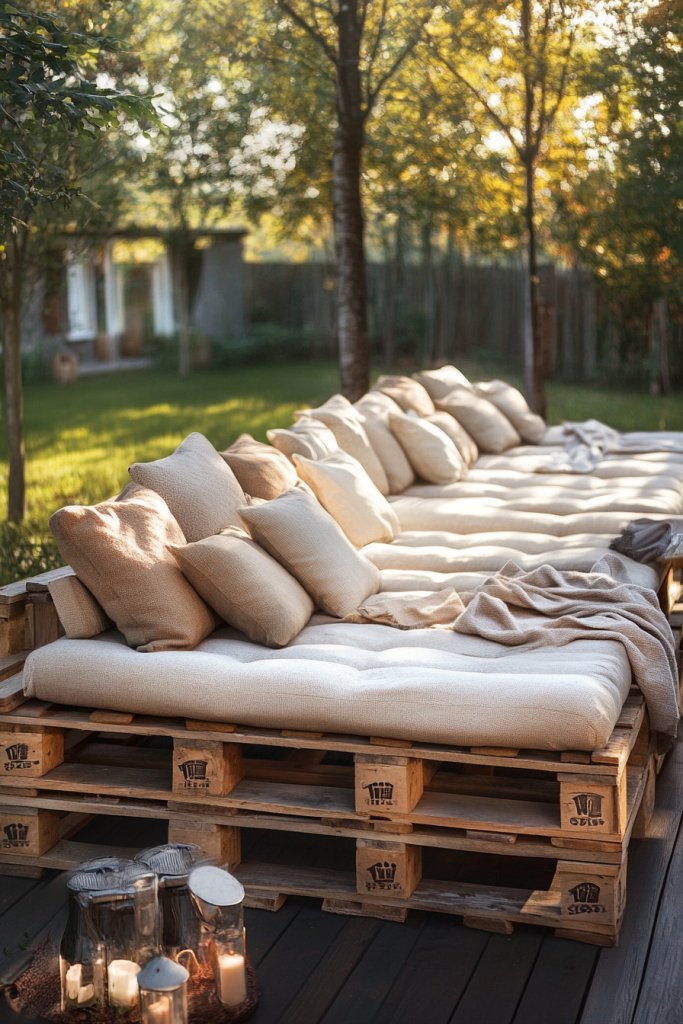
Dreaming of a comfy outdoor nook to lounge and unwind? A pallet daybed with cushions offers a rustic yet luxurious retreat. It’s perfect for lazy weekends, reading, or catching up with friends. Plus, making one yourself means you can customize it to your exact style and comfort preferences.
Imagine a broad pallet laid flat, topped with plush cushions in neutral tones or vibrant patterns. The sides are lined with additional pillows for back support. A light blanket drapes over the edge, inviting you to curl up. Surround the daybed with potted plants, lanterns, or fairy lights to create a cozy, inviting space that feels like an outdoor living room.
Use weather-resistant fabrics and cushions to ensure longevity. Customize the size—double or triple pallets for more space—and add a canopy or shade structure if needed. Mix textiles like chunky knits or smooth linens for texture. Incorporate built-in storage underneath for blankets or books. Change up cushion covers seasonally for fresh appeal.
Start by selecting sturdy pallets and cleaning them thoroughly. Secure the pallets together with screws to form a large, flat surface. Add thick outdoor cushions and arrange decorative pillows. Reinforce the structure if necessary, and cover the entire surface with weatherproof fabric or paint for extra durability. Create a small side table from pallets or crates for convenience.
Add personalized touches with embroidered or painted accents, or attach hanging lanterns or string lights. Use a variety of cushions for color and comfort, and swap them out seasonally. Incorporate a small side table or tray for drinks and snacks. Seasonal decor like faux foliage or fairy lights can enhance the ambiance.
A pallet lounge daybed is a fantastic DIY project that elevates your outdoor space. It offers a personal sanctuary for relaxation and a perfect spot to enjoy the outdoors. Building your own means you can tailor it to your comfort, style, and space. Your backyard just got a whole lot more inviting!
8. Refinished Pallet Side Tables for Garden Nooks
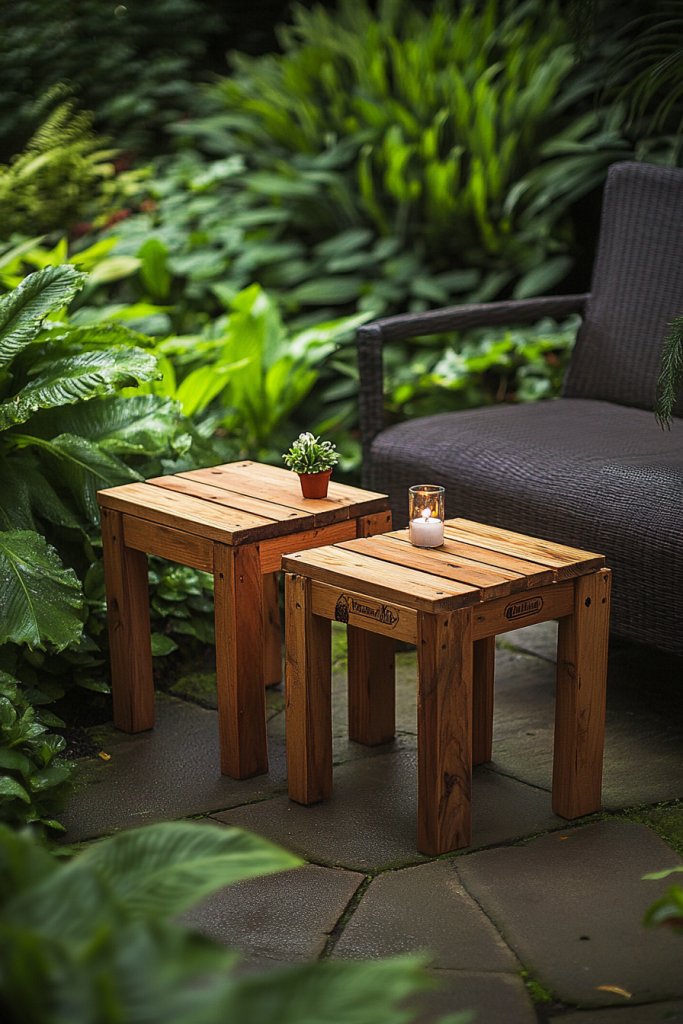
Need a cute, functional table to hold drinks, candles, or decor? Refinished pallet side tables are a simple way to add rustic charm and practicality to your garden or patio. They’re perfect for filling empty corners or complementing seating areas. And best of all, they’re easy to customize and build yourself.
Picture a small pallet painted in a soft, distressed white, topped with a candle holder and a small ceramic dish. The rough-hewn texture pairs beautifully with lush greenery and cozy outdoor cushions. Place it next to a vintage armchair or lounge chair, creating a cozy nook that invites lingering. The rustic finish adds warmth and character to any corner.
Choose different paint colors or stain for a weathered, vintage look or a sleek modern finish. Add a small drawer or shelf underneath for extra storage. Use decorative hardware or stencils to personalize the surface. Scale the design for different spaces, from tiny corner tables to larger accent pieces. You can even stack pallets for a taller side table.
Select solid pallets and clean thoroughly. Sand all surfaces to smooth out splinters and rough edges. Apply a weatherproof stain or paint, then seal with a clear protective coat. For stability, reinforce the structure with corner brackets or additional screws. Attach decorative handles or knobs if you want a vintage dresser look. Place in your garden or patio and style with your favorite items.
Decorate with painted patterns, stenciled designs, or chalkboard surfaces for notes or quotes. Add small hooks to hang tools or keys. Personalize with engraved initials or family symbols. Change accessories seasonally—faux flowers, mini lanterns, or woven baskets. These small touches make your tables uniquely yours.
Refinished pallet side tables are a quick project that adds instant personality to your outdoor space. They’re versatile, practical, and easy to adapt to any style. Plus, they prove that DIY furniture can be both beautiful and functional. Time to craft some charming garden nooks!
9. Pallet Flower Bed Frame with Natural Finish
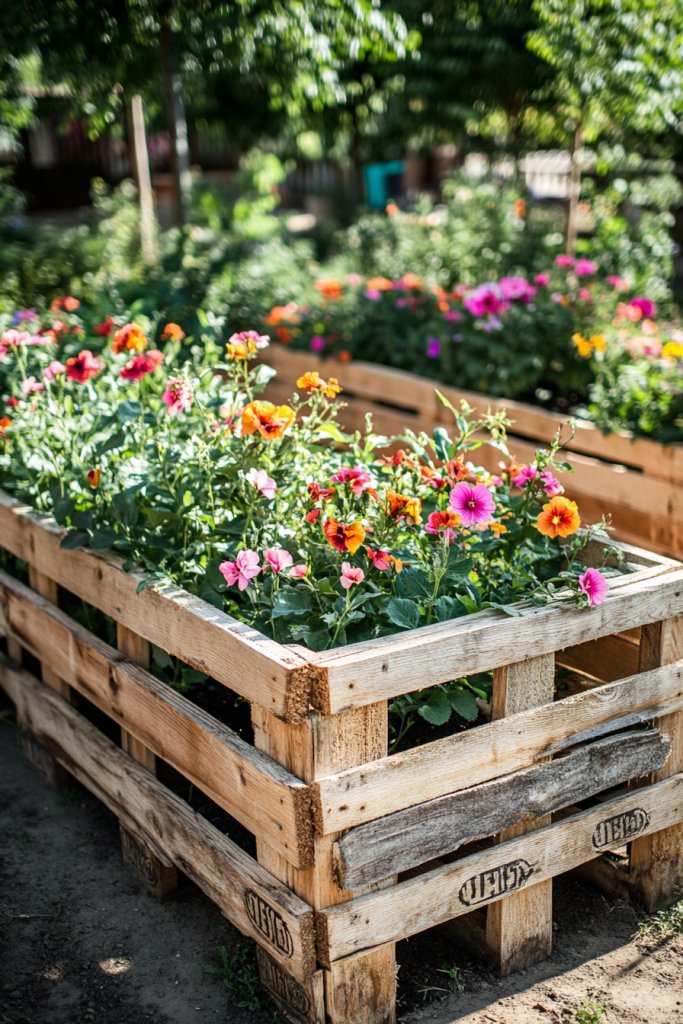
Want to create a charming, natural border for your flower beds without spending a fortune? A pallet flower bed frame offers a rustic, eco-friendly way to define your garden spaces. It’s simple, customizable, and perfect for DIY enthusiasts who love that reclaimed wood look. Plus, it keeps your flowers tidy and contained.
Visualize a weathered pallet laid on its side, acting as a natural border around a lush flower bed. The rough wood contrasts beautifully with vibrant blooms—bright reds, yellows, and purples. The uneven edges and rustic finish add character, making the garden feel like a secret, enchanted space. Small gaps between the planks allow for drainage and airflow, essential for healthy plants.
Use multiple pallets stacked or lined up side by side for larger beds. Stain or leave the wood natural for a more organic look. Secure the pallets with nails or screws, and reinforce with stakes if needed. For a more decorative touch, add painted accents or carvings. You can also line the inside with landscape fabric to prevent weeds from creeping through.
Start by selecting sturdy pallets and cleaning them thoroughly. Arrange the pallets in your desired shape and secure the corners with nails or screws. Place the frame around your flower bed, ensuring it’s level and stable. Fill inside with soil, compost, and your favorite plants. Water thoroughly and enjoy your natural, rustic garden border.
Decorate the frame with painted patterns, stenciled borders, or engraved personal messages. Add small decorative stones or pebbles along the edges for a finished look. Incorporate lighting or lanterns nearby to highlight your flower beds at night. Seasonal touches like faux vines or wreaths can also add charm.
This project proves that beautiful, functional garden borders can be simple and affordable. It’s a great way to incorporate natural elements into your outdoor decor. Your garden will look more organized and inviting, encouraging more outdoor time. Get creative and frame your flowers with rustic style!
10. Pallet Bar Cart for Outdoor Entertaining
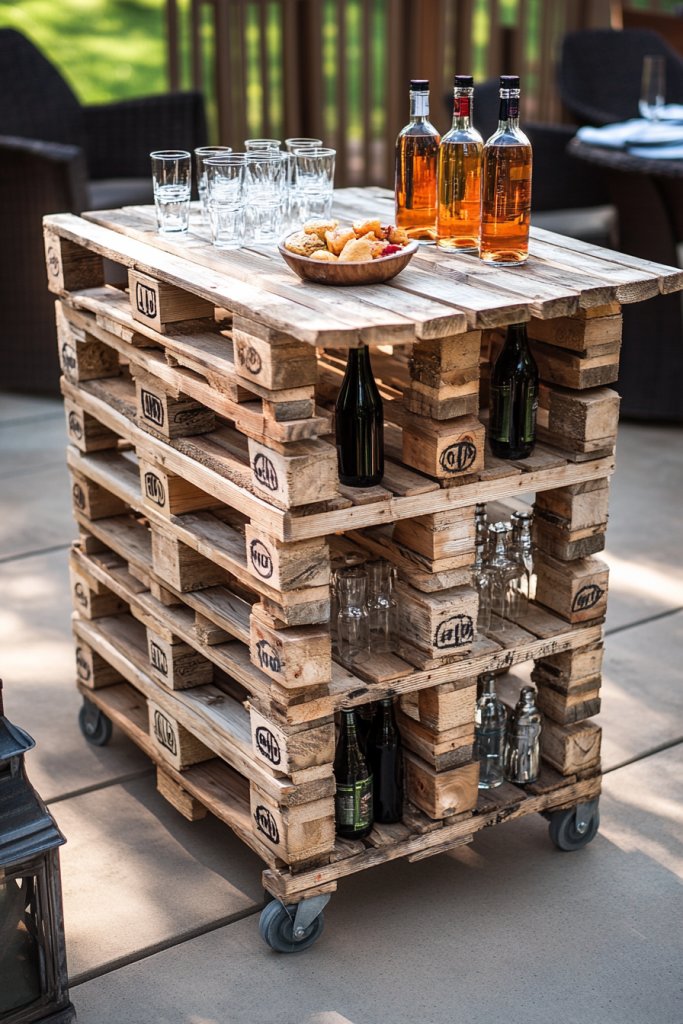
Hosting outdoor parties and want a stylish way to serve drinks? A pallet bar cart combines rustic charm with practicality, making your gatherings feel special. It’s mobile, customizable, and adds a warm, inviting vibe to any garden or patio. Plus, building your own means you control the look and layout.
Imagine a weathered pallet painted in a deep, smoky hue, topped with a sturdy surface for glasses and bottles. Small wheels make it easy to roll around, while hooks or shelves hold your bar essentials. With string lights overhead and a few stools, it becomes the centerpiece of your outdoor soirée. Lush plants and lanterns complete the cozy, rustic scene.
Paint the pallet in bold colors or leave it natural for a vintage feel. Add a removable top or attach a fold-down shelf for extra prep space. Incorporate hooks or racks for bottles and utensils. For a more refined look, install a waterproof finish or use reclaimed wood for an authentic vibe. The cart can be as simple or elaborate as you like.
Select a sturdy pallet and clean it thoroughly. Sand rough edges and secure wheels or casters to the bottom. Reinforce the structure with additional support if needed. Attach hooks or small shelves to hold bottles, glasses, or bar accessories. Seal the surface with outdoor-grade paint or stain for weatherproofing. Stock it with your favorite beverages and enjoy.
Decorate with painted or stenciled patterns, or add personalized labels. Hang string lights or fairy lights for evening ambiance. Incorporate decorative elements like faux greenery or vintage signage. You can also add a small fold-out table or extra storage underneath for supplies. Make it uniquely yours with personal touches.
This DIY bar cart turns any outdoor space into a party zone effortlessly. It’s a fun project that elevates your entertaining game and showcases your craftsmanship. Your friends will be impressed by your rustic, personalized setup. Time to serve up drinks with style!
11. Pallet Storage Chest for Garden Tools
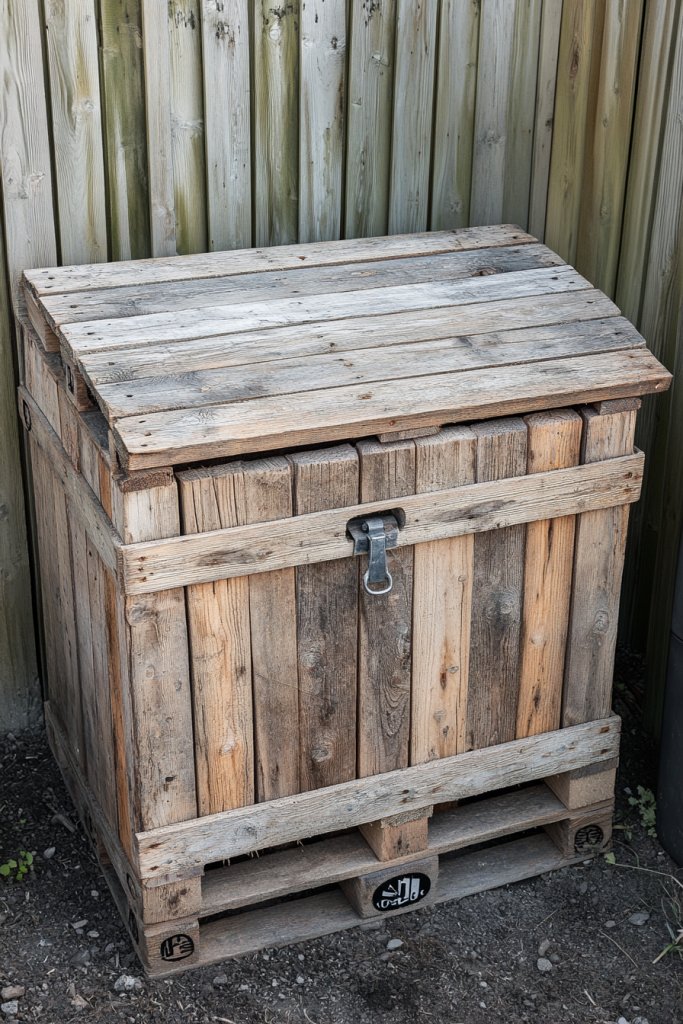
Fed up with cluttered garden tools and supplies? A pallet storage chest offers a rustic, affordable solution to keep everything organized and protected. It’s easy to build, customizable, and adds charm to your outdoor space. Plus, it keeps your tools handy and your yard tidy.
Picture a large, weathered pallet with a hinged lid, nestled against a shed or wall. Inside, your pruning shears, gloves, and small tools are neatly stored. The rough texture of the wood adds character, blending beautifully with the garden’s natural elements. A simple latch keeps everything secure, while the open design makes access quick.
Paint or stain the pallet for a different look—vintage, modern, or natural. Add a handle or wheels for mobility, especially if you move your tools around often. Customize the size to fit your storage needs—small for hand tools or larger for hoses and equipment. You can also line the interior with waterproof fabric or liner for added protection.
Choose a sturdy pallet and clean thoroughly. Reinforce the structure with additional support or corner braces. Attach a hinged lid with outdoor hinges, ensuring it opens smoothly and stays secure. Seal the wood with weatherproof paint or stain to withstand the elements. Install a latch or lock for security. Store your gardening essentials inside and keep the lid closed when not in use.
Decorate the chest with painted patterns, stenciled labels, or engraved initials. Add small hooks on the sides for hanging gloves or small tools. Incorporate a weatherproof cushion on top for a quick outdoor seat. Seasonal accents like faux flowers or decorative signs can make it stand out even more.
A pallet storage chest is an easy DIY project that keeps your garden organized and adds rustic appeal. It’s practical, customizable, and a great way to showcase your woodworking skills. Your garden tools will be neatly stored, and your outdoor space will look polished. Get started and enjoy a clutter-free garden!
12. Rustic Pallet Coffee Table with Crate Storage
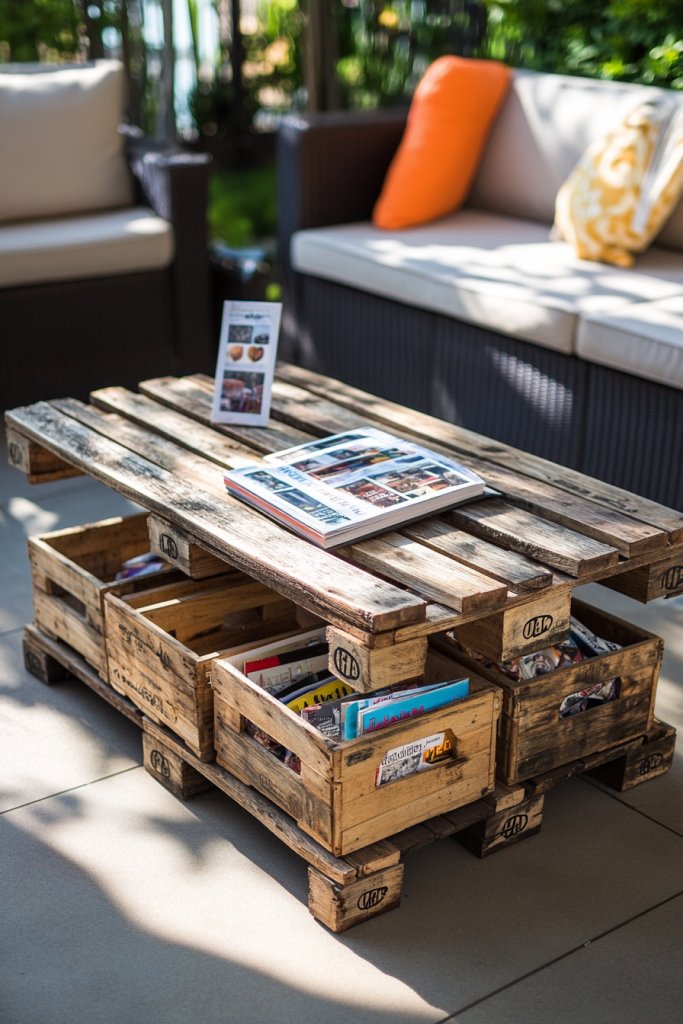
Looking for a versatile, rustic coffee table that also offers storage? A pallet coffee table with built-in crates delivers both style and function. It’s perfect for outdoor lounging or patio spaces, adding character while keeping your essentials close. And DIY? It’s easier than you might think.
Envision a chunky pallet with a distressed finish, topped with a weatherproof surface. Beneath, built-in crates made from pallets or reclaimed wood provide space for magazines, gardening tools, or outdoor games. The rough texture and earthy tones blend seamlessly with garden furniture and lush surroundings. Place a few decorative lanterns or candles on top for cozy evenings.
Paint or stain the wood to match your decor style—whitewashed for shabby chic, dark stain for sophisticated rustic. Customize the size—larger for a spacious patio or smaller for a balcony. Incorporate removable or hinged crate lids for easy access. Use decorative hardware or metal accents to enhance the vintage vibe.
Start with selecting strong pallets and cleaning them well. Assemble the top surface by stacking and securing pallets, then attach crates underneath using screws or brackets. Sand all edges and surfaces to prevent splinters. Seal the wood with outdoor-grade protective finish. Position the table on a level surface, load with your outdoor essentials, and enjoy your multifunctional piece.
Add painted or stenciled patterns, or personalize with engraved initials. Decorate the crates with fabric liners or labels. Place a weatherproof cushion on top for comfortable seating. Seasonal accents like faux foliage or fairy lights can turn it into a centerpiece for gatherings.
This pallet coffee table with crates is a practical yet charming DIY project that transforms your outdoor area. It’s a testament to how simple materials can create something both functional and beautiful. Your friends will ask where you bought it—and you can proudly say you made it. Time to craft your own rustic centerpiece!
13. Pallet Ottoman or Footstool with Cushioned Top
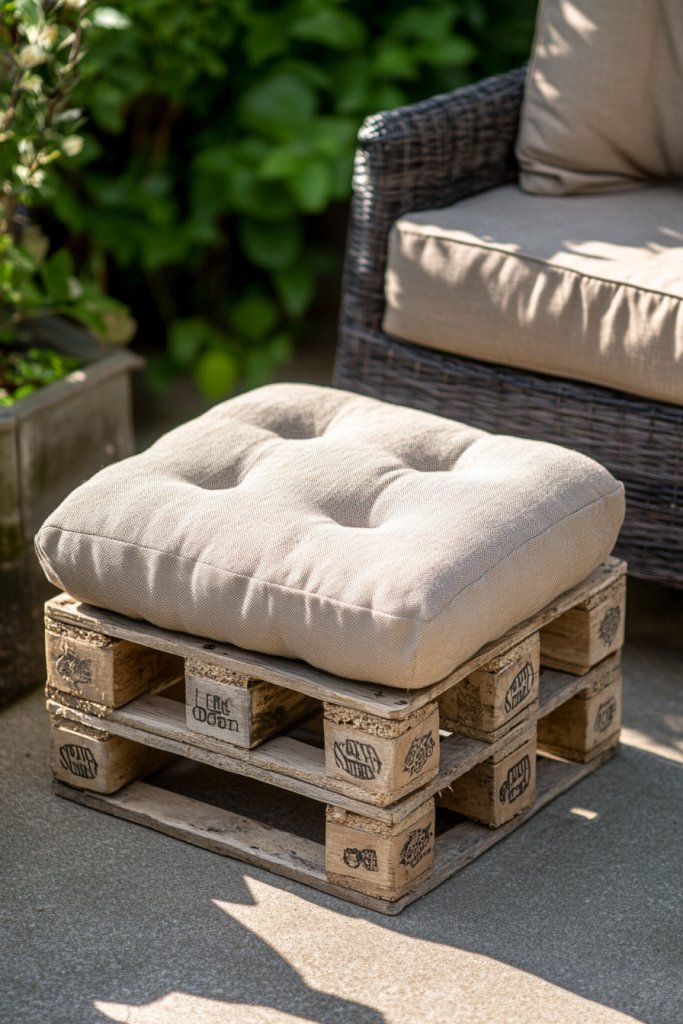
Seeking extra seating or a comfy footrest outdoors? A pallet ottoman with a cushioned top offers a rustic, versatile addition to your garden or patio. It’s perfect for relaxing, chatting, or even as an impromptu table. And the best part? It’s a simple DIY project anyone can tackle.
Imagine a sturdy pallet painted in a weathered white or stained in dark wood, topped with a thick, weather-resistant cushion. The cushion’s cover features a playful pattern or a neutral tone to suit your style. Surround it with outdoor lounge chairs or a small table, creating an inviting seating zone. The rough wood and plush cushion balance rustic charm with comfort.
Use different fabrics for cushions—sunproof, fade-resistant materials work best. Customize the size by stacking or trimming pallets, or add a decorative skirt for a softer look. Incorporate storage underneath by placing a hinged lid or removable cushion. Choose cushions with handles or ties for easy removal and cleaning.
Pick a solid pallet, clean and sand it smooth. Attach a weatherproof cushion or pad on top, securing with ties or Velcro if needed. Reinforce the pallet with additional support if necessary. Seal the wood with outdoor paint or stain to resist weather. Place it wherever you need extra seating or a footrest, and style with outdoor rugs or pillows.
Decorate the cushion with embroidered or painted accents. Add decorative tassels or trim to the cushion cover. Personalize with painted initials or symbols on the pallet sides. Swap out cushions seasonally for a fresh look. Incorporate small side tables or lanterns nearby for ambiance.
This DIY ottoman is a quick project that adds both function and style to your outdoor space. It’s a great way to showcase your craftiness while enhancing comfort. Your outdoor area will become more inviting and versatile, perfect for relaxing or entertaining. Start building and enjoy your upgraded space!
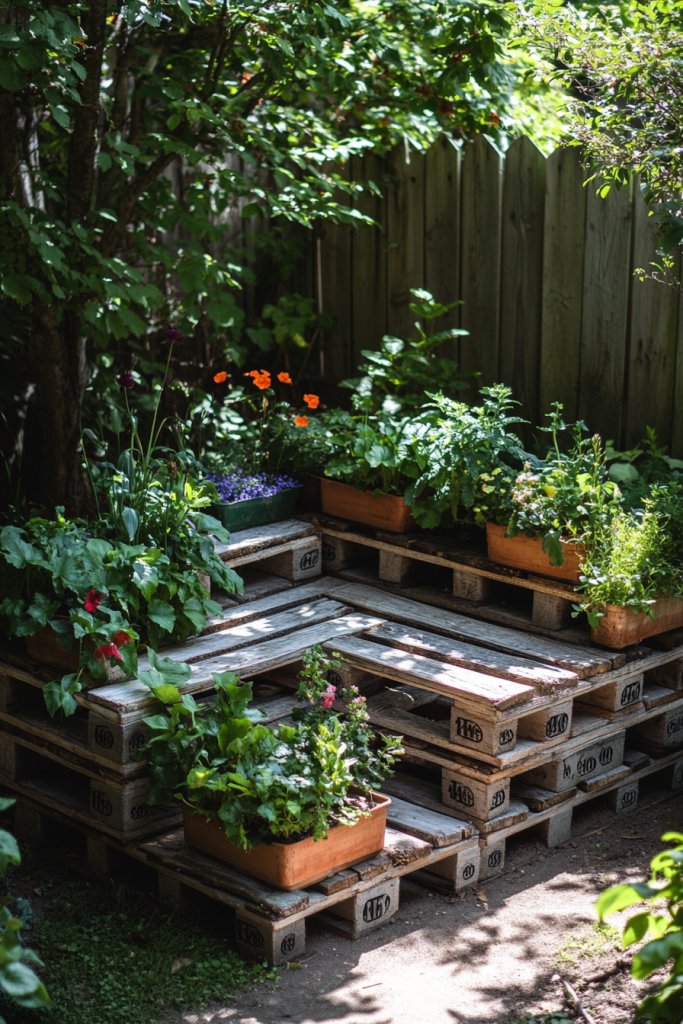
14. Tiered Pallet Plant Stand
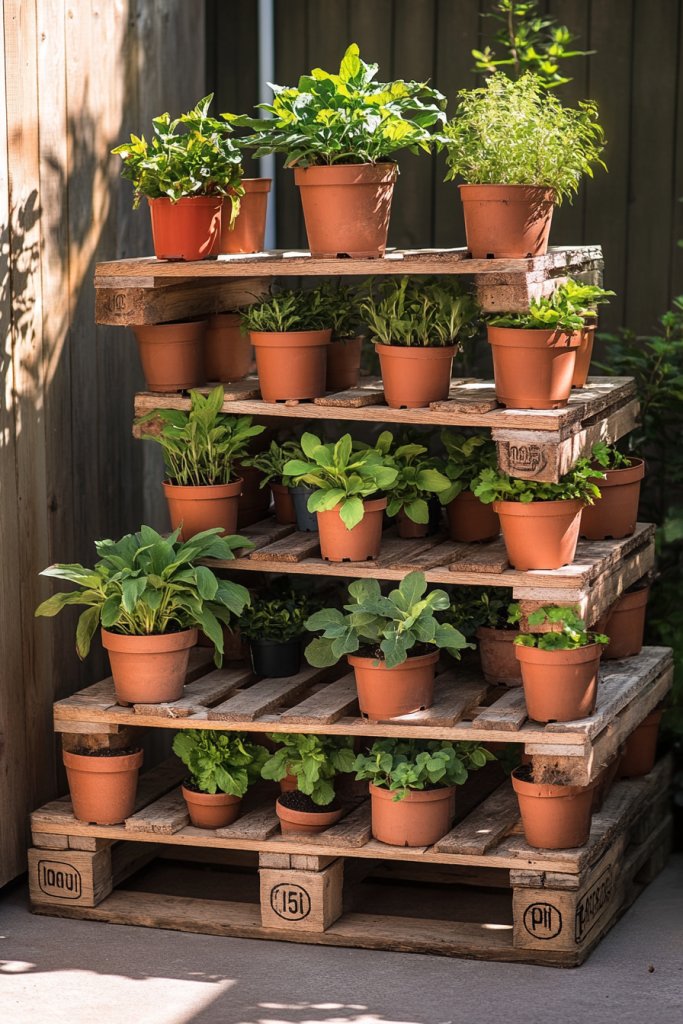
Looking for a stylish way to display your potted plants? A tiered pallet plant stand offers a rustic, space-saving solution. It’s perfect for patios or decks where space is limited but you still crave a lush, vibrant look. Plus, it’s a fun DIY project that adds personality to your garden decor.
Picture a multi-level pallet structure with staggered shelves, each holding a variety of colorful pots. The wood’s natural, weathered finish contrasts beautifully with fresh greenery and blooms. The tiers create depth and dimension, turning a simple stand into a focal point. Surround it with fairy lights or decorative stones for added charm.
Adjust the height and number of levels to fit your space and plant collection. Stain or paint the wood to match your aesthetic—bright colors for fun, natural tones for rustic elegance. Add small hooks or brackets for hanging plants or garden tools. You can also incorporate a small drawer or storage compartment at the bottom.
Select sturdy pallets and clean thoroughly. Cut or assemble pallets into tiers, securing each level with screws or brackets. Sand all surfaces to smooth out splinters and rough edges. Seal the wood with weatherproof paint or varnish. Arrange the stand on a flat surface, fill the pots with soil, and plant your favorites. Water consistently to keep plants thriving.
Decorate the stand with painted patterns, stenciled labels, or engraved motifs. Add decorative stones or small lanterns around the base. Personalize with custom plant tags or signs. Change out plants seasonally or add faux foliage for year-round visual appeal. The stand’s rustic look complements almost any garden style.
A tiered pallet plant stand is a creative way to showcase your gardening skills and add life to your outdoor space. It’s a project that’s easy to adapt and personalize, making your garden truly unique. Plus, it’s a practical solution that keeps your plants organized and accessible. Get inspired and start building!
15. Pallet Pergola with Climbing Plant Supports
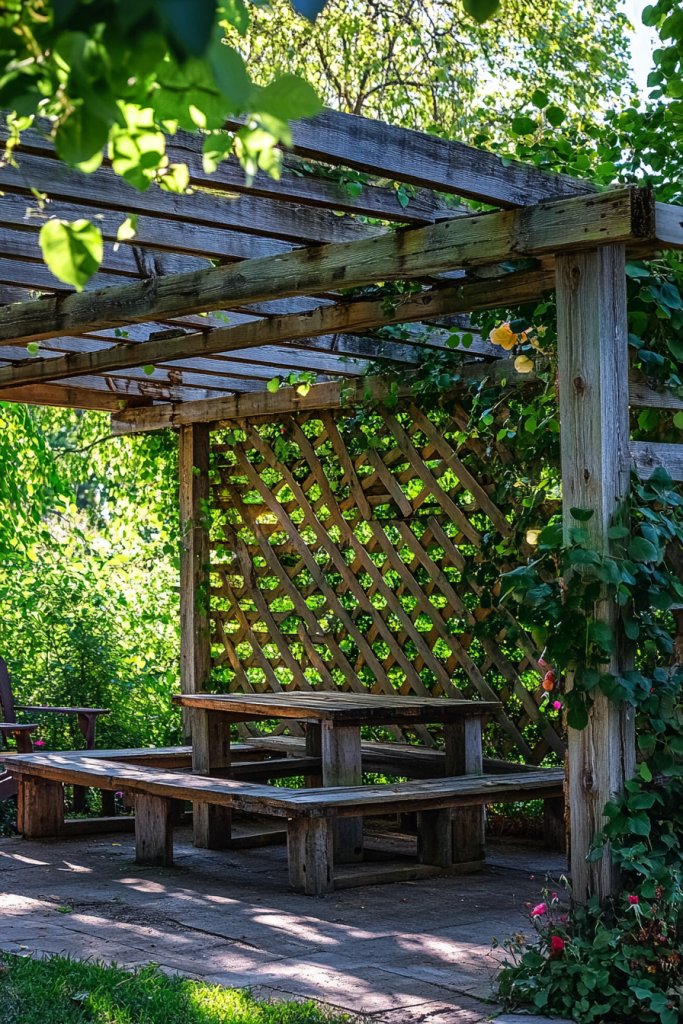
Want to create a shaded, intimate outdoor space without spending a fortune? A pallet pergola with climbing plant supports offers rustic elegance and functional shade. It’s perfect for relaxing afternoons or romantic dinners. Plus, it’s a DIY project that transforms your yard into a cozy retreat.
Imagine a sturdy wooden frame made from pallets, with climbing vines or roses winding through the slats. The natural wood finish blends seamlessly with the garden’s greenery. Dappled sunlight filters through the leafy canopy, casting inviting shadows. String lights or lanterns hanging from the structure add a magical glow at night.
Build the pergola in different sizes to suit your space—small for a corner or large for a dining area. Stain or paint the wood to match your aesthetic—whitewashed, dark, or natural. Support climbing plants with trellises, wires, or additional pallets. Add curtains or outdoor fabric for privacy and a softer look.
Construct a frame from pallets, securing the corners with screws and brackets. Reinforce the structure for stability, especially if installing in windy areas. Attach support wires or trellises for climbing plants. Ensure the structure is anchored deep enough into the ground or secured to a solid surface. Plant climbers at the base and train them to grow through the slats.
Decorate with painted patterns, engraved signs, or hanging ornaments. Add fairy lights or solar lanterns for evening ambiance. Incorporate outdoor curtains or drapes for extra privacy and shade. Personalize with name plaques or family symbols. Seasonal flowers or faux foliage can enhance the romantic vibe.
Building a pallet pergola is a rewarding project that elevates your garden’s style and functionality. It’s a beautiful focal point that also provides shade and privacy. Your outdoor space becomes a personal sanctuary, perfect for unwinding or entertaining. Start your rustic pergola today!
16. Reclaimed Pallet Swing Bed with Canopy
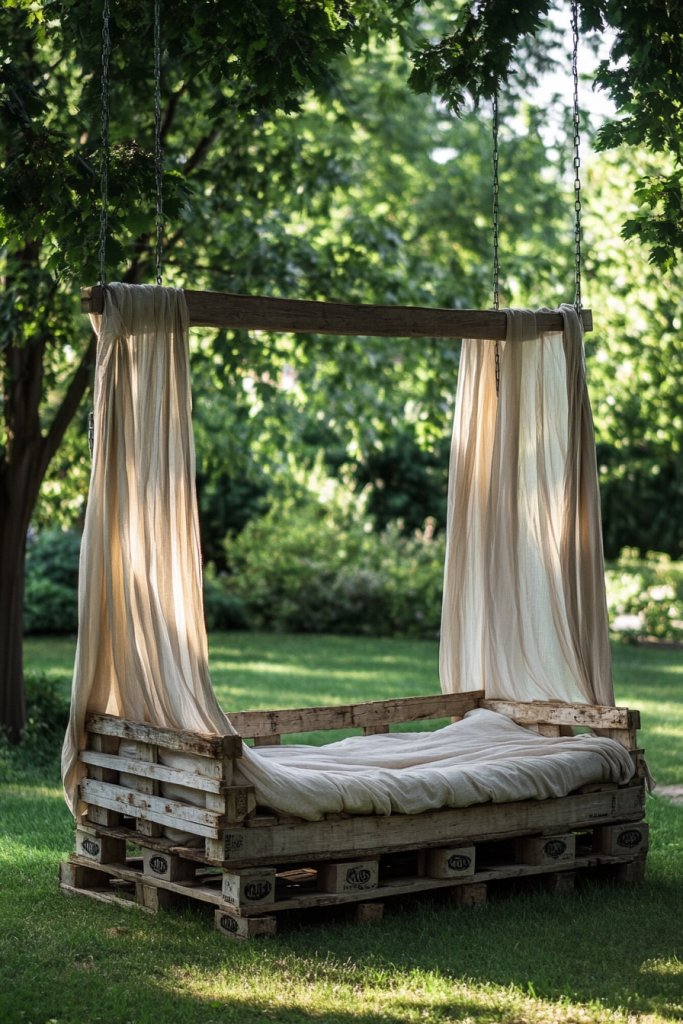
Dreaming of a lazy, relaxing outdoor retreat? A reclaimed pallet swing bed with a canopy offers rustic charm and ultimate comfort. It’s perfect for napping, reading, or just soaking in the outdoors. Plus, building your own makes the experience even more special.
Imagine a sturdy pallet frame suspended from a robust support, draped with a light, flowing canopy. The bed is layered with plush cushions and cozy throws, inviting you to unwind. Surround it with flowering plants, fairy lights, and perhaps a small side table. It creates a dreamy, retreat-like atmosphere perfect for lazy afternoons.
Paint or stain the pallets in weather-resistant finishes—white, natural, or dark hues. Choose a lightweight, breathable canopy fabric in neutral or vibrant colors. Add extra cushions or pillows for personalized comfort. Incorporate decorative elements like tassels, pom-poms, or fringe for a boho vibe. Adjust the size based on available space.
Select strong, reclaimed pallets and reinforce them with support beams if needed. Hang the frame securely from a sturdy overhead structure or trees, ensuring safe weight distribution. Attach the canopy using eye hooks or rings, allowing it to flutter gently in the breeze. Add cushioned mattresses or layered pillows, and secure with ties or straps. Weatherproof the entire structure for durability.
Decorate with personalized embroidery or painted motifs on the cushions or canopy. Hang fairy lights or lanterns from the support beams for magical evenings. Incorporate hanging plants or decorative ribbons for added charm. Use seasonal fabrics or accents to keep the look fresh year-round.
This DIY swing bed is a showstopper that transforms your yard into a rustic paradise. It’s a creative project that yields a cozy, inviting space for relaxation and gatherings. Your friends will envy your outdoor oasis, and you’ll love the sense of achievement. Start dreaming and building!
17. Pallet Corner Seat with Built-in Planters
Want to maximize seating and greenery in a tight corner? A pallet corner seat with built-in planters offers a stylish, space-efficient solution. It turns an awkward nook into a charming outdoor retreat. Plus, it’s easy to customize and a fun DIY project that adds instant personality.
Picture a sturdy pallet structure shaped into an L, with cozy cushions and integrated planters along the sides. Vibrant flowers or lush greenery spill over the edges, adding color and life. The seat fits perfectly into a corner, creating a private nook for reading or chatting. Surround it with fairy lights or lanterns for evening ambiance.
Paint or stain the pallets to match your decor—bright, pastel, or natural tones. Use different sizes of planters for variety, and fill them with your favorite flowers or herbs. Add cushions or pillows for comfort, and incorporate small side tables or storage compartments. You can also customize the height or shape for different spaces.
Select sturdy pallets and clean thoroughly. Assemble the corner seat using screws or brackets, reinforcing the structure for stability. Attach planters made from pallets, pots, or repurposed containers, securing them along the sides. Fill the planters with soil and plants, then add cushions on top. Seal the wood if desired for weather resistance. Place into your corner and style.
Decorate with painted patterns, stenciled designs, or engraved initials. Add decorative stones or faux foliage around the planters. Personalize with custom cushions, or hang small lanterns or fairy lights nearby. Seasonal flowers or faux vines can keep the space fresh and lively.
This corner seat with planters is a practical, beautiful DIY project that transforms small spaces. It’s a charming way to combine seating and gardening, boosting your outdoor decor. You’ll love the cozy, lush atmosphere it creates—perfect for relaxing and entertaining. Start building today!
18. Pallet Fire Pit Surround with Seating Area
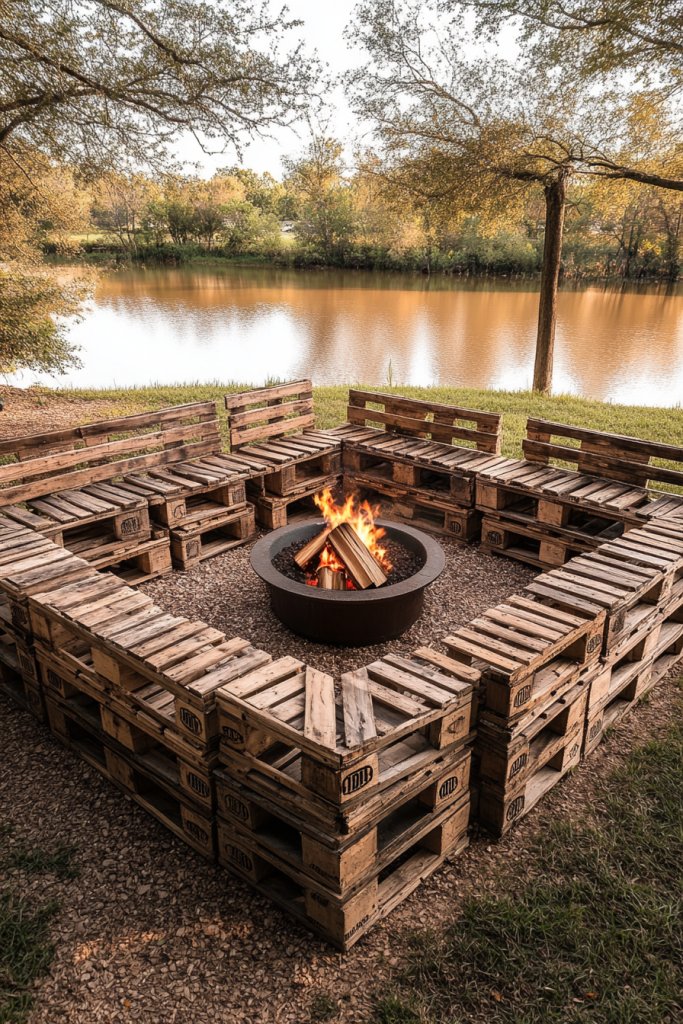
Looking to create a cozy gathering spot in your yard? A pallet fire pit surround with seating area offers rustic charm and functional warmth. It’s affordable, customizable, and perfect for roasting marshmallows or sharing stories under the stars. Plus, it’s a DIY project that brings warmth and atmosphere to any outdoor space.
Imagine a circular or rectangular ring of weathered pallets, forming a barrier around a fire pit. Inside, comfortable seating—cushioned or with added pillows—invites friends to relax. The wood’s natural finish blends with the flickering firelight, creating a warm glow. String lights overhead and outdoor rugs complete the inviting scene.
Arrange pallets in different shapes—circle, square, or freeform—depending on your yard’s layout. Paint or stain the pallets for a cohesive look, or leave them natural for a rustic vibe. Add a metal or stone fire pit in the center. Incorporate built-in benches or removable chairs for seating flexibility.
Choose durable pallets and clean thoroughly. Arrange them into your desired shape and secure with screws or brackets. Reinforce the structure for stability, especially if exposed to wind. For safety, ensure the fire pit is properly installed and ventilated. Attach cushions or weatherproof seating, and add decorative elements like lanterns or outdoor rugs. Always check local fire safety regulations before lighting.
Paint or stencil the pallets with patterns or quotes for a personalized touch. Add string lights, lanterns, or faux torches for ambiance. Incorporate storage underneath for firewood or outdoor accessories. Seasonal decor like faux fur throws or holiday ornaments can make the space festive.
Building your own fire pit surround is a rewarding DIY project that turns your yard into a cozy retreat. It’s practical, stylish, and perfect for entertaining. You’ll love the rustic charm and the warm glow of your custom creation—making every evening special. Get started and gather around!
Conclusion
With a diverse array of pallet garden furniture ideas, you now have countless ways to infuse rustic charm into your outdoor space. Whether you prefer simple benches, elaborate lounge sets, or decorative touches, these projects are accessible and rewarding. Don’t hesitate to bring your creative vision to life—start crafting your own rustic oasis today and watch your garden transform into a cozy haven that reflects your personal style!
Leave a Reply