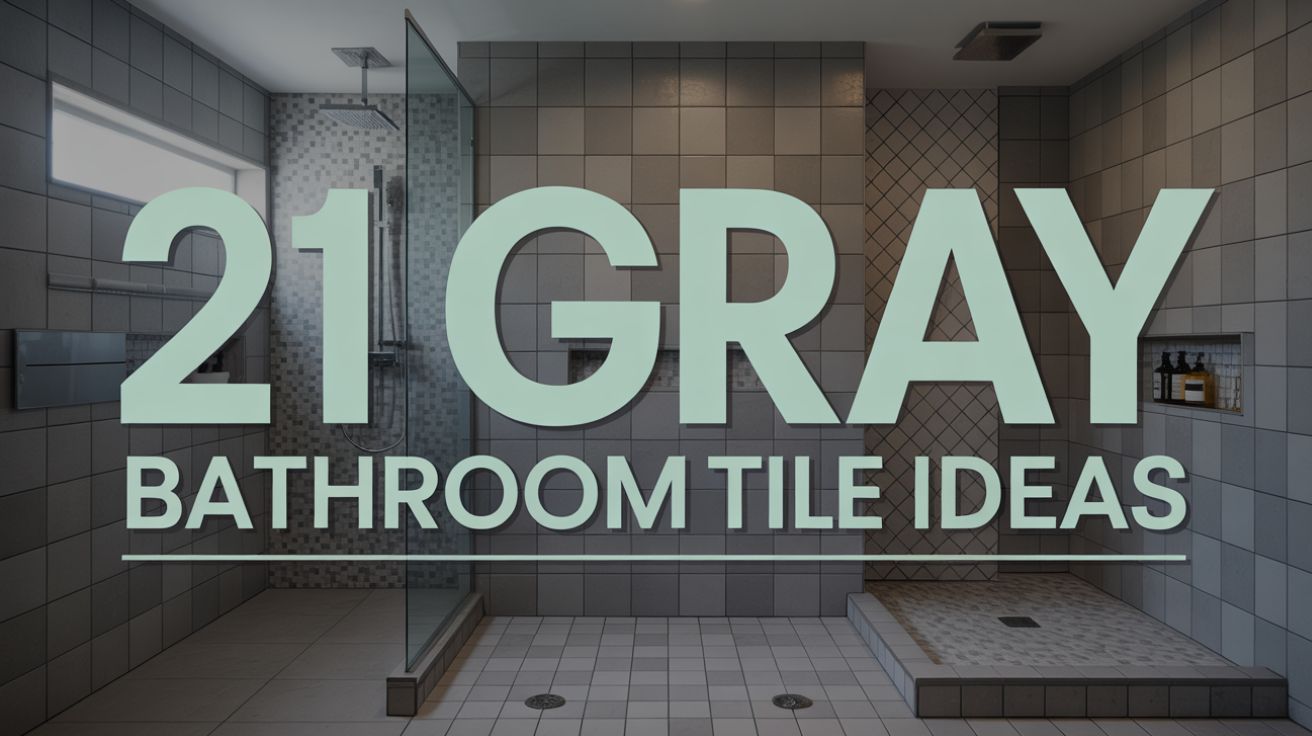
21 Gray Bathroom Tile Ideas for Modern Neutrality
I have been, or can be if you click on a link and make a purchase, compensated via a cash payment, gift, or something else of value for writing this post. As an Amazon Associate, I earn from qualifying purchases. Please read my full Affiliate Disclosure for more information.
Gray bathroom tiles have taken center stage in modern interior design, captivating homeowners with their sleek, versatile appeal. Their ability to create a calm, sophisticated atmosphere while complementing a range of color schemes makes them a popular choice for those seeking neutrality with style.
In this article, you’ll explore a variety of creative gray bathroom tile ideas that will inspire your next renovation. From subtle mosaics to bold geometric patterns, each concept offers a unique way to elevate your space and reflect your personal taste in contemporary design.
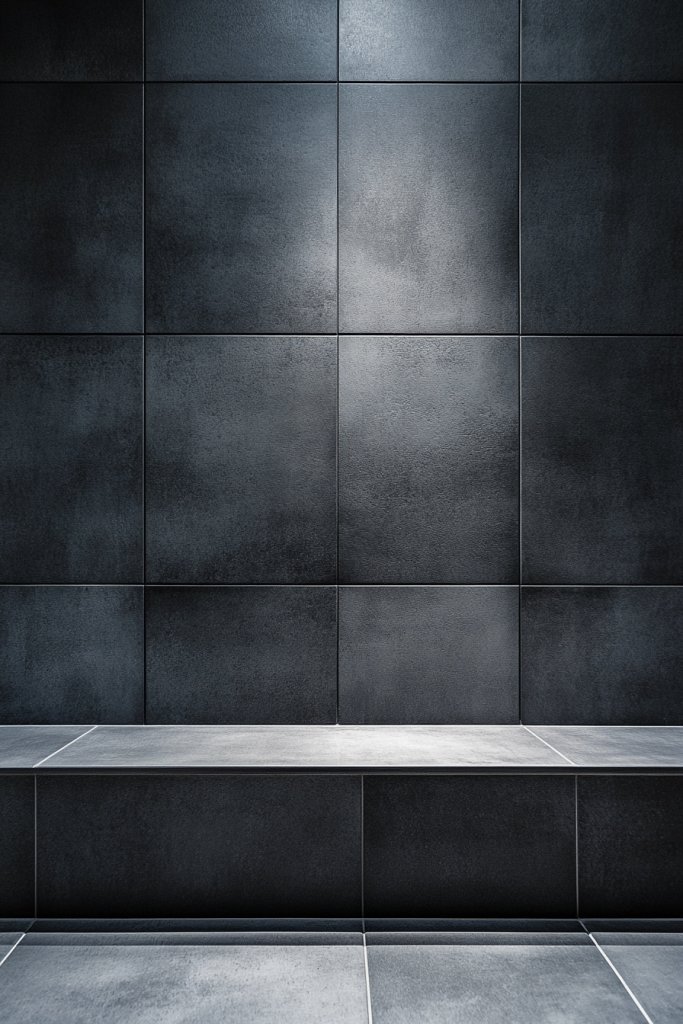
1. Sleek Large-Format Gray Tiles for a Minimalist Look

Ever feel like your bathroom is stuck in a time warp or just needs a serious upgrade? Large-format gray tiles are like a breath of fresh air for anyone craving that sleek, modern vibe. They help create a sense of openness and reduce visual clutter, making tiny bathrooms feel more spacious. Plus, who doesn’t want that effortless, high-end look without breaking the bank?
Imagine walking into a bathroom with huge, seamless gray tiles stretching from floor to ceiling. The smooth, matte surface reflects light softly, while the minimal grout lines give a clean, uninterrupted surface. The tiles have a subtle texture that invites you to run your hand over them, adding warmth to the space. Everything feels calm, organized, and downright luxurious, like a boutique spa.
These oversized tiles work well in both small and large bathrooms, but you can tweak their look with different finishes—matte for a subdued, sophisticated feel or a slight sheen for more brightness. For a cozy vibe, pair them with warm-toned accessories or textured textiles. In ultra-modern spaces, combine them with black fixtures or minimalist hardware for a striking contrast.
Start by selecting large tiles—typically 24×48 inches or bigger—made from porcelain or natural stone for durability. Prepare your wall and floor surfaces thoroughly, ensuring they are flat and sturdy. Use a high-quality adhesive suitable for large tiles to prevent cracking or unevenness. Grout lines should be minimal; a color that matches the tiles enhances the seamless look. Consider professional installation to avoid awkward cuts or lippage issues.
Add personal touches by incorporating textured towels, a soft rug, or a statement piece like a sculptural shelf with curated decor. Consider installing floating vanities with clean lines to complement the minimalist tiles. Warm up the space with subtle lighting accents—think hidden LED strips or wall sconces—to highlight the tiles’ sleekness. Keep decor simple to let the tiles shine.
Large-format gray tiles elevate your bathroom into a modern sanctuary. They are versatile, timeless, and forgiving with maintenance. Once installed, you’ll wonder why you ever settled for smaller tiles. It’s a simple upgrade that makes a bold statement, perfect for anyone eager to adopt a sleek, minimalist aesthetic.
2. Herringbone Pattern in Soft Gray for Visual Interest
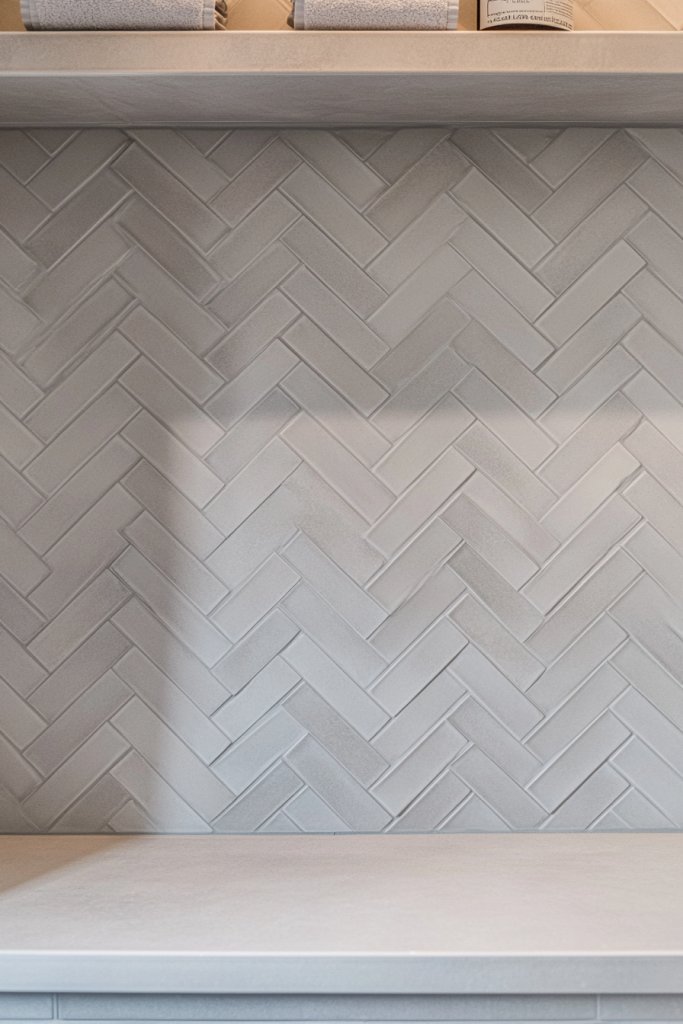
Tired of boring, cookie-cutter tile layouts? Want to add a touch of sophistication without going overboard? The herringbone pattern in soft gray tiles is your ticket to elevating even the simplest bathroom. It creates visual interest and a sense of craftsmanship that makes your space stand out.
Picture a wall or floor adorned with tiny rectangular tiles arranged in a zigzag, fishbone pattern. The soft gray hues blend seamlessly into a neutral palette, but the intricate layout draws your eye and adds depth. The textured surface catches light at different angles, creating subtle shadows that dance across the surface. It’s like wallpaper but way more durable.
This pattern lends itself well to both traditional and contemporary styles. For a playful vibe, combine with white or darker gray grout to accentuate the pattern. For a more subdued look, match the grout to the tiles for a seamless appearance. You can also vary the size of tiles or mix in some larger pieces for a custom, eclectic effect.
Start by choosing rectangular or subway-shaped tiles in a soft gray shade. Use spacers to ensure even pattern alignment and a level surface. The pattern works best on feature walls or as a floor accent, so plan your layout carefully. Apply mortar evenly and press tiles firmly into place, checking alignment constantly. After setting, use a grout color that complements or contrasts depending on your style choice. Pattern consistency is key—consider professional help if you’re new to intricate layouts.
Elevate the look with decorative trims or a border in a darker or contrasting shade. Add textured textiles or layered accessories to soften the geometric vibe. You could also incorporate subtle lighting to emphasize the pattern’s depth. Personal touches like a vintage mirror frame or a sleek towel rack can complete the aesthetic without overpowering the pattern.
A herringbone gray tile layout offers timeless appeal with a modern twist. It’s a smart way to add character without overwhelming the space. Once you see how the pattern transforms your bathroom, you’ll wonder why more people don’t try this classic technique. With a bit of patience, you can achieve a designer look that’s both stylish and durable.
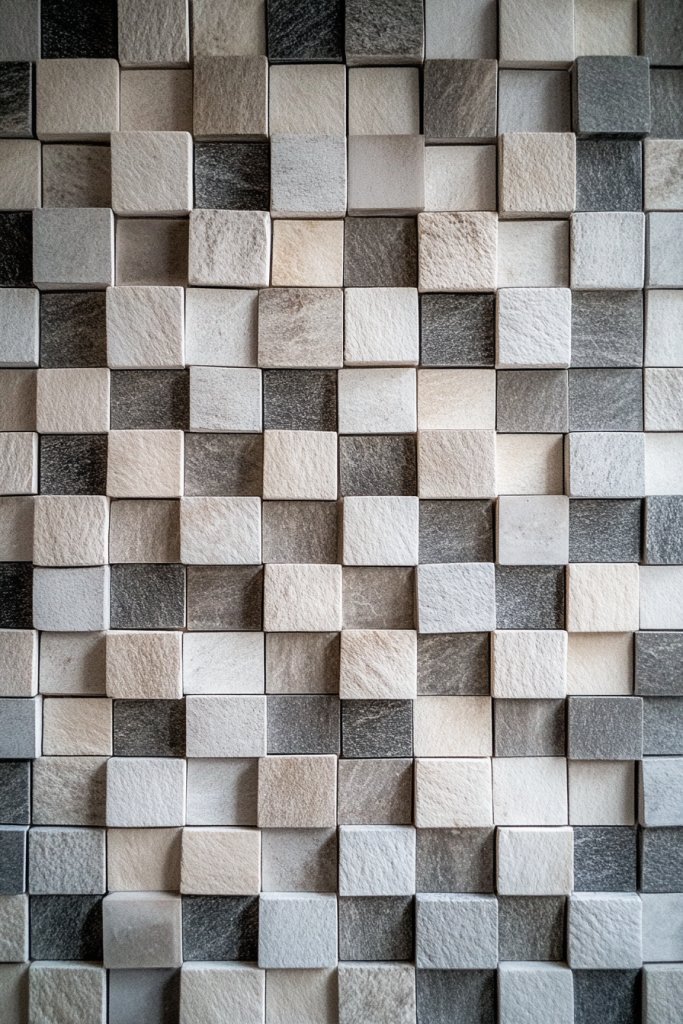
3. Textured Matte Gray Tiles for a Tactile Experience
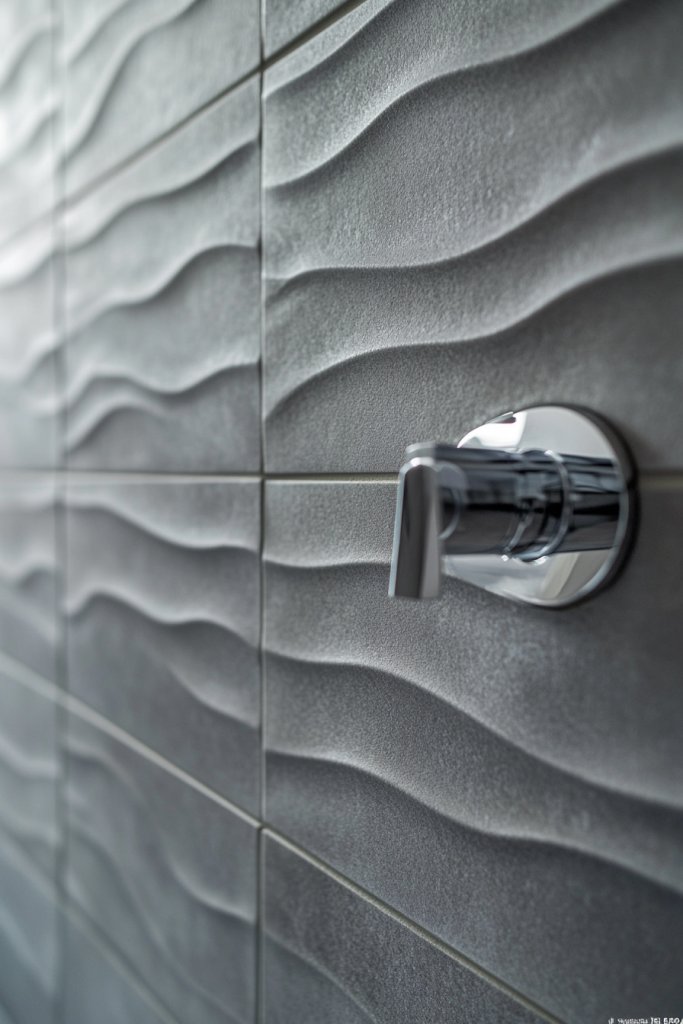
Ever wish your bathroom felt more inviting and less sterile? Textured matte gray tiles bring a tactile dimension that invites touch and adds warmth. They create a cozy, approachable atmosphere perfect for those who love subtle sensory details.
Imagine running your hand over a wall or floor with a slightly rough, matte finish that has gentle ridges or patterns. The subtle texture softens the overall look while adding visual complexity. The matte surface absorbs light, reducing glare, and giving the space a calming, almost organic feel. It’s like nature-inspired decor you can actually touch.
Choose textured tiles in various patterns—linear, pebble-like, or embossed geometric shapes—to match your style. Pair with smooth, matte fixtures and soft textiles for a balanced look. For a more dramatic effect, combine textured tiles with plain, glossy ones in a contrasting layout. These tiles work well in both small bathrooms and larger spaces.
Select high-quality, textured matte tiles made from porcelain or natural stone. Prepare your surfaces carefully, ensuring they are flat and clean. Use a suitable adhesive that grips textured surfaces securely. When grouting, opt for a color that blends to emphasize the texture rather than distract from it. Pay close attention to alignment and consistency, especially with embossed or patterned tiles. Consider sealing natural stone to preserve its tactile qualities.
Add personal flair with plush towels, textured rugs, or sculptural accessories that complement the tactile theme. Incorporate layered textiles or soft lighting to highlight the textures further. You might also introduce a mix of textures—smooth countertops with rougher wall tiles—to create visual and tactile contrast. These details make your bathroom both functional and inviting.
Textured matte tiles are a subtle yet powerful way to upgrade your bathroom aesthetic. They provide comfort, warmth, and a unique sensory experience that standard tiles lack. Once installed, they create a space that feels both refined and cozy, encouraging relaxation and mindfulness. This is a choice that combines style with sensory delight, truly elevating your daily routine.
4. Subtle Gradient Gray Tiles for Depth and Dimension
Feeling like your bathroom lacks depth? Want a subtle way to add visual intrigue without overwhelming the space? Gradient gray tiles offer a sophisticated solution that plays with light and shadow for a layered look. They bring dimension to flat surfaces while maintaining a neutral palette.
Visualize tiles that transition smoothly from light to dark gray, creating a gentle ombré effect. The subtle gradient catches the eye without dominating, giving the room a dynamic yet calming vibe. The surface has a matte or semi-matte finish, which softens the transition and adds depth. The effect mimics natural stone or weathered concrete, blending rustic charm with modern elegance.
Use gradient tiles as a feature wall or on the floor for a dramatic statement. Pair with solid-colored grout or matching shades to emphasize the gradient. For a more subdued look, select tiles with minimal contrast in tones, blending seamlessly into your overall design. Incorporate natural elements or warm textiles to balance the cool neutrality.
Choose tiles with carefully calibrated color transitions—these are often pre-designed or digitally printed. Measure your space and plan your layout to maximize the gradient effect. Use spacers and a level to ensure even placement, and consider professional installation for precise alignment. Apply a consistent layer of adhesive and press tiles firmly into place. Grout in a color that complements the gradient, such as light gray or matching tones. Seal natural stone to preserve its appearance.
Personalize by adding LED lighting to highlight the gradient at different times of day. Mix in textured or patterned tiles in small accents to create contrast and visual interest. Incorporate warm-colored accessories or soft textiles to soften the cool tones. You can also customize the gradient hue by choosing different shades in the transition.
Subtle gradient tiles are a clever way to add depth without complexity. They evoke natural landscapes and bring a tranquil, layered feel to your bathroom. Once installed, you’ll enjoy the visual richness that a simple color shift can create. It’s a modern, understated upgrade that transforms your space with elegance and ease.
5. Combining Glossy and Matte Gray Tiles for Contrast
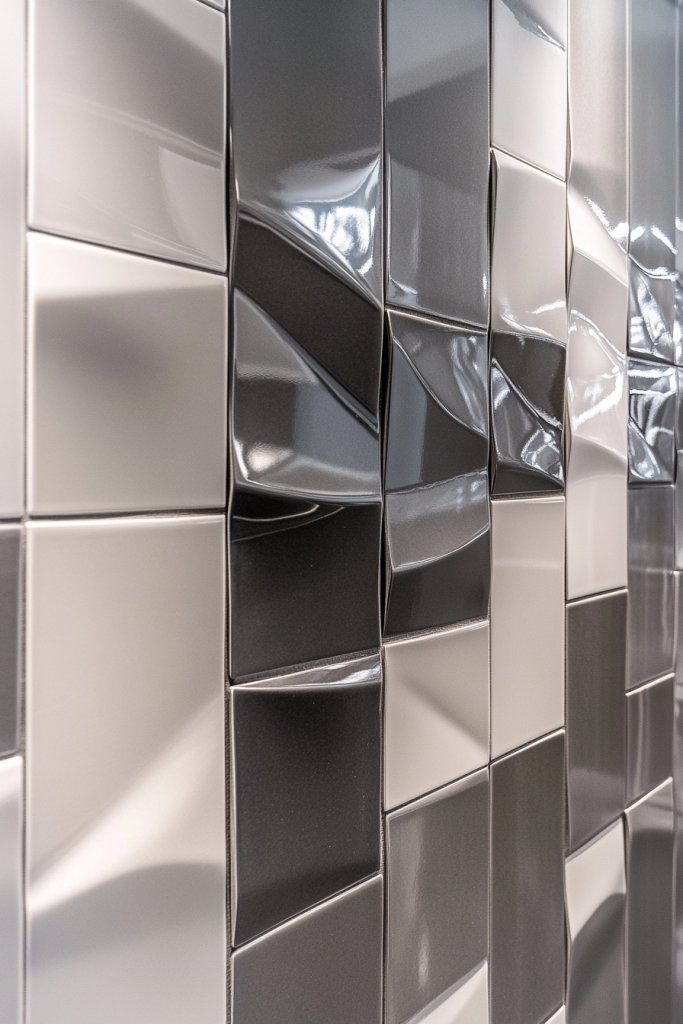
Ever wish your bathroom had more visual punch? Combining glossy and matte gray tiles creates a striking contrast that adds depth and interest. It’s a simple trick to elevate a neutral space into something more dynamic and modern. Who says gray has to be boring?
Imagine a wall with glossy tiles that reflect light and matte tiles that absorb it, arranged in a pattern or in contrasting sections. The interplay between shiny and muted surfaces catches your eye and creates a tactile experience. The glossy tiles shine softly under the light, while the matte ones provide a calming backdrop. Together, they make the space feel layered and curated.
Use the glossy finish for accent areas like a backsplash or niche, and matte for larger surfaces to balance the look. You can also alternate tiles in a checkerboard pattern or create a border with contrasting finishes. Match grout colors to the tiles or choose a contrasting hue for extra pop. This approach works well in both small and expansive bathrooms.
Select high-quality tiles with different finishes in similar gray tones for cohesion. Plan your layout to maximize contrast, perhaps with a bold diagonal or grid pattern. Apply adhesive carefully, ensuring no air bubbles or uneven spots. Use spacers to keep consistent spacing, and grout in a color that enhances either the contrast or the harmony. Seal the tiles as needed, especially if natural stone is involved.
Add visual interest with decorative trims, metallic fixtures, or textured textiles. Incorporate lighting fixtures that highlight the glossy surfaces without causing glare. Consider a mix of textures within accessories—smooth soap dishes or matte finish shower controls—to continue the contrast theme. Personal touches like artwork or shelving can further enhance the layered aesthetic.
Mixing glossy and matte gray tiles is a proven way to add sophistication and personality. It demonstrates your eye for detail and style, making your bathroom a true reflection of your taste. Once you see the striking difference, you’ll be inspired to experiment further with textures and finishes. It’s an effortless upgrade with big visual impact.
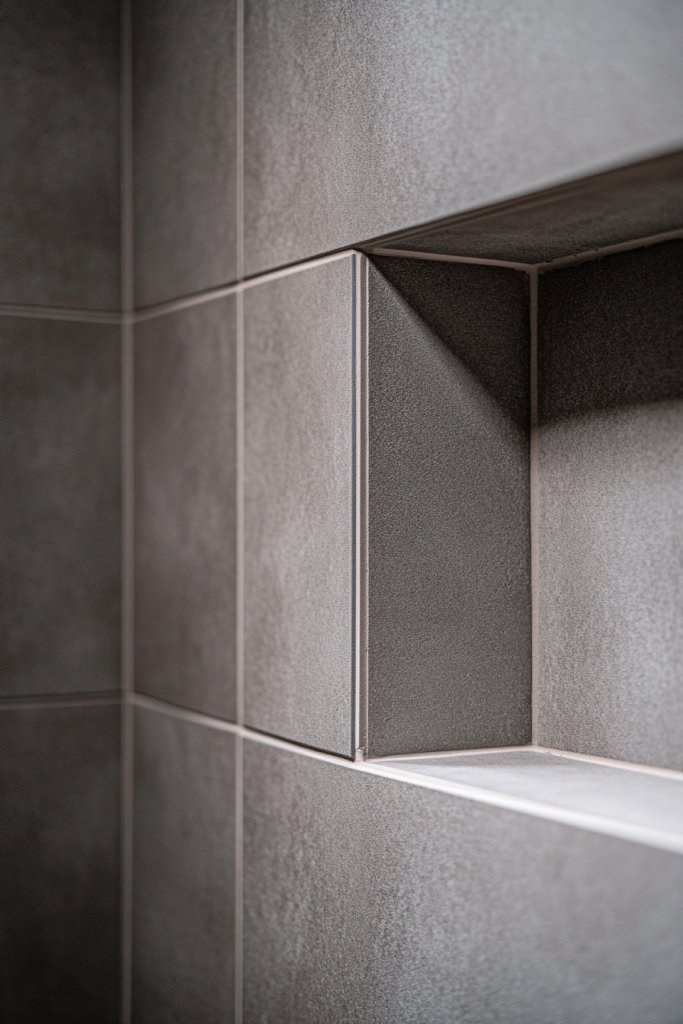
6. Frameless Gray Tile Shower with Clear Silicone Seals
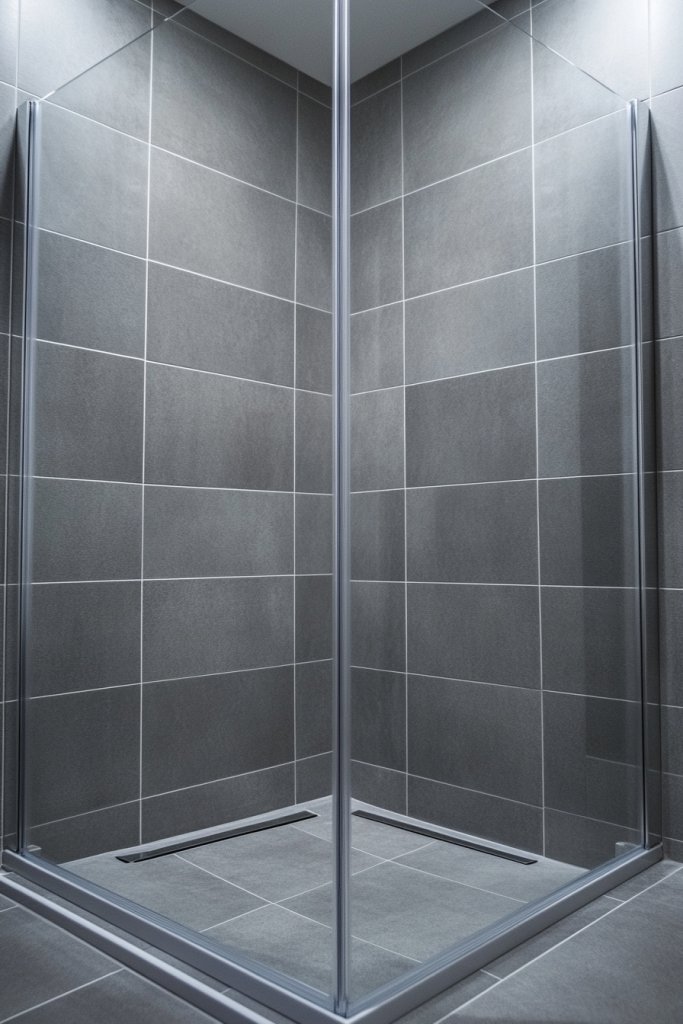
Looking for that sleek, seamless shower look? Frameless gray tile showers with clear silicone seals are the epitome of modern minimalism. They create a clean, uninterrupted flow that makes your bathroom appear larger and more luxurious. Plus, they’re surprisingly easy to maintain—no nooks or crannies to clean.
Visualize a shower enclosed by large gray tiles, with no bulky frames or metal hardware breaking the lines. The transparent silicone seals blend almost invisibly, giving the illusion of a floating glass wall. The matte or semi-matte tiles provide a soft, sophisticated backdrop that enhances the openness. The overall effect is a sleek, spa-like retreat that feels both fresh and uncluttered.
Perfect for contemporary and industrial styles, this setup works with large tiles or smaller ones arranged in a grid or linear pattern. To add contrast, incorporate warm metal fixtures or textured wall niches. Keep the color palette monochrome or add subtle accent tiles within the shower for visual interest. This design also adapts well to different space sizes.
Choose large-format gray tiles that can be cut precisely to fit your shower dimensions. Prepare the surfaces meticulously to ensure flatness and stability. Use high-quality, flexible silicone sealant that remains clear over time—this prevents yellowing or cracking. Apply the sealant in a continuous bead, smoothing it with a silicone tool for a seamless finish. Make sure all tiles are securely adhered and level before sealing.
Add subtle textured shower mats, or install built-in niche shelves to display essentials without clutter. Incorporate brushed metal fixtures or matte black hardware to amplify the modern aesthetic. Use ambient lighting or waterproof LED strips to highlight the sleek lines. Keep the overall look minimal but functional.
A frameless gray tile shower exemplifies modern elegance and precision. It’s a design choice that signals sophistication and confidence in your style. Once installed, it’s almost impossible not to feel like you’re in a high-end spa every day. This is a timeless upgrade that combines form, function, and a little bit of wow factor.
7. Incorporate Textured Subway Gray Tiles for a Classic Twist
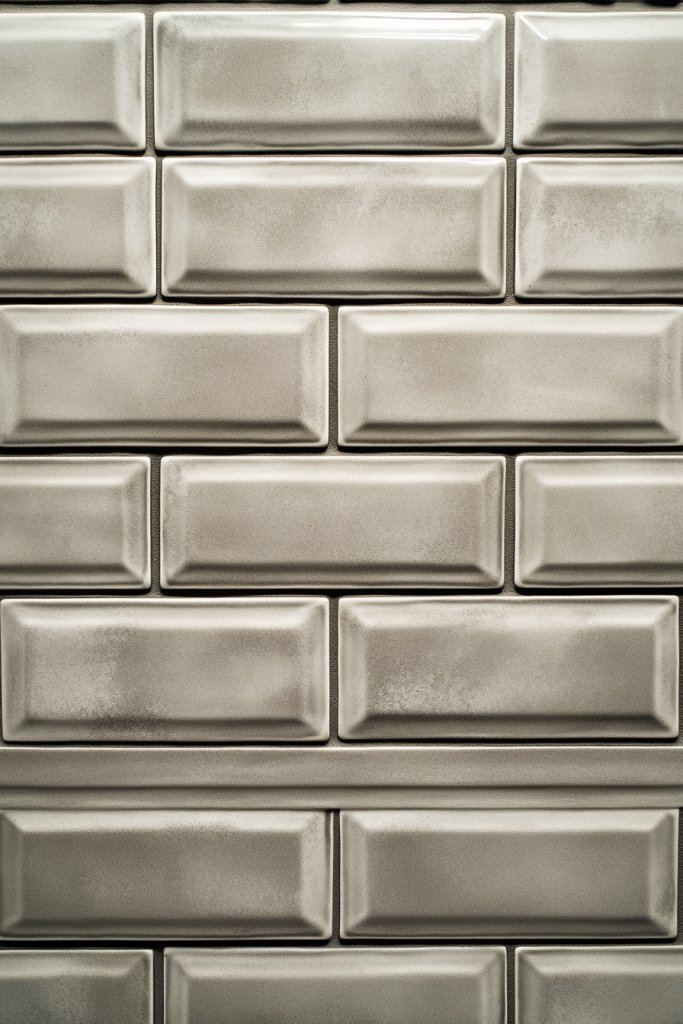
Craving a timeless look with a hint of modern flair? Textured subway gray tiles bring a classic yet fresh vibe to any bathroom. They’re a nod to traditional design but with a tactile update that keeps things interesting. Perfect for those who want style without sacrificing comfort.
Picture a wall covered with rectangular tiles, but each tile features a subtle texture—perhaps a rippled surface or embossed pattern. The gray tones are neutral, but the textures catch light differently, creating shadows and depth. The matte finish absorbs light, adding to the understated elegance. It’s like a vintage subway with a contemporary twist.
Pair textured subway tiles with smooth, matte walls or glossy fixtures for contrast. Use darker or lighter grout shades to enhance or soften the pattern. For a bolder look, combine with geometric patterned tiles or mosaics in small accents. This style works well in both small and large bathrooms, especially as a feature wall.
Select tiles with subtle relief or embossed patterns in shades of gray. Prepare your surfaces, ensuring they are flat and clean. Use spacers to keep the pattern aligned, and apply a high-quality adhesive suitable for textured surfaces. Grout in a matching or contrasting hue depending on your desired effect. Carefully clean excess grout for a professional finish. Consider sealing natural stone options to prevent staining.
Add warmth with textured textiles or layered towels in complementary shades. Incorporate metallic or matte fixtures to enhance the vintage-modern feel. Create a cozy atmosphere with carefully chosen lighting—warm LED or sconces—to accentuate the textures. A few decorative accents like a sculptural soap dish or textured basket can complete the look.
Textured subway tiles offer a smart blend of classic and contemporary style. They add personality without overpowering the space and invite touch and interaction. Once installed, they provide a timeless backdrop that can evolve with your decor. It’s an easy way to upgrade your bathroom’s character with minimal fuss.
8. Patterned Gray Hexagon Tiles for Geometric Elegance
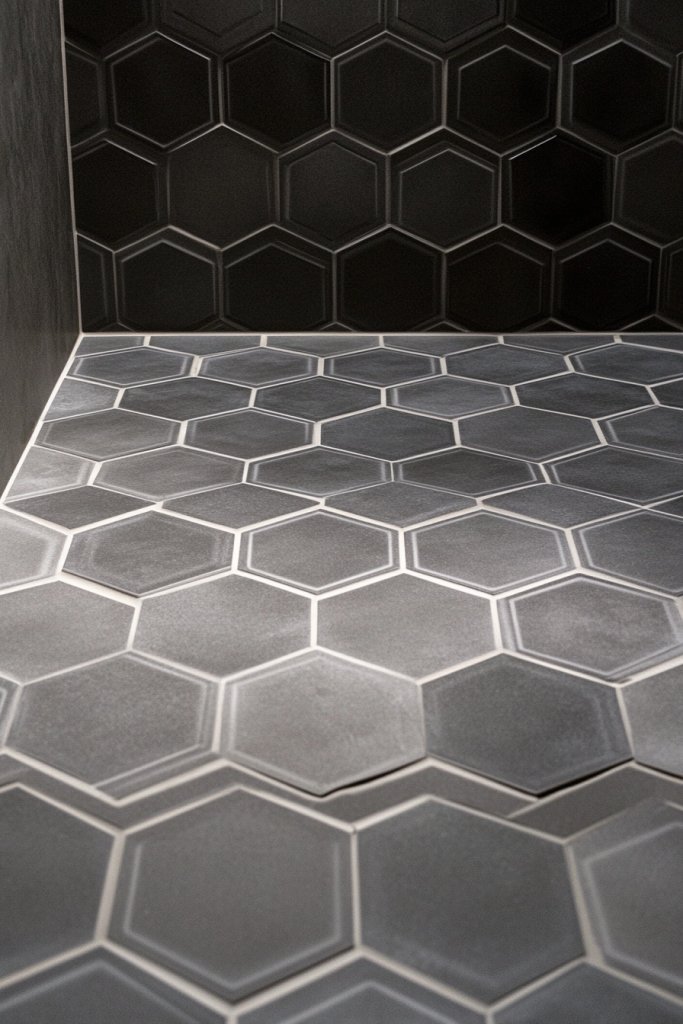
Looking to inject some geometric fun into your bathroom? Gray hexagon tiles with subtle patterns are perfect for creating a bold, modern statement. They add visual interest and a touch of sophistication without overwhelming the space. Ready to turn your bathroom into an artful design playground?
Imagine a floor or accent wall made up of small hexagonal tiles in various shades of gray, some with delicate embossed patterns. The shape naturally draws the eye, guiding it across the surface like a honeycomb. The muted gray tones keep the look elegant and neutral, while the pattern adds a playful yet refined vibe. The textured surfaces catch light at different angles, adding depth.
Use patterned hex tiles on floors or as a feature wall behind the vanity. Mix with plain gray tiles to create contrast, or keep them consistent for a seamless look. Incorporate darker grout lines to emphasize the geometric pattern or match grout to tiles for a more subdued effect. These tiles work well in contemporary spaces aiming for a subtle statement.
Choose hexagon tiles with built-in patterns or embossed textures in various gray shades. Carefully plan your layout to achieve a balanced, symmetrical appearance. Use spacers to keep the hexagons aligned and press each tile securely into place. Grout in a color that highlights the pattern—darker shades create more definition. Seal natural stone options to prevent staining and enhance durability.
Add warmth with textured or soft textiles and incorporate metallic fixtures for a luxe touch. Use lighting to cast shadows that accentuate the geometric shapes. Incorporate small decorative pieces, like a sculptural soap dish or textured baskets, to complement the tiles. Personalize with subtle color accents in accessories or textiles.
Hexagon patterned tiles are a timeless trend that’s perfect for modern and vintage-inspired bathrooms alike. They offer a clever way to add personality without sacrificing elegance. Once installed, they provide a striking, cohesive look that boosts your confidence in your design choices. It’s a smart upgrade for style-conscious homeowners.
9. Vertical Tile Installation for a Taller, Slimmer Effect
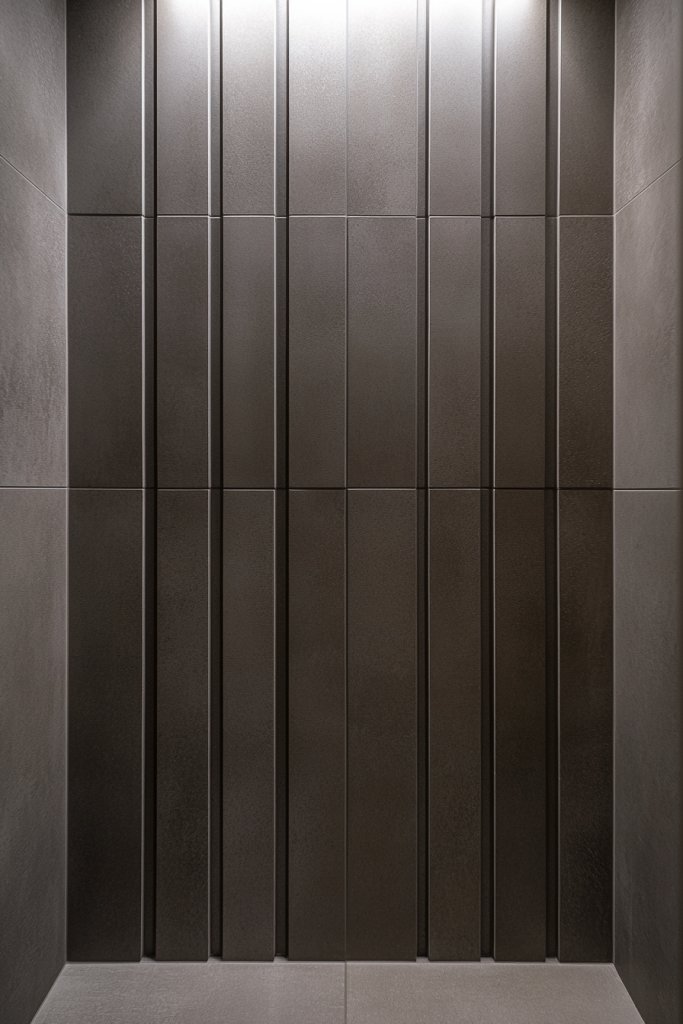
Does your bathroom feel a bit cramped or squat? Want to create the illusion of height and space? Installing gray tiles vertically is a simple yet effective trick to make your walls appear taller and your room more open. It’s like optical illusion magic for your walls.
Envision a wall where the gray tiles are laid from floor to ceiling in a straight vertical pattern. The clean lines draw the eye upward, elongating the space. The matte or semi-matte finish absorbs light, emphasizing the height rather than reflecting it. The uniform gray color keeps the look modern and sleek, adding a sense of sophistication.
Use narrow, elongated tiles or rectangular ones stacked in a running bond pattern for maximum effect. Combine with contrasting horizontal bands or borders to add visual breaks if desired. Vertical installation works well in small bathrooms, as well as in larger spaces seeking to emphasize height or a dramatic focal wall. Pair with natural or warm lighting to further accentuate the vertical lines.
Select tiles with a consistent color and finish, preferring elongated rectangular shapes. Prepare your surfaces thoroughly to ensure flatness and stability. Use spacers to keep the tiles aligned vertically, and install from floor to ceiling for the full effect. Use a suitable adhesive and consider professional help if your walls are uneven. Grout in a matching or slightly darker shade to enhance the vertical lines.
Add vertical shelves or sculptural elements that follow the line of the tiles. Incorporate lighting fixtures that draw the eye upward, such as wall sconces or LED strips. Keep accessories minimal and sleek to avoid cluttering the elongated space. Personalize with textured textiles or subtle color accents in towels or small decor items.
Vertical tile installation is a clever way to transform a basic bathroom into a room that feels taller and more spacious. It’s a simple visual trick that can completely change your perspective on the space. Once done, you’ll enjoy a feeling of openness and modernity that’s hard to beat. Confidence in your design is guaranteed with this technique.
10. Mix Light and Dark Gray Tiles for a Monochromatic Mosaic
Looking for a way to add depth without abandoning your love for neutrals? Mixing light and dark gray tiles creates a monochromatic mosaic that’s rich, layered, and endlessly stylish. It’s an elegant way to keep things neutral but far from boring. Ready to add some visual spice?
Imagine a carefully curated mosaic featuring a blend of light and dark gray tiles arranged in a playful or structured pattern. The contrast emphasizes the mosaic’s design, creating a subtle yet striking visual effect. The tiles have matte, semi-matte, or textured finishes, which add to the complexity. The overall look feels sophisticated, like an abstract painting turned into flooring or a feature wall.
Create a patterned mosaic for feature walls or floors, or use a random mix for a more organic feel. Grout can be a matching shade or a darker hue to enhance the contrast. For a refined look, keep the color palette strictly within gray tones, but vary the textures and finishes. This approach works especially well with natural stone or porcelain tiles.
Choose tiles in different shades of gray, balancing light and dark for visual interest. Lay out your pattern beforehand, experimenting with arrangements. Use spacers to keep the pattern even, and press tiles firmly into the adhesive. Grouting should enhance the contrast—consider a darker grout to make the mosaic pop or a matching tone for a more seamless appearance. Seal natural stone tiles for longevity.
Highlight the mosaic with directional lighting or accent lights to bring out the contrast. Incorporate textured textiles or accessories in similar shades for a cohesive look. Add sculptural or layered decor that complements the monochrome theme, emphasizing the sophisticated simplicity. Personal touches make the space uniquely yours.
Mixing light and dark gray tiles in mosaics offers a subtle play of contrasts that feels both modern and timeless. It shows your eye for detail and your ability to balance simplicity with complexity. Once you see your finished mosaic, you’ll feel proud of how a simple color palette can create such visual richness. It’s a smart, stylish choice for any modern bathroom.
11. Incorporate Reclaimed-Look Gray Tiles for Rustic Modernity
Craving that warm, lived-in feel but with a modern twist? Reclaimed-look gray tiles are perfect for blending rustic charm with contemporary minimalism. They add character and history, making your bathroom feel cozy yet chic. Who says modern has to be cold?
Picture tiles that mimic weathered wood, aged concrete, or distressed stone in shades of gray. The surface has a matte, slightly rough texture that echoes natural materials. The irregularities and imperfections tell a story, giving your space a sense of authenticity. The overall effect is a balanced mix of old-world charm and sleek modern design.
Use reclaimed-look tiles on feature walls or floors to create a focal point. Pair with modern fixtures and minimalist furniture to balance the rustic and contemporary. Incorporate natural textiles like linen or jute for warmth. For a more eclectic style, combine different reclaimed textures and patterns, but keep the color palette consistent.
Choose tiles with a distressed or reclaimed appearance, ensuring they are suited for wet environments. Prepare surfaces thoroughly, and use a durable adhesive that can handle textured surfaces. Grout in neutral tones, possibly slightly darker to mimic aged mortar. Seal natural stone or concrete to prevent staining and preserve the authentic look. Professional installation ensures the irregular shapes fit seamlessly.
Add vintage or handcrafted accessories, textured textiles, or reclaimed wood shelving to reinforce the rustic vibe. Use warm lighting—such as Edison bulbs or warm LEDs—to enhance the cozy atmosphere. Incorporate natural elements like pebbles or driftwood in decor, but keep the focus on the authentic tile texture. These touches create a welcoming, timeless space.
Reclaimed-look gray tiles instantly add warmth and character, making your bathroom feel inviting and unique. They reflect an appreciation for craftsmanship and history, giving your space depth and personality. Once you embrace this style, you’ll enjoy a space that feels both modern and rooted in tradition. It’s a confident, stylish choice for a cozy yet contemporary bathroom.
12. Use Small Gray Mosaic Tiles for Shower Floors and Nooks
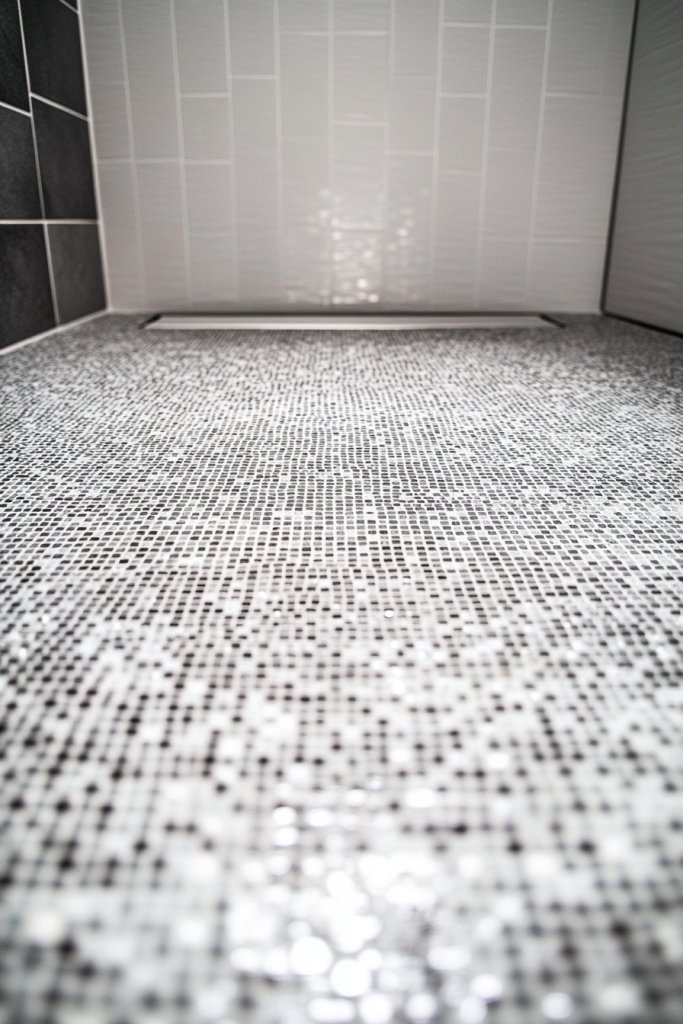
Want to improve safety and add detail in your bathroom? Small gray mosaic tiles are perfect for shower floors and niches, providing better grip and a textured look. They’re the unsung heroes of bathroom design—functional, stylish, and endlessly versatile. Plus, they make cleaning a breeze!
Visualize tiny square or hexagonal tiles in various shades of gray, creating a textured mosaic that covers your shower floor or niche. The small size offers excellent slip resistance and molds easily to curves and corners. The subtle color variations add depth, while the matte or textured finish prevents glare and hides water spots. It’s a practical yet pretty upgrade.
Use mosaic tiles exclusively on the shower floor or as an accent within a larger tiled wall. Mix shades of gray for a natural, stone-like appearance or go monochrome for a cleaner look. Combine with larger tiles on walls for contrast, or use in shower niches to add visual interest. Grout can be a matching or slightly darker shade for a seamless or bold effect.
Choose small mosaic tiles made from porcelain, glass, or natural stone suitable for wet areas. Prepare the surface and ensure it is flat and clean. Use a flexible adhesive designed for mosaics and press tiles firmly into place, working in small sections. Grout carefully, ensuring no gaps or air pockets, and clean excess grout promptly. Seal natural stone if used to prevent staining and water absorption.
Add textured or patterned towels to complement the textured tiles. Use waterproof LED lighting to highlight the mosaic’s detail. Incorporate small decorative elements or sculptural accents in the niche. Personal touches like a custom soap dish or a textured basket can enhance the functional aesthetic.
Small gray mosaic tiles are a practical and stylish solution that elevates safety and design. They add detailed texture and visual interest while offering durability. Once installed, they transform your shower into a detailed mosaic masterpiece that’s both functional and beautiful. It’s a small upgrade with a big impact.
13. Create a Border or Frame with Contrasting Gray Shades
Looking to add a subtle framing detail to your tiled surfaces? Using contrasting gray shades for borders or frames creates a polished, intentional look. It’s a simple way to define spaces and add visual interest without overwhelming your design. Who knew borders could be so stylish?
Picture a wall or shower with a main field of light gray tiles, edged with a darker or warmer gray border. This framing accentuates the edges and adds a layer of depth. The contrast draws the eye inward, highlighting the main surface. The overall effect feels refined, like a framed artwork, adding a tailored finish to your space.
Use a thicker border to create a strong frame or a thin, subtle line for a minimalist touch. Combine with different textures—matte tiles in the main area, glossy or textured tiles in the border. For a more dramatic look, alternate colors or patterns within the border. This approach suits both modern and traditional styles.
Select tiles in two shades of gray—lighter for the main surface, darker or textured for the border. Measure carefully to ensure the border lines up perfectly around edges and corners. Use spacers and a level to keep lines straight, and apply a flexible adhesive for a precise fit. Grout in a contrasting or matching tone to enhance the border’s effect. Seal if natural stone is involved.
Add small decorative trims or metallic accents to further define the border. Use lighting to emphasize the frame—LED strips or spotlights work well. Keep accessories simple to let the border stand out, and consider adding a decorative corner piece for extra flair. Personal touches like textured towels or minimal decor complete the look.
Creating borders or frames with contrasting shades elevates your tilework to a more finished, professional look. It’s an easy way to add structure and sophistication to your bathroom. Once you see the clean lines and defined edges, you’ll be inspired to experiment with other geometric or color contrasts. It’s a subtle but powerful upgrade that feels both intentional and stylish.
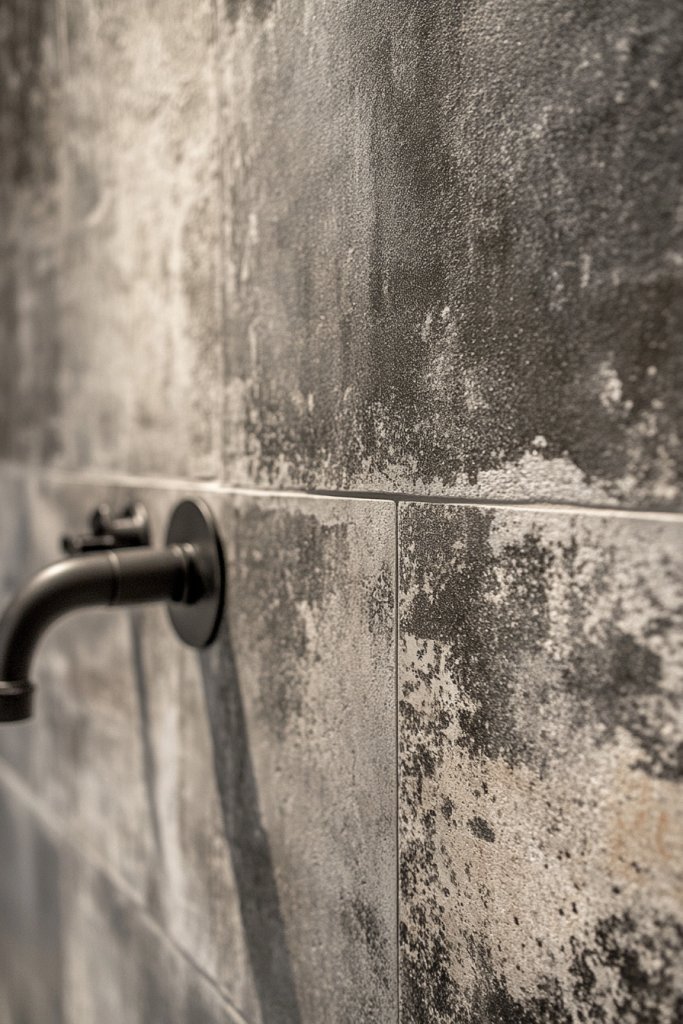
14. Combine Gray Tiles with Warm Metallic Fixtures for a Luxuriously Modern Touch
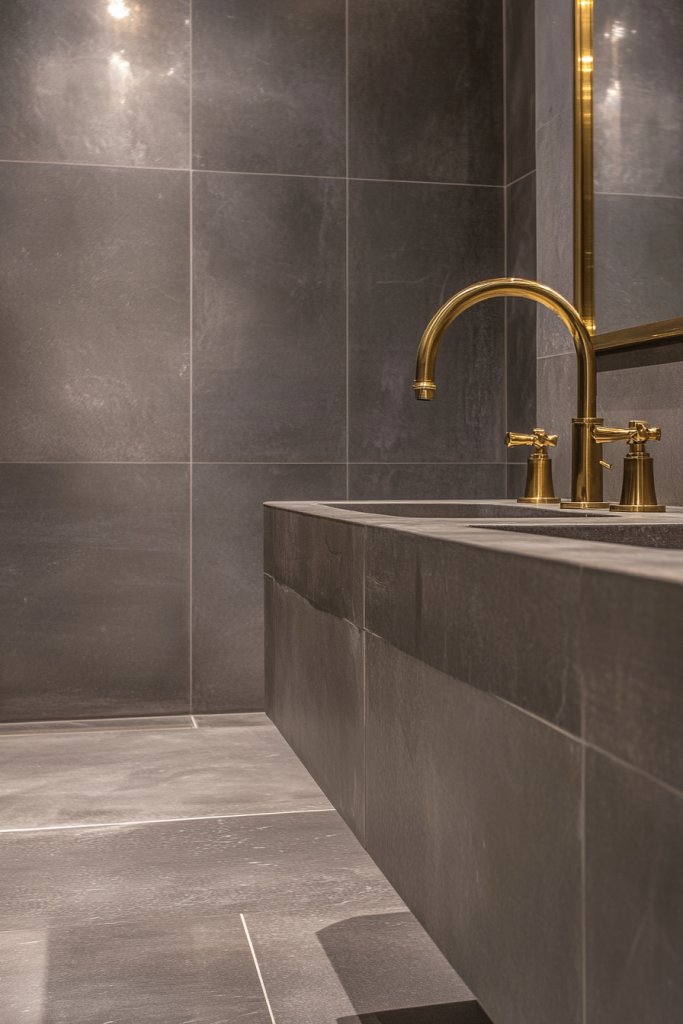
Want to add a touch of luxury without overdoing it? Pairing gray tiles with warm metallic fixtures instantly elevates your bathroom’s style. It’s a simple trick that adds warmth, sophistication, and visual interest. Who says modern can’t be glamorous?
Visualize matte gray tiles serving as a neutral backdrop, accented by fixtures in warm brass or matte gold. The contrast between cool gray and warm metallic creates a balanced, inviting atmosphere. The shiny surfaces of the fixtures catch the light, adding a subtle glow that complements the matte textures of the tiles. It’s a look that feels both contemporary and timeless.
Use metallic fixtures on faucets, showerheads, towel racks, and handles to create a cohesive look. Mix different metals—brass, gold, or copper—for a curated, eclectic vibe. Pair with textured textiles or soft lighting to enhance the warm tones. This combination suits both minimalist and more ornate styles.
Select gray tiles with matte or semi-matte finishes for a sleek base. Choose fixtures in warm metallic finishes, ensuring they are durable and corrosion-resistant. Install fixtures carefully, aligning with your tile layout. Keep the finishes consistent across hardware and accessories for a harmonious look. Use sealants if needed to maintain the metal’s luster.
Add decorative accents like sculptural soap dishes or textured towels in complementary shades. Use lighting fixtures that highlight the metallic finishes, such as sconce lights or backlit mirrors. Incorporate small decorative pieces with warm metals or textured ceramics to finish the look. Personalize your space with unique hardware or artisanal fixtures.
Combining gray tiles with warm metallic fixtures creates a luxurious, modern ambiance that’s hard to beat. It shows a sophisticated eye for detail and elevates your bathroom’s style effortlessly. Once you see how these warm accents brighten and warm the space, you’ll be inspired to incorporate other luxe touches. It’s a winning formula for a polished, inviting bathroom.
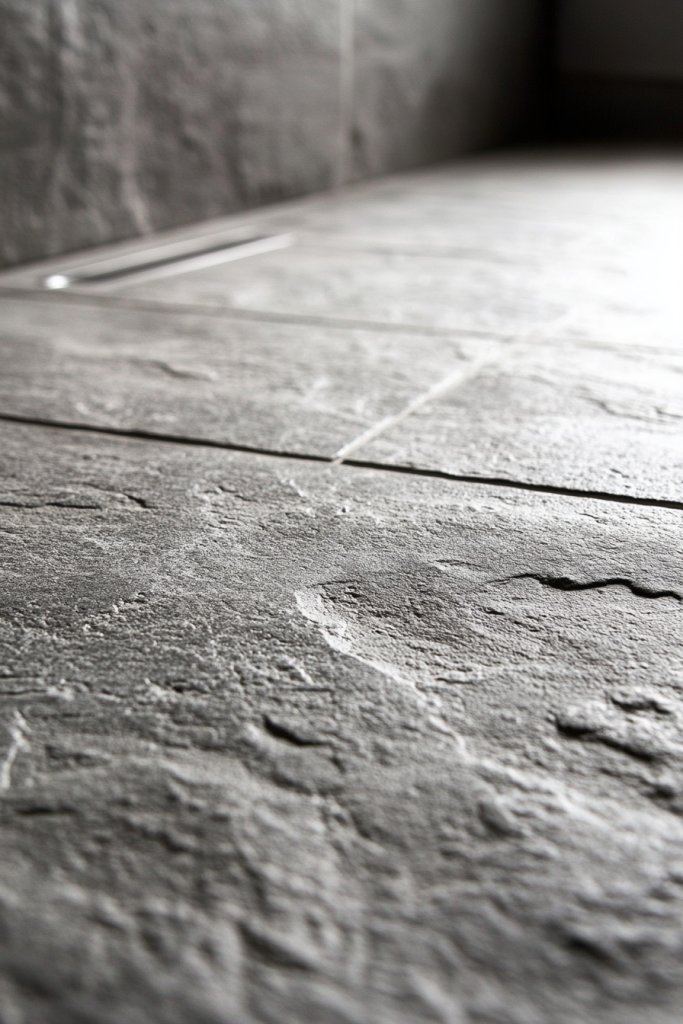
15. Use Gray Tiles with Natural Stone-Look Textures for Organic Warmth
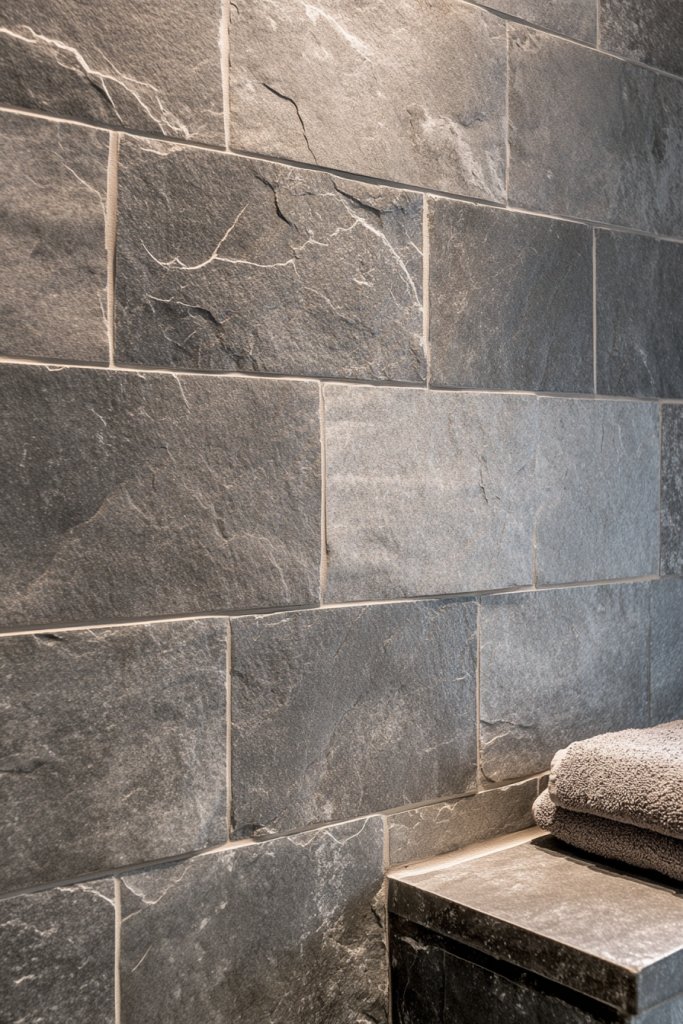
Craving that organic, earthy vibe but with modern durability? Gray tiles mimicking natural stone textures give you the best of both worlds. They add warmth and character, making your bathroom feel grounded and welcoming. It’s like bringing a piece of nature indoors.
Imagine tiles that resemble weathered limestone, slate, or travertine, with textured surfaces that invite touch. The variations in gray shades mimic natural stone’s imperfections, creating a rich, layered look. The matte finish absorbs light softly, emphasizing the organic feel. These tiles evoke a serene, spa-like atmosphere that’s both timeless and contemporary.
Use natural stone-look tiles on floors or accent walls to anchor your design. Pair with warm wood accents, organic textiles, or handcrafted accessories. Keep the color palette within earthy grays and browns for a cohesive look. Combine with sleek, modern fixtures for contrast, or stick with rustic elements for a more traditional aesthetic.
Choose textured tiles that replicate natural stone, ensuring they are suitable for wet areas. Prepare surfaces thoroughly to ensure proper adhesion. Work with a professional if dealing with irregular shapes or sizes. Use a neutral grout to highlight the textures, and seal the tiles to protect against stains and water absorption. Regular sealing prolongs their natural appearance.
Complement the organic vibe with handcrafted ceramics, woven baskets, or textured textiles. Incorporate warm lighting to mimic sunlight filtering through natural materials. Use artisanal fixtures or fixtures with matte finishes to enhance the earthy aesthetic. Personal touches like pebble accents or wood shelving can make the space truly unique.
Natural stone-look gray tiles bring a calming, earthy presence to your bathroom. They add depth and authenticity while remaining stylish and durable. Once installed, they create a space that feels like a retreat—grounded in nature yet modern in design. It’s a confident choice for anyone seeking balance between rustic charm and contemporary elegance.
16. Install Gray Tiles in a Brick Pattern for a Contemporary Vibe
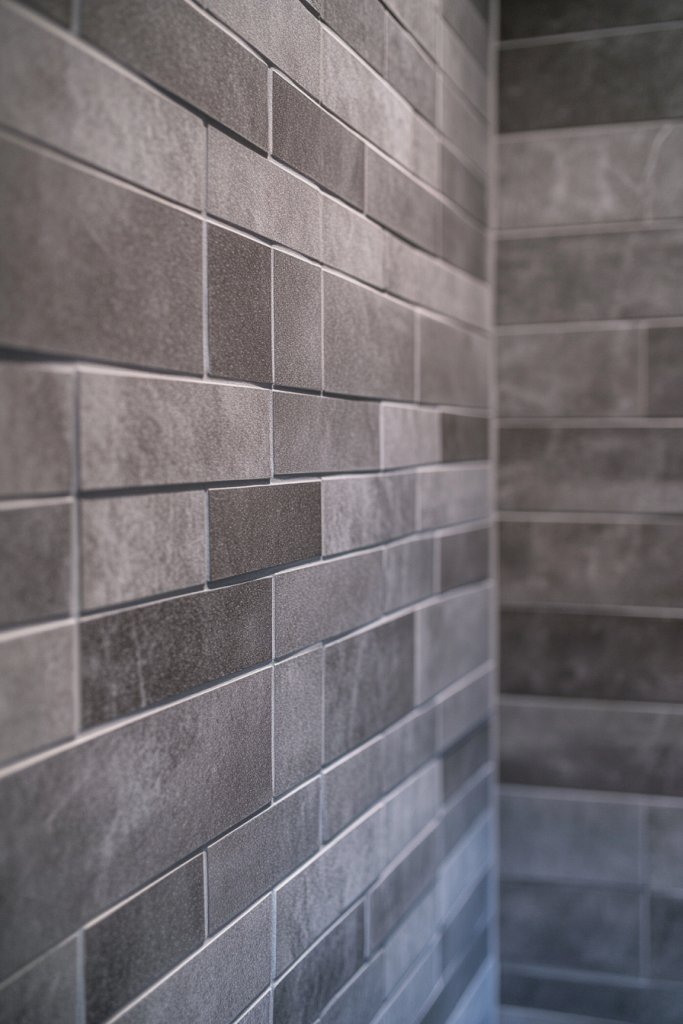
Tired of the same old tile layouts? Want to add a modern twist to classic brickwork? Installing gray tiles in a brick pattern gives your bathroom a fresh, contemporary vibe. It’s an easy upgrade that feels both timeless and current. Ready to brick up your style?
Picture rectangular gray tiles laid in a staggered, running bond pattern, mimicking traditional brickwork. The uniform color combined with the pattern creates visual rhythm and movement. The matte or semi-matte finish absorbs light, keeping the look sleek and modern. It’s a subtle but impactful way to add texture and structure.
Use this pattern for walls, floors, or even as a backsplash. Play with grout colors—darker shades for contrast or matching grout for a seamless look. Incorporate accent tiles, perhaps with a different texture or finish, in select areas. Pair with minimalist fixtures or industrial elements for a bold, urban feel. The pattern adapts well across various styles.
Select rectangular tiles with consistent size and finish. Lay out your pattern before installing to ensure alignment and avoid gaps. Use a high-quality adhesive and work systematically, staggering tiles for the typical brick look. Maintain consistent spacing with spacers and check levels frequently. Grout carefully, choosing a shade that enhances the pattern—darker for contrast or matching for subtlety. Seal as needed.
Add metallic or matte fixtures that complement the brick pattern. Incorporate textured textiles or accessories that echo the pattern’s geometric rhythm. Use lighting to cast shadows that highlight the staggered layout. Personal touches like a sculptural mirror or industrial shelves can complete the urban aesthetic. Keep the decor minimal to emphasize the pattern.
A brick pattern in gray tiles offers a modern take on a classic look, perfect for adding character and texture. It’s a versatile choice that fits many design themes—from industrial to minimalist. Once you see the pattern come together, you’ll appreciate how a simple layout can make a big impact. Confidence in your design choices will grow with each project.
17. Incorporate Glass Gray Tiles for a Reflective, Brightening Effect
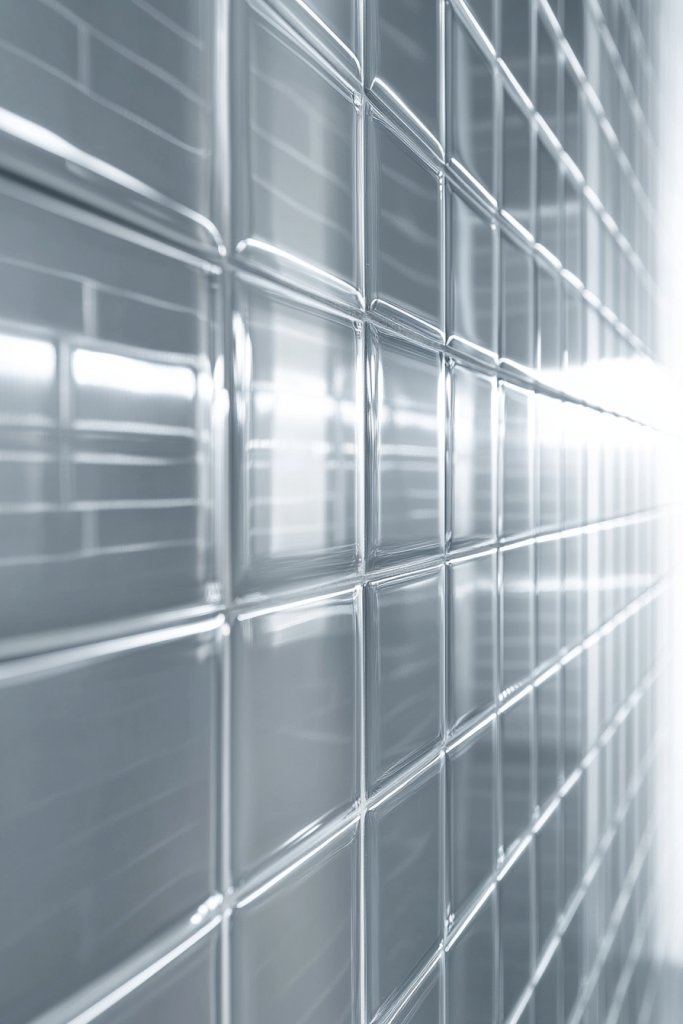
Want to make your bathroom feel larger and more luminous? Glass gray tiles are your secret weapon. They reflect light beautifully, bouncing brightness around the space. It’s an easy way to create a fresh, airy vibe that feels open and inviting. Who doesn’t love a brighter bathroom?
Visualize shimmering gray glass tiles covering a backsplash or accent wall. The translucent quality catches and reflects ambient light, adding a luminous glow. The subtle gray hue keeps the look neutral, but the reflective surface makes the space feel bigger and more vibrant. It’s like having a mirror wall but with added texture.
Use glass tiles as a splashback behind the vanity or in shower niches for a pop of shine. Mix with matte or textured tiles for contrast and depth. Pair with brushed nickel or matte black fixtures for a modern touch. These tiles work well in small bathrooms, where light reflection is especially beneficial.
Choose high-quality, tempered glass tiles with a consistent gray hue. Prepare the surface by cleaning thoroughly and ensuring flatness. Use a suitable adhesive designed for glass tiles, and press tiles firmly into place. Keep spacers consistent for a uniform look. Grout with a clear or light gray sealant to enhance transparency. Seal edges carefully to prevent water penetration.
Highlight the reflective effect with layered lighting—LED strips, spotlights, or backlit mirrors. Add decorative elements with metallic or glossy finishes to complement the tiles. Use minimalistic accessories to keep the focus on the shimmering surfaces. Incorporate textured textiles or soft lighting to soften the high shine.
Glass gray tiles bring brightness and a contemporary edge to your bathroom. They amplify natural and artificial light, making the space feel larger and more welcoming. Once you see how much light they reflect, you’ll be motivated to include more reflective surfaces in your design. It’s a sleek, luminous upgrade with a high-end feel.
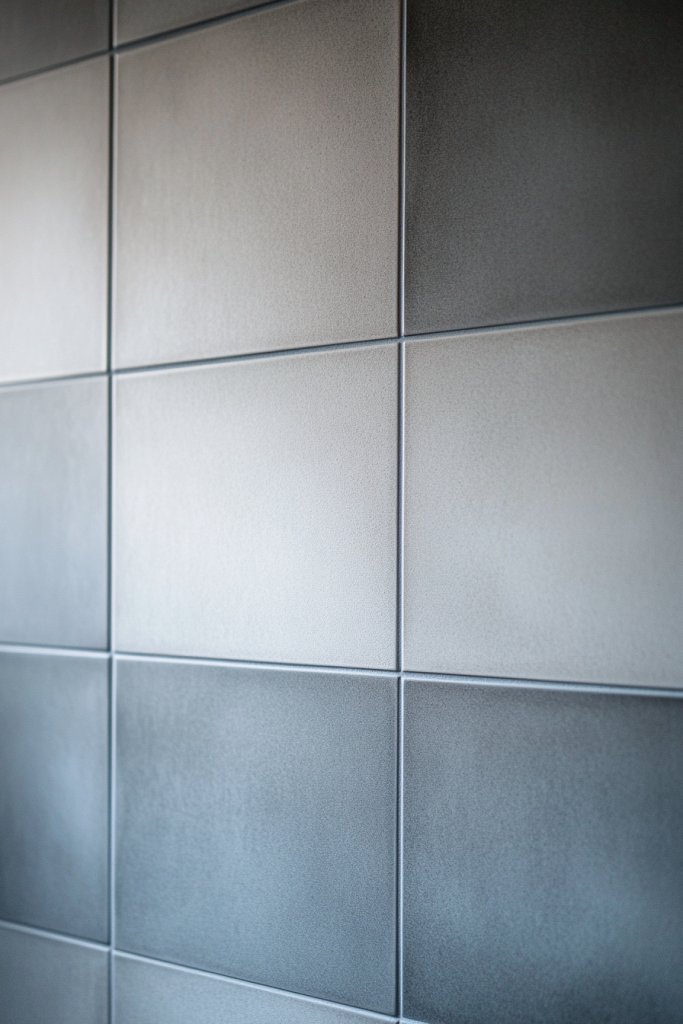
18. Combine Different Gray Shades in a Checkerboard or Random Pattern
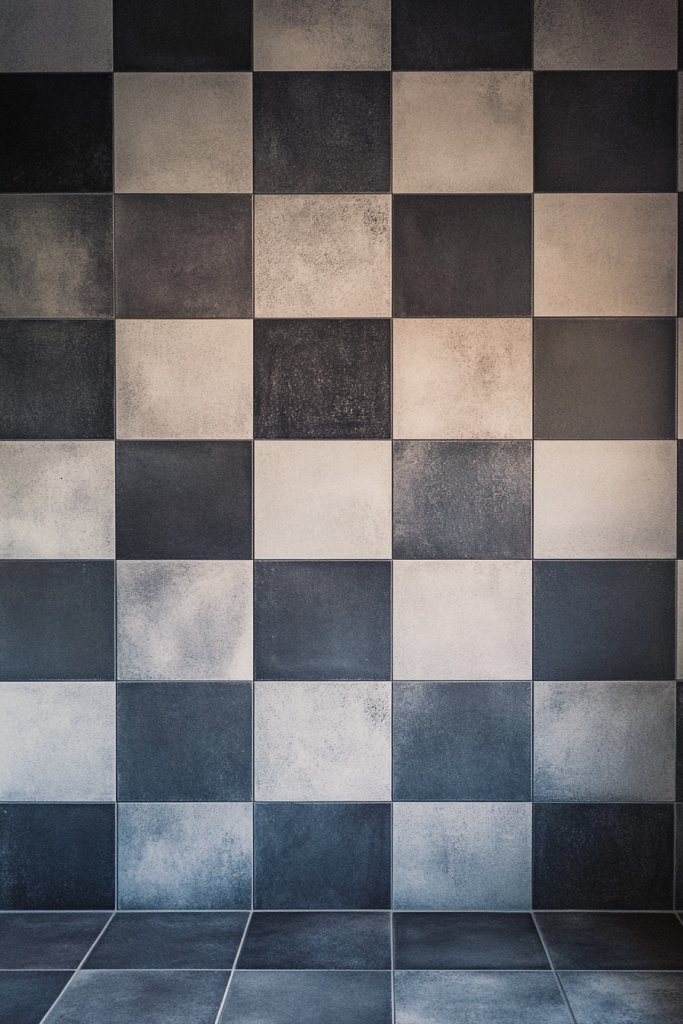
Looking to add some playful personality to your bathroom? Combining different shades of gray in a checkerboard or random pattern creates visual interest and keeps things fun. It’s a subtle way to break the monotony of uniform tiles while staying neutral. Ready for a little design adventure?
Imagine a floor or wall with square tiles in varying shades of gray—light, medium, and dark—laid out in a playful checkerboard or a more organic, random arrangement. The contrasting tones keep your eye moving, creating depth and texture. The matte or semi-matte finishes absorb light gently, making the space feel cozy yet lively.
Use a checkerboard pattern for a classic look or a more random mix for a contemporary, artistic vibe. Mix sizes or shapes for added complexity, but keep the color palette within gray tones for cohesion. Incorporate textured or patterned tiles for extra depth. Pair with simple fixtures and neutral textiles to keep the focus on the pattern.
Select tiles in complementary shades, ensuring good color variation. Lay out your pattern before fixing tiles, experimenting with placements. Use spacers and level tools to ensure evenness. Apply adhesive and press tiles into place, then grout with a shade that emphasizes contrast or blends seamlessly. Seal natural stone tiles to preserve their appearance and prevent staining.
Accent the pattern with textured textiles or decorative accessories in matching or contrasting shades. Use lighting to highlight the visual movement created by the pattern. Incorporate small decorative objects or art pieces that echo the geometric or organic theme. Keep the overall decor minimal to let the pattern stand out.
Mixing gray shades in a checkerboard or random pattern offers a playful yet sophisticated aesthetic. It demonstrates your willingness to experiment and your eye for detail. Once finished, you’ll enjoy a space that feels dynamic and personalized. It’s a smart, stylish way to make your bathroom uniquely yours.
19. Use Textured Gray Tiles on the Floor for Durability and Style
Want a floor that’s both practical and stylish? Textured gray tiles provide durability while adding visual and tactile interest. They’re perfect for high-traffic areas like showers and floors where slip resistance matters. Who says practicality can’t look good?
Picture a textured gray tile floor with a subtle rippled or embossed surface. The texture catches light from different angles, creating shadows and depth that make the floor lively and engaging. The gray hue keeps the look neutral, but the textured surface adds personality and warmth. It’s like walking on a piece of art.
Combine textured tiles with smooth ones for contrast and emphasis. Use in the shower floor, as a focal point, or throughout the entire bathroom for a cohesive look. Pair with warm, natural textiles and matte fixtures to soften the roughness. Incorporate textured rugs or mats for added comfort.
Select durable, textured tiles suitable for wet areas, such as porcelain or natural stone. Prepare your surface thoroughly for stability and flatness. Use a strong adhesive, and press tiles firmly into place, making sure the texture is aligned as planned. Grout in a color that blends or contrasts depending on your style—darker shades enhance the textured look. Seal natural stone surfaces regularly.
Add plush, textured towels or mats to enhance the tactile experience. Use lighting to cast highlights and shadows that emphasize the texture. Incorporate decorative elements like sculptural accessories or textured baskets. Keep your decor simple to let the textured floor be the star.
Textured gray tiles on the floor combine durability with style, making your bathroom safer and more inviting. They add depth and interest, proving that functional elements can also be beautiful. Once you see how they transform your space, you’ll be inspired to explore other textured surfaces and finishes. It’s a practical upgrade that pays off in style and safety.
20. Accent with Small Gray Tile Borders or Dot Patterns
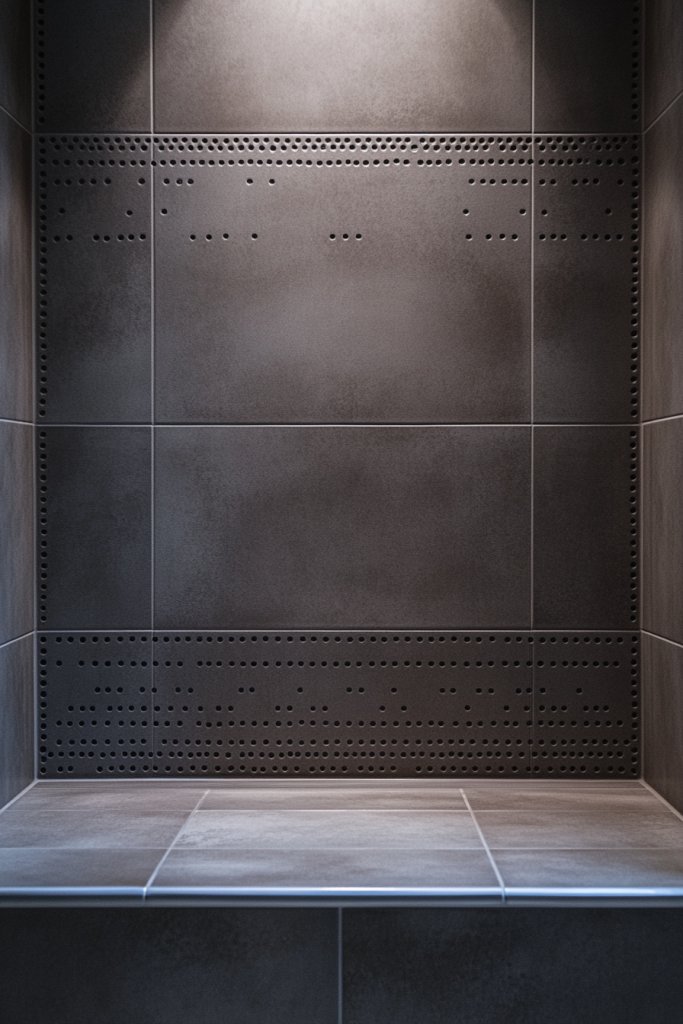
Looking for a refined way to frame your tiles? Small gray tile borders or dot patterns add a subtle, sophisticated touch that elevates your entire bathroom design. They create clean lines and visual separation without overwhelming the space. Ready to add a touch of elegance?
Visualize a main wall or floor area framed with a narrow border of darker or contrasting gray tiles. Alternatively, small dot patterns dot the surface, creating a textured visual pathway. The contrast or pattern guides the eye and defines the space, adding a layer of craftsmanship. It’s like framing a masterpiece—simple but impactful.
Use borders to delineate different areas, such as separating shower zones from vanity spaces. Incorporate dotted patterns in a random or organized way to add movement. Match or contrast grout colors to enhance the border or pattern. Keep the surrounding decor minimal to let the borders or dots stand out.
Select small tiles in shades of gray, possibly with textured or matte finishes. Measure carefully to ensure borders are straight and consistent. Use spacers and a level to lay out the borders or dot patterns precisely. Apply adhesive and press tiles firmly, then grout carefully, cleaning excess for a tidy finish. Seal natural stone options for longevity.
Highlight borders or dotted patterns with lighting, such as LED strips or spotlights. Use complementary textiles or accessories to enhance the subtle design. Incorporate metallic or matte fixtures that echo the pattern’s clean lines. Small decorative elements like sculptural soap dishes or textured baskets can complete the refined look.
Small tile borders or dot patterns add refinement and detail that elevate your bathroom’s style. They demonstrate your attention to detail and appreciation for subtle design elements. Once you see the finished effect, you’ll be inspired to experiment with other framing or detailing techniques. It’s a simple upgrade with a polished, sophisticated touch.
21. Implement a Monochrome Gray Tile Wall for a Dramatic Statement
Craving a bold focal point that screams modern elegance? A monochrome gray tile wall makes a dramatic statement while keeping the color palette simple. It’s a powerful design move that draws attention and anchors your entire bathroom aesthetic. Think big, and go gray.
Imagine an entire wall covered in uniform gray tiles, from floor to ceiling, with a matte or semi-matte finish. The consistent color creates a sleek, continuous surface that commands attention. Light reflects softly off the surface, emphasizing clean lines and modern minimalism. It’s like a giant piece of abstract art that sets the tone for the entire space.
Choose large tiles for a seamless look or smaller tiles for texture and pattern. Pair with minimal fixtures and neutral or metallic accents to maintain the focus on the wall. For added drama, incorporate textured or patterned tiles within the monochrome palette. Use lighting to accentuate the wall’s depth and surface qualities.
Select high-quality, uniformly colored tiles suitable for wet areas. Prepare your wall surface thoroughly, ensuring it is flat and clean. Install with a high-quality adhesive, starting from the center and working outward to keep lines straight. Use spacers for consistent gaps, and grout with a matching or slightly darker shade for a sleek finish. Seal natural stone if used.
Add subtle lighting accents or backlighting to enhance the wall’s depth. Keep surrounding decor minimal—think sleek vanity, simple fixtures, and neutral textiles—to let the wall be the star. Incorporate small, textured accessories or sculptural elements that complement the monochrome aesthetic. Personalize with a statement mirror or artwork that plays off the gray backdrop.
A monochrome gray tile wall is a bold, modern choice that exudes confidence. It creates a strong visual impact with minimal fuss, proving that simplicity can be stunning. Once you see the transformation, you’ll be inspired to make more daring design choices. It’s a statement piece that elevates your entire bathroom.
Conclusion
This collection of gray bathroom tile ideas showcases the endless possibilities for transforming your bathroom into a stylish and serene retreat. Whether you prefer a minimalist vibe or a more textured, dynamic look, these ideas are easy to adapt and personalize. Embrace these concepts and take the first step toward creating a modern, neutral bathroom that truly reflects your style!