I have been, or can be if you click on a link and make a purchase, compensated via a cash payment, gift, or something else of value for writing this post. As an Amazon Associate, I earn from qualifying purchases. Please read my full Affiliate Disclosure for more information.
Is your craft closet starting to feel like a chaotic maze instead of a creative haven? You’re not alone! Craft closet organization ideas are gaining popularity because they turn clutter into inspiration, making it easier to find exactly what you need and spark your creativity.
In this article, you’ll discover a variety of clever and practical organization tips that cater to all kinds of craft supplies. Whether you’re a seasoned crafter or just starting out, these ideas will help you maximize your space, keep everything tidy, and make your crafting sessions more enjoyable than ever before.
1. Install Adjustable Shelving for Flexible Storage
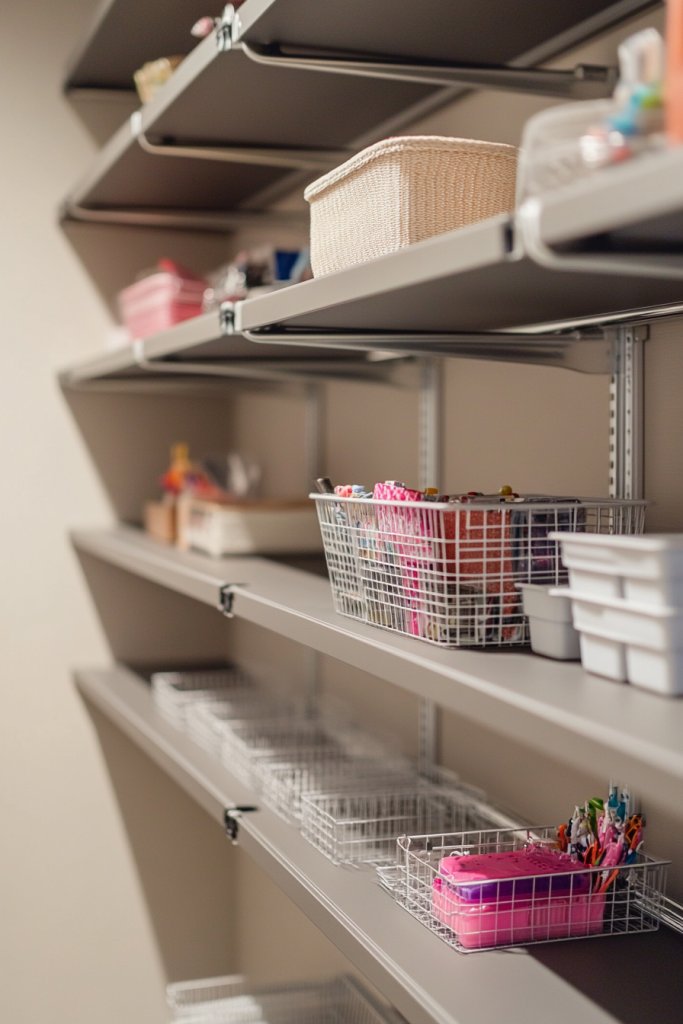
Ever feel overwhelmed by a cluttered craft space that never seems to stay organized? Flexible storage solutions like adjustable shelving can be a total game-changer. They let you customize your space to fit your growing collection of supplies without sacrificing style. No more cramming everything into tight spaces or feeling like your shelves are fixed in stone.
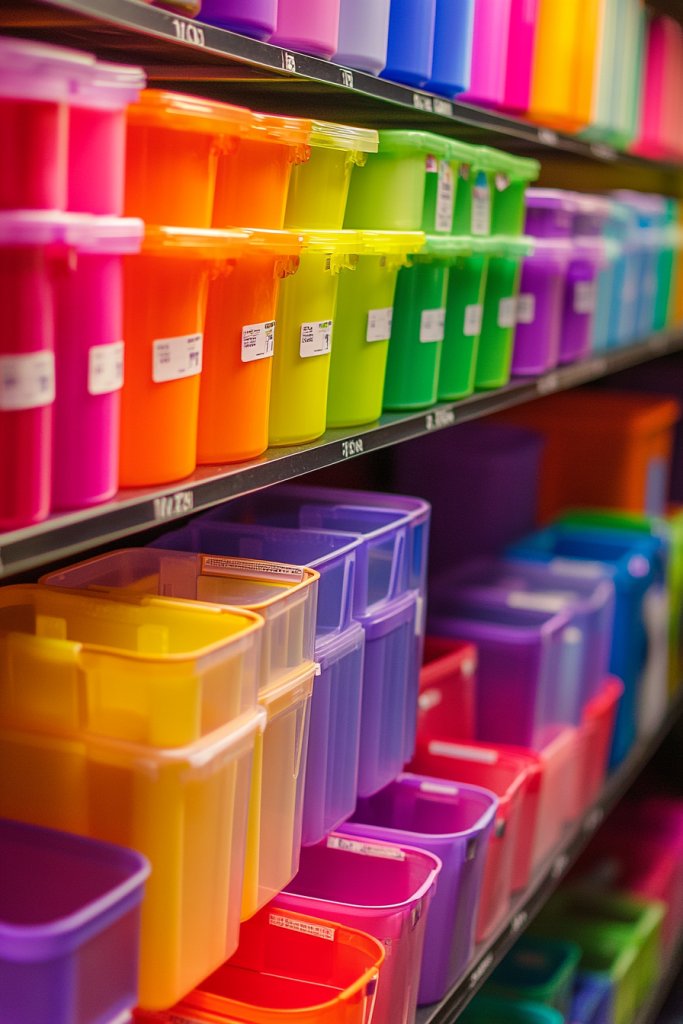
Imagine sleek metal or wood shelves mounted on your closet wall, adjustable to various heights. Brightly colored storage bins sit neatly on each shelf, ready to hold your paints, fabrics, or tools. The shelving system creates a visual balance, making it easy to see everything at a glance. You can even add decorative baskets or boxes for a pop of color and personality.
Adjustable shelving works well in both modern and rustic styles, depending on your choice of materials. For seasonal changes, you can easily shift shelves to accommodate new supplies or reorganize for different projects. Small spaces benefit from narrower, taller shelves, while larger rooms can host wider, more decorative units. Flexibility means you can adapt the setup for your evolving needs.
Start by measuring your closet space and deciding where adjustable shelving will fit best. Choose durable, easy-to-install options—metal, wood, or composite materials work well. Use a level and a drill for secure mounting, and consider wall anchors for heavier shelves. Arrange your supplies by frequency or category to keep everything accessible. Label the shelves or bins for extra organization. Regular adjustments can keep your space fresh and functional.
Add personal touches like custom-painted shelves or decorative edging. Incorporate color-coded bins to match your workspace theme or mood. You could also install small hooks underneath shelves for hanging scissors or tools. Use soft lighting above the shelves to highlight your collection and make browsing easier. The key is making your storage both practical and inspiring.
Adjustable shelving turns your chaotic craft closet into a sleek, organized haven. It boosts your confidence to tackle projects because everything is within reach and easy to find. Plus, it’s a flexible solution that grows with your skills and supplies, making it a smart investment for any creative space.
2. Incorporate Pull-Out Drawers for Small Items
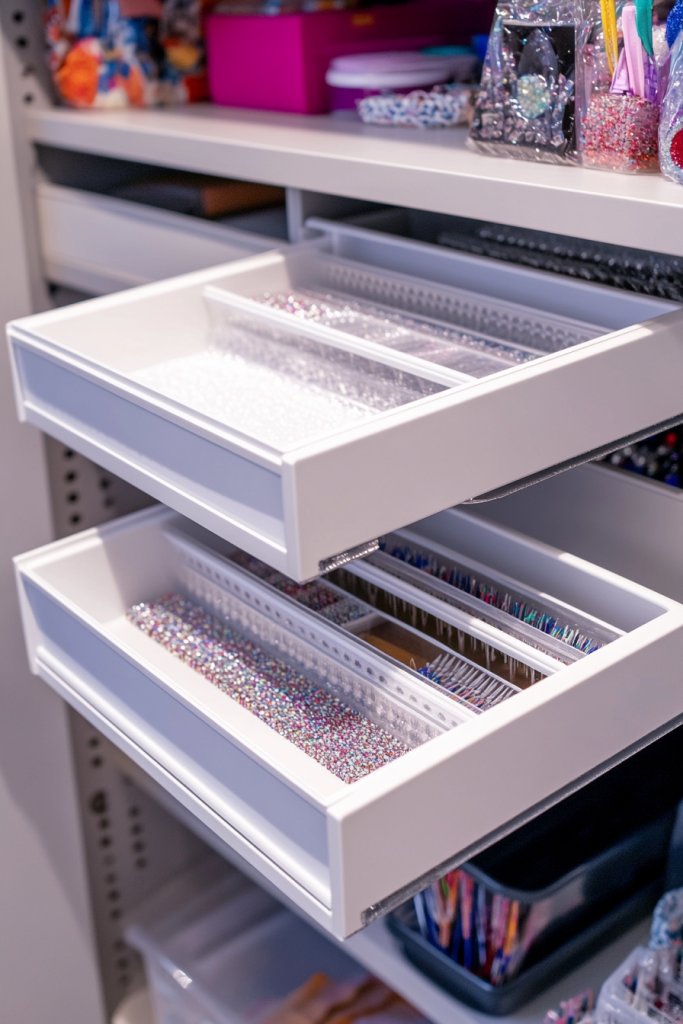
Are tiny craft supplies like buttons, sequins, and needles scattered all over? Pull-out drawers are a lifesaver for keeping small items organized and within reach. They eliminate the frustration of digging through cluttered bins or jars. Plus, they add a sleek, modern touch to your craft closet.
Imagine smooth-gliding drawers tucked into your closet shelves, each filled with tiny, sorted treasures. When you pull out a drawer, everything is visible and accessible, no more rummaging. The drawers are often transparent or labeled, making it easy to find exactly what you need. They create a tidy, streamlined look that keeps your space feeling open and organized.
Choose shallow drawers for small supplies or deeper ones for larger tools. Use dividers inside drawers to separate items further—think tiny compartments for beads or pins. For a customized look, opt for wooden or acrylic drawers that match your decor style. Incorporate drawers into existing shelving units or install new ones for maximum flexibility. Seasonal or project-specific drawers make organization even easier.
Identify the small items that tend to clutter your space and plan drawer placement accordingly. Select high-quality, durable pull-out drawers with smooth mechanisms. Install them into your existing shelves or build custom drawers into cabinetry. Label each drawer with a clear tag or sticker indicating contents. Use divider inserts inside drawers for extra organization. Regularly declutter and reorganize to keep the system efficient. This setup keeps tiny supplies accessible and prevents loss.
Personalize drawers with decorative handles or painted fronts. Create a color-coding system for different types of supplies—pink for sequins, blue for beads, etc. Add small labels or icons for quick identification. Use drawer liners or mats to protect delicate items and add a pop of color. The goal is a functional yet charming organization station tailored to your style.
Pull-out drawers make your craft space more manageable and inspire confidence in your organizational skills. They turn chaos into a tidy, efficient system that encourages regular tidying. When small items are easy to find, your creative flow improves. It’s a simple change with a huge impact on your overall craft experience.
3. Hang Pegboards for Tools and Accessories
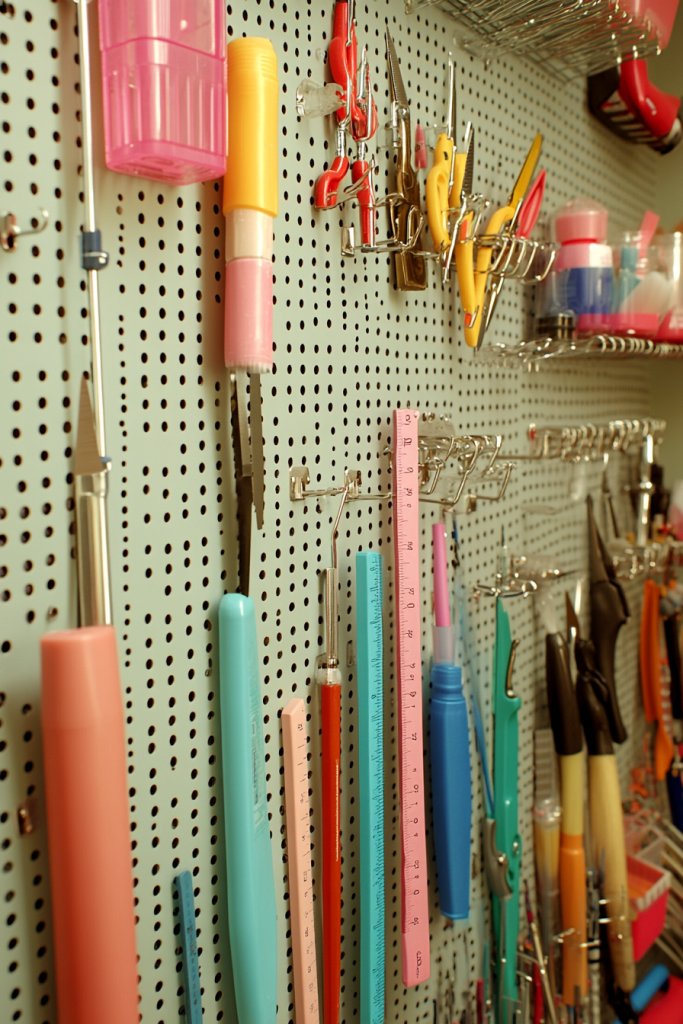
Tired of hunting for scissors, rulers, or brushes every time you need them? Hanging pegboards can free up space and keep your most-used tools right at your fingertips. They turn clutter into order and bring a professional touch to your craft closet. Plus, they make your workspace look intentionally organized.
Visualize a sturdy pegboard mounted on your closet wall, filled with hooks and small baskets. Your scissors, rulers, and even small boxes of embellishments hang neatly, ready to grab. The hooks hold tools vertically, making them easy to see and select. The board’s open design allows you to customize and add new hooks as your collection grows, transforming chaos into a clean, accessible display.
Choose a pegboard in your favorite color or a neutral tone that blends with your decor. Use a mix of hooks, baskets, and clips to hold different tools and supplies. For smaller tools or delicate items, add small bins or cups attached to the board. Mount the pegboard at a height that suits your height and reach, or incorporate it into a larger organizational wall. Seasonal accessories or themed hooks can keep your setup fresh.
Start by selecting a durable pegboard that can handle the weight of your tools. Mark the placement on your wall or inside your closet door. Use a level and drill to secure it firmly. Arrange hooks and baskets in a way that maximizes space and accessibility. Group similar items together for efficiency. Regularly reassess and rearrange as your tools and accessories evolve, making sure everything remains visible and usable.
Decorate your pegboard with colorful hooks, themed accessories, or painted accents. Add small labels or icons to identify different tool categories. Incorporate decorative elements like washi tape borders or custom painted backgrounds. You can also attach small shelves or ledges for mini storage or decorative items. Personal touches turn a functional pegboard into a striking feature.
Pegboards boost your craft space’s efficiency and inspire confidence in your organizational skills. They make it easy to keep tools in order and encourage regular tidying. When everything has a designated place, your creative flow is smoother, and projects become more enjoyable. It’s a simple upgrade that makes your craft closet truly functional.
4. Add Curtain Rods for Vertical Hanging Storage
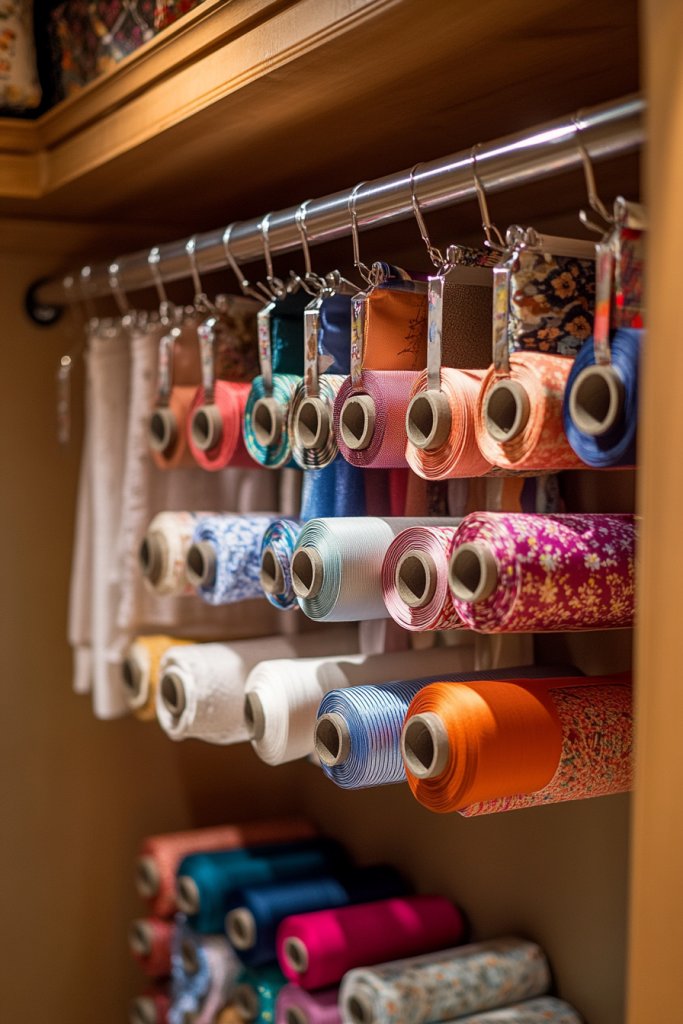
Cluttered shelves and drawers can make finding fabric or ribbons a chore. Installing curtain rods offers a simple, elegant way to hang and organize rolls of fabric, ribbons, or even lightweight storage pouches. It keeps your supplies visible and accessible, saving you time and effort. Plus, it adds a charming, boutique-like vibe to your craft space.
Imagine sleek tension rods or mounted curtain rods running along your closet wall or door. Rolls of fabric hang vertically, like a mini fabric store, with labels for quick identification. Ribbons are neatly wound and hung in small loops, ready for use. The visual effect is airy and organized, with everything standing tall and easy to browse. The soft fabric textures contrast beautifully with the smooth rods, creating a tactile, inviting environment.
Choose from tension rods for easy installation or sturdy mounted rods for heavier fabrics. Use different heights or lengths depending on your closet size and collection. Incorporate decorative finials or painted rods for a personalized touch. For seasonal or special project fabrics, add additional rods or clips to expand your hanging options. This system adapts well to both small and large collections.
Measure your space and select appropriate tension or mounted rods. Install the rods securely at a height that allows easy access while maximizing vertical space. Organize fabrics or ribbons by size, color, or project type, and label accordingly. Use clips or fabric ties to prevent unwinding or slipping. Regularly rotate or update your collection to keep the display fresh. This solution keeps your most-used supplies front and center.
Paint or decorate the rods to match your decor or add fun accents. Use colorful labels or tags to distinguish different fabric types or ribbon styles. Incorporate decorative curtain rings or clips for a playful look. You could also add small hooks for accessories or tools along the rod for extra functionality. Personal touches make this hanging system both practical and pretty.
Vertical hanging storage with curtain rods transforms chaos into charm. It makes your fabric collection inviting and easy to browse, inspiring more frequent use. When supplies are well-organized and attractive, your confidence in your craft space skyrockets. It’s a simple tweak that boosts both function and style effortlessly.
5. Repurpose Over-the-Door Organizers for Additional Storage
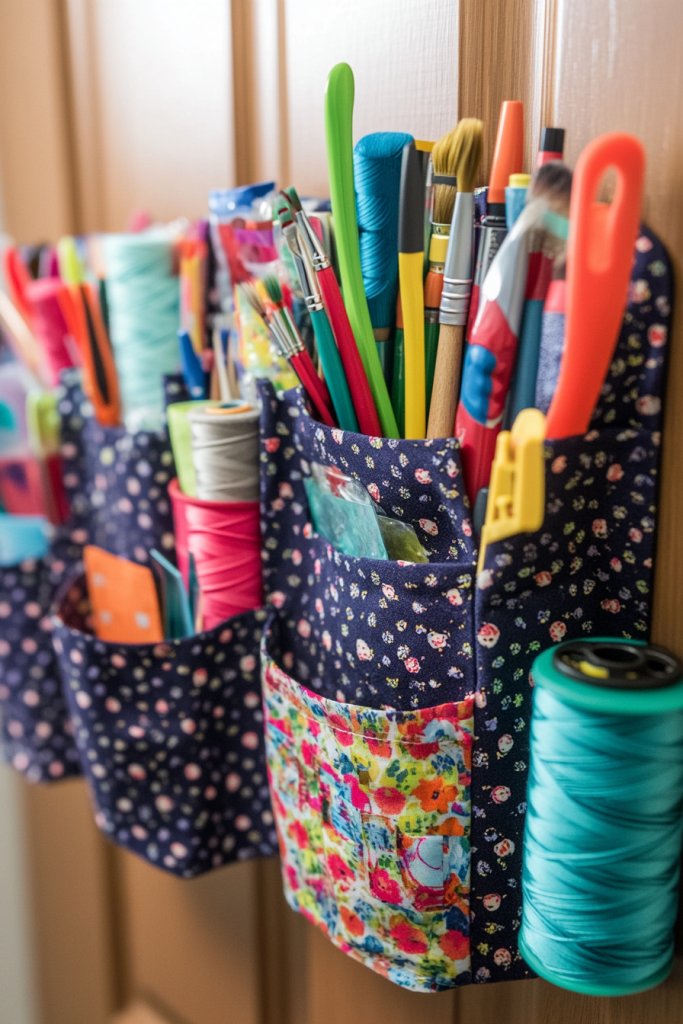
Limited space can make it tough to keep all your craft supplies accessible. Over-the-door organizers are a genius solution to add extra storage without sacrificing precious floor or shelf space. They’re perfect for holding paints, brushes, or embellishments in one tidy, visible place. Plus, they’re super easy to install and move around.
Picture a fabric or mesh pocket organizer hanging over your closet door, filled with small jars of paint, brushes in their holders, or spools of thread. The see-through pockets make it easy to grab what you need at a glance. The fabric adds a soft touch to your space, and the pockets stretch vertically for maximum capacity. It’s like having a mini craft store right on your door.
Choose between mesh, fabric, or clear plastic pockets depending on your aesthetic. Use larger pockets for bulky items like glue guns or large scissors. Smaller pockets work well for stickers, beads, or pins. You can also layer multiple organizers or combine them with other storage solutions for a customized setup. Seasonal or project-specific organizers help keep things relevant and tidy.
Select an over-the-door organizer that fits your closet door and storage needs. Hang it securely and organize your supplies into different pockets based on type or frequency of use. Label the pockets with stickers, tags, or fabric paint for quick identification. Regularly review and declutter to prevent overflowing. This method keeps your supplies visible and within arm’s reach, making your workflow smoother.
Decorate the pockets with fabric paint, washi tape, or small charms for a personalized look. Use color-coded stickers to distinguish types of supplies or projects. Incorporate small hooks or clips inside pockets for tools or additional accessories. You can even sew or add decorative trim to the organizer for a unique touch that matches your style.
Repurposed over-the-door organizers turn small spaces into highly functional zones. They make your supplies easy to see and reach, encouraging more spontaneous creativity. When everything has a dedicated spot, your confidence in maintaining your craft area grows. It’s a simple, effective upgrade that elevates your entire organization system.
6. Incorporate Stackable Storage Bins for Seasonal Supplies
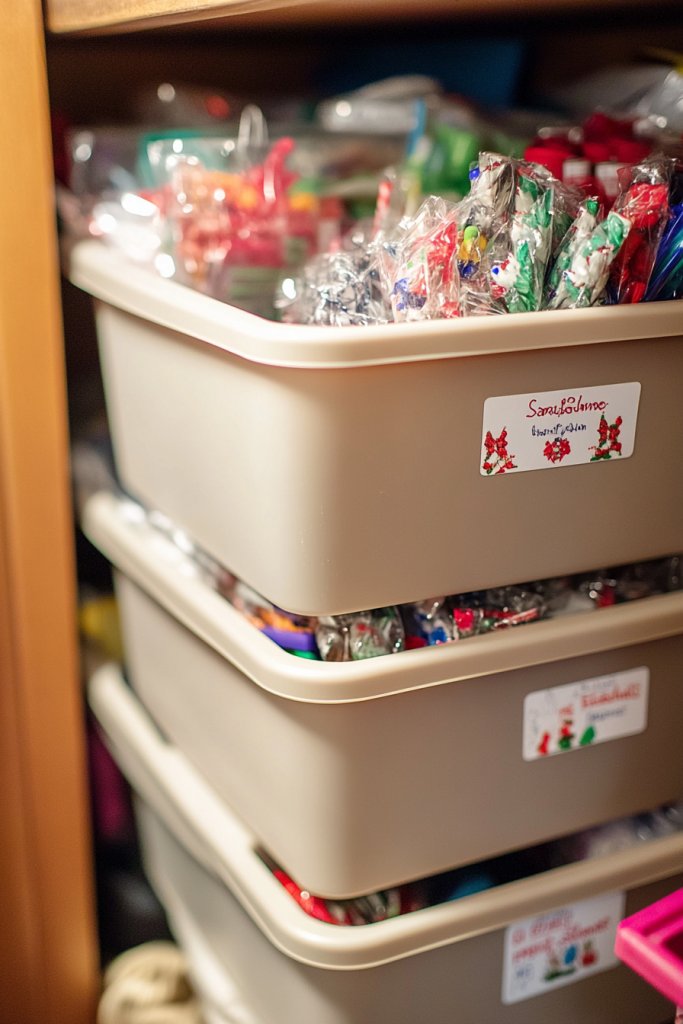
Trying to keep seasonal or infrequently used craft supplies organized can be a hassle. Stacking storage bins offer a neat, space-efficient way to store these items out of the way but still easily accessible. They help reduce clutter and keep your main craft area clear for daily projects. Plus, they make seasonal transitions a breeze.
Visualize a tower of matching plastic bins, each labeled with the season or project type. The clear lids and sides allow you to see contents instantly, while stacking keeps everything compact. You might have one bin for holiday-themed decorations and another for summer beach crafts. When you need a specific item, you simply pick the right bin from the stack.
Use uniform bins for a sleek, coordinated look or mix different sizes for added visual interest. Incorporate color-coded labels to quickly identify seasonal or project-specific supplies. Store smaller bins inside larger ones for nested organization. Stackable bins work well in tight spaces, like closets or under shelves, and can be rearranged as your collection evolves. Seasonal bins are a smart way to keep your craft closet clutter-free year-round.
Start by sorting your seasonal or less-used supplies into categories. Choose stackable bins that fit your space and supply size. Label each bin clearly with a permanent marker or printable tags. Stack the bins neatly in a corner or on a high shelf. Regularly review your collection and swap out seasonal items to keep everything current. This method maximizes storage while keeping your main workspace tidy.
Decorate the bins with themed stickers, washi tape, or paint for a personalized touch. Use different colors for different seasons or categories—red and green for Christmas, pastel for Easter, etc. Add small fabric or paper labels for a handcrafted feel. Incorporate decorative tags or charms for a fun, whimsical vibe. Customization makes organization more engaging and inspiring.
Stackable storage bins make your craft closet more organized and manageable. They help you focus on creating rather than searching for supplies. When seasonal supplies are neatly stored and labeled, your confidence in staying organized skyrockets. It’s a simple system that makes your craft space more functional and welcoming.
7. Install Lazy Susans for Corner Storage
Corners in closets often turn into dead zones filled with hard-to-reach supplies. Lazy Susans are the perfect solution to unlock this space and make it functional. They allow you to spin jars of buttons, paints, or small tools into easy view and access. No more crawling into tight corners or knocking over stacks of clutter.
Imagine a round spinning tray tucked into your closet corner, filled with neatly organized jars and containers. As you give it a gentle spin, colorful beads, tiny brushes, or small embellishments come into view. The smooth rotation keeps everything within reach without disturbing the rest of your collection. It transforms awkward corners into practical, eye-catching storage spots.
Choose a size that fits your corner space and the volume of supplies you have. Use glass or plastic trays to match your decor and ensure visibility. Fill the Lazy Susan with small jars, baskets, or trays of related items—think of it as a mini-museum of your craft supplies. For larger corners, stack multiple Lazy Susans or combine with shelving. Seasonal or project-specific Lazy Susans keep supplies organized and accessible.
Measure your corner space to select an appropriately sized Lazy Susan. Install it securely into the corner, ensuring it spins smoothly. Fill it with small containers or jars, sorted by type or color for quick browsing. Label each jar or section with clear stickers or tags. Regularly rotate and refresh contents to keep the system effective. This setup makes use of tricky spaces and keeps everything visible.
Decorate the Lazy Susan with paint, decals, or patterned tape to personalize it. Use color-coded jars or labels for easy identification. Incorporate small decorative elements or themed stickers that match your craft style. Consider adding a small lip or edge to keep items from slipping off while spinning. Personal touches turn a functional piece into a charming feature.
Lazy Susans maximize corner space and make your supplies more manageable. They inspire confidence because you can see everything at once and reach it effortlessly. When your supplies are organized in a compact, accessible way, your creativity flows more freely. It’s a smart upgrade that turns neglected corners into productivity hubs.
8. Create a Visual Color-Coded System
Searching through a jumble of supplies can kill your creative vibe fast. A color-coded system not only looks stunning but also makes finding what you need a snap. It adds an element of fun and order to your craft closet, helping you stay motivated and inspired. Plus, it’s a quick visual cue that keeps your supplies organized.
Picture bins, drawers, and shelves arranged by color—reds, blues, yellows—creating a vibrant rainbow effect. Each color corresponds to a specific type of supply or project, like blue for fabrics or pink for embellishments. The visual harmony makes it easy to browse and select items. When you open your closet, the colorful palette sparks creativity and a sense of calm.
Use colored storage containers, labels, or even painted accents to implement your system. Keep similar shades together for a gradient effect or organize by project theme. Seasonal palettes can add a fresh feel—pastels for spring or jewel tones for winter. This system can be as simple or elaborate as you like, matching your style and space. It’s flexible enough to evolve with your craft journey.
Sort your supplies by color first. Choose containers, bins, or drawers in corresponding shades. Label each with matching colored tags or printouts. Arrange everything from light to dark for a seamless look or group by type within each color. Regularly update labels and rearrange as your collection grows. Use color-coding as a quick reference guide to streamline your workflow. It makes organization both beautiful and practical.
Incorporate decorative elements like colored washi tape or patterned stickers to enhance labels. Mix textures and finishings—matte, shiny, metallic—to add dimension. Create themed palettes for different seasons or projects. Use color to motivate yourself, like bright shades during energetic projects or calming tones for detailed work. Personal touches make your system uniquely yours.
A color-coded system turns your craft closet into a vibrant, joyful space. It boosts confidence by reducing search time and creating a pleasing environment. When supplies are organized by color, your creative flow is more natural and inspired. It’s a simple, effective way to elevate your entire crafting experience.
9. Use Drawer Dividers for Organized Compartments
Ever find yourself tangled in washi tapes, needles, or stickers? Drawer dividers are the unsung heroes of organization—creating neat compartments for small items. They help you avoid chaos and keep everything in its designated spot. Plus, they make your drawer look like a professional organizer’s dream.
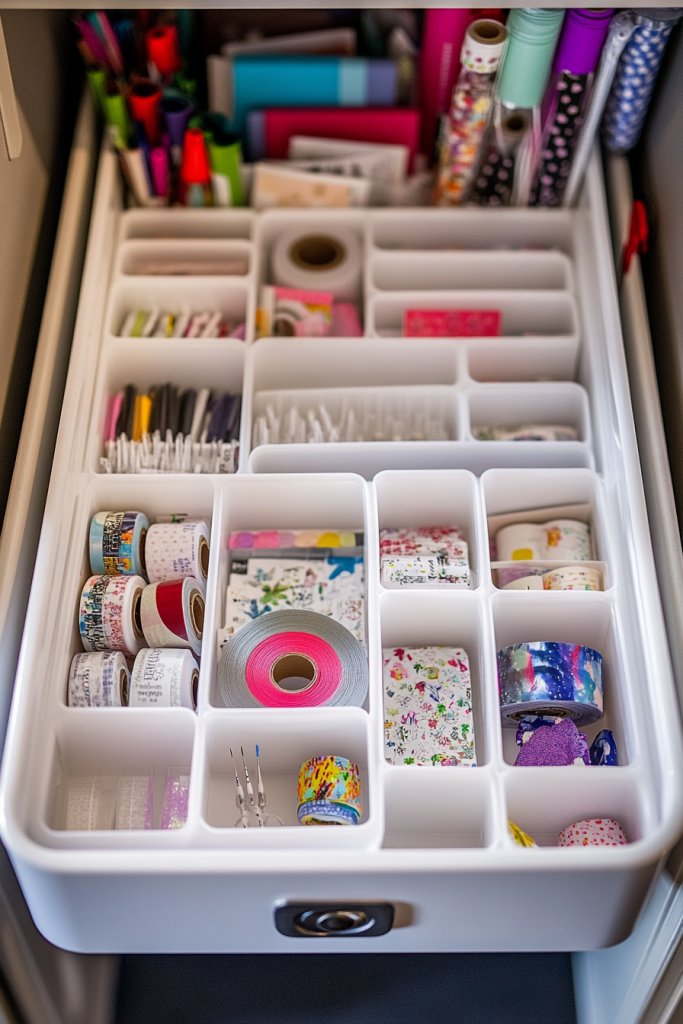
Imagine adjustable or fixed dividers inside a deep drawer, segmenting space into tidy sections. Each compartment houses a specific item—washi tapes in one, sewing needles in another. The dividers keep things from sliding around when you open or close the drawer. Everything stays neat, visible, and easy to grab, transforming your clutter into order.
Choose from plastic, wooden, or foam dividers depending on your aesthetic and budget. Use adjustable dividers for customizable compartments or fixed ones for a more permanent setup. Combine different sizes to fit various items—long, narrow sections for tapes, small boxes for pins. Incorporate labels or color-coding to further streamline your system. Adapt the setup to your specific needs and space constraints.
Empty your drawer and sort your supplies into categories. Measure the drawer dimensions to select the right divider size. Arrange the dividers inside, creating compartments that suit each item’s shape. Label each section with small stickers or tags for quick identification. Regularly review and reorganize to keep the system functional. This approach keeps your small supplies visible, accessible, and tangle-free.
Decorate the dividers with paint, washi tape, or printed labels to match your style. Use different colors for different categories—pinks for embellishments, blues for sewing supplies, etc. Add decorative touches like stickers or icons to make the labels fun. Personalization turns a simple divider into a charming part of your organization system. It’s all about making your space work for YOU.
Drawer dividers make your craft space more manageable and boost your confidence in staying organized. When everything has a place, you spend less time hunting and more time creating. The visual clarity encourages ongoing tidiness and inspires you to keep your supplies in check. It’s a small change with a big impact on your craft experience.
10. Install Under-Shelf Baskets for Extra Storage

Limited shelf space can turn into a clutter nightmare, especially when storing papers, foam sheets, or flat supplies. Under-shelf baskets are a smart way to add hidden storage without taking up extra room. They’re perfect for keeping flat or lightweight items organized and within easy reach. Who says your storage has to be bulky and unsightly?
Imagine baskets hanging neatly beneath your existing shelves, filled with neatly stacked papers or craft foam. The baskets are often wire or fabric, giving a light, airy feel. When you need an item, you simply pull out the basket, browse, and close it back. It creates a layered look that maximizes vertical space while keeping everything visible.
Opt for wire baskets for a vintage industrial vibe or fabric baskets for softness and color. Use different sizes and shapes to suit various supplies—long, shallow baskets for paper or deep ones for foam sheets. Mount baskets securely with brackets or hooks, and label them for even faster access. Seasonal or project-specific baskets keep your storage relevant and clutter-free.
Measure the space beneath your shelves and select baskets that fit comfortably. Install brackets or hooks to hold the baskets securely in place. Organize your flat supplies by type or size and place them into the baskets. Label each basket with clear tags or stickers. Regularly review and adjust the contents to maintain order. This solution cleverly adds storage without crowding your existing setup.
Decorate the baskets with paint, fabric, or decorative trims for a personalized touch. Use color-coding or themed labels for quick identification—pastel for seasonal crafts, bold for everyday supplies. Incorporate small charms or tags for a whimsical look. Personal touches make your storage both functional and stylish, inspiring ongoing organization.
Under-shelf baskets unlock hidden space and keep your craft area tidy. They make your supplies more accessible and help you stay motivated to keep everything organized. When flat items are stored neatly, your workspace feels calmer and more inviting. It’s an easy, effective way to upgrade your craft closet’s efficiency and style.
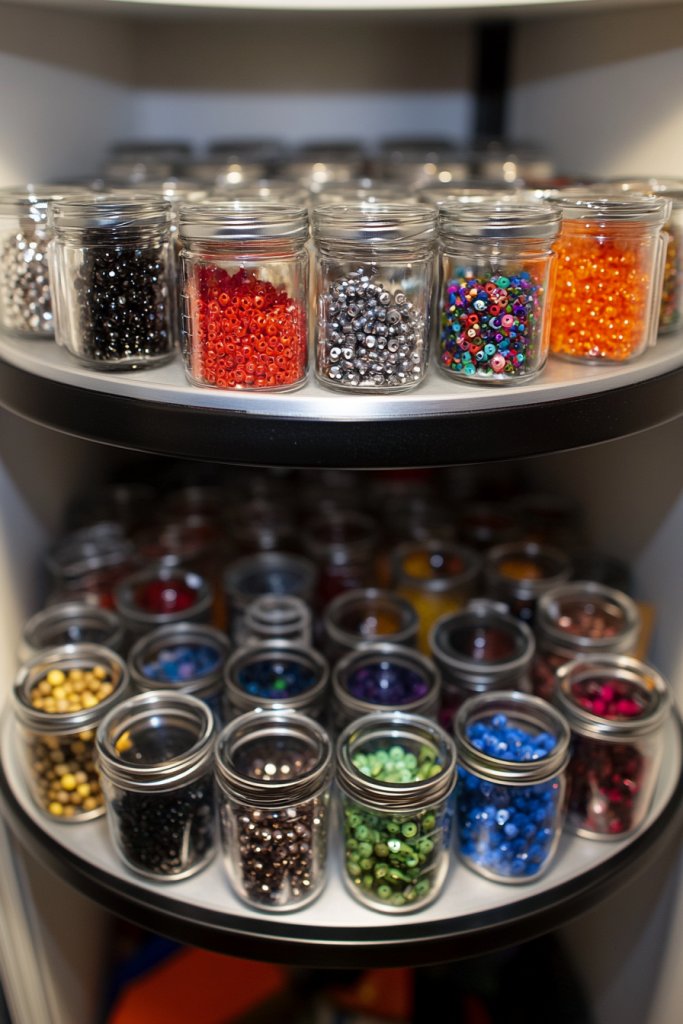
11. Incorporate Clear Tube or Jar Storage for Beads and Buttons
Small craft items like beads and buttons tend to get lost or tangled in cluttered drawers. Clear tubes or jars are the perfect way to display and organize these tiny treasures. They keep your collection accessible and visually appealing. Plus, it’s satisfying to see all your colors and shapes at a glance.
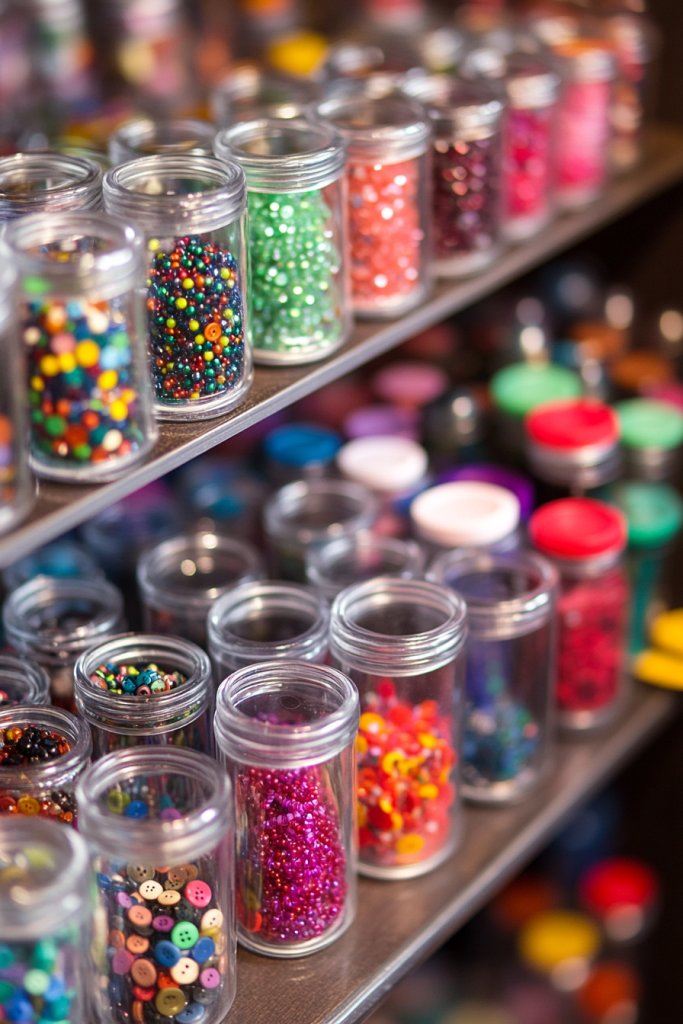
Picture transparent jars or tubes filled with a rainbow of beads, buttons, or tiny embellishments. The clear containers showcase every hue and shape, turning your storage into a colorful display. When you need a specific item, you can simply glance at the jars and pick what you want. This setup adds a cheerful, organized vibe to your craft closet.
Choose small glass or plastic jars with screw caps or clip-top lids. Use uniform containers for a cohesive look or mix different sizes for variety. For extra flair, decorate jars with washi tape, labels, or painted accents. Arrange jars on shelves or inside a dedicated storage unit for easy access. Seasonal or project-specific collections can be stored separately for convenience.
Sort your beads and buttons by color or type, then fill the jars accordingly. Label each jar with clear, durable tags or printed labels for quick identification. Place jars on open shelves or inside drawers for easy browsing. Keep frequently used items at eye level and less common ones higher or lower. Regularly tidy and refill jars to maintain order. This method simplifies selection and keeps your supplies tidy.
Decorate jars with colorful labels, stickers, or custom-painted lids. Use a consistent color theme for different categories—metallic for embellishments, pastel for delicate beads. Add creative tags with handwritten or printed info. Incorporate small charms or decorative elements on the lids for a fun, personalized touch. It’s all about making storage both practical and pretty.
Clear jar storage elevates your craft space by making tiny supplies easy to find and use. It encourages you to keep everything organized and accessible, boosting your confidence. When supplies are beautifully displayed, your creative energy flows more freely. It’s a simple upgrade that makes a big difference in your crafting routine.
12. Use Magnetic Strips for Metal Tools and Pins
Searching for small metal tools, pins, or clips can be like finding a needle in a haystack. Magnetic strips offer a clever way to keep these tiny essentials organized and easy to access. They stick right to your wall or inside your closet and turn a mess of loose items into a neat display. Who knew magnetic power could be so handy?
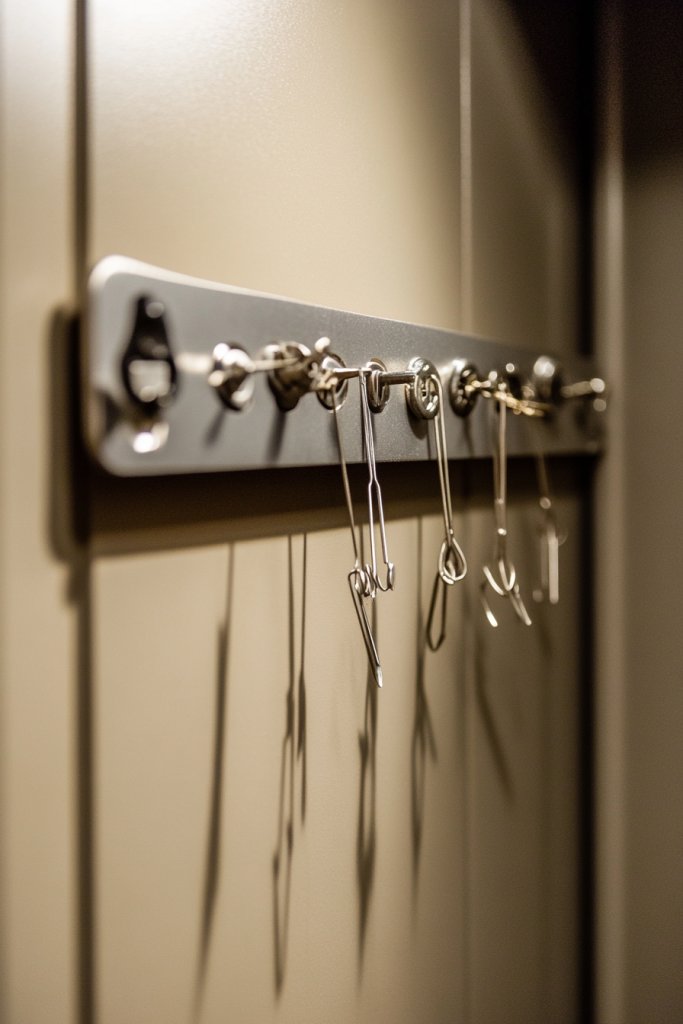
Imagine a sleek metal strip mounted on your closet wall, with all your metal tools, pins, and clips neatly attached. The magnetic surface keeps everything in place, yet visible and ready to grab. It’s like a mini magnet museum—organized, functional, and visually tidy. When you need a pin or a small tool, you just reach out and pick it up, no fuss.
Choose from simple magnetic strips or decorative versions with patterns or colors that match your decor. Use multiple strips for different categories—one for pins, another for small tools, and a third for clips. Mount strips at various heights for ergonomic access. Incorporate small containers or cups on the strip for extra storage. Seasonal or project-specific magnets can keep your setup dynamic and fun.
Measure the available wall or closet space and select a magnetic strip accordingly. Mount it securely with screws or adhesive hooks, ensuring it’s level and sturdy. Arrange your metal tools, pins, or clips onto the strip, grouping similar items together. Label sections if possible for quick identification. Regularly clean and reorganize to keep the magnetic surface free of dust and debris. This system keeps tiny items visible and within easy reach.
Decorate the strips with paint or decorative tape to match your style. Use different colored magnets or labels to categorize items further. Add small decorative elements like charms or stickers for a personalized touch. Incorporate themed magnets for holidays or special projects. Personal touches make your magnetic storage both functional and charming.
Magnetic strips simplify your craft storage and boost your confidence in staying organized. They make it easy to find and return small items, reducing clutter and frustration. When supplies are visible and accessible, your creativity can flourish without interruption. It’s a straightforward upgrade that makes your craft closet more efficient and inspiring.
13. Designate a Craft Supply Station with a Portable Cart
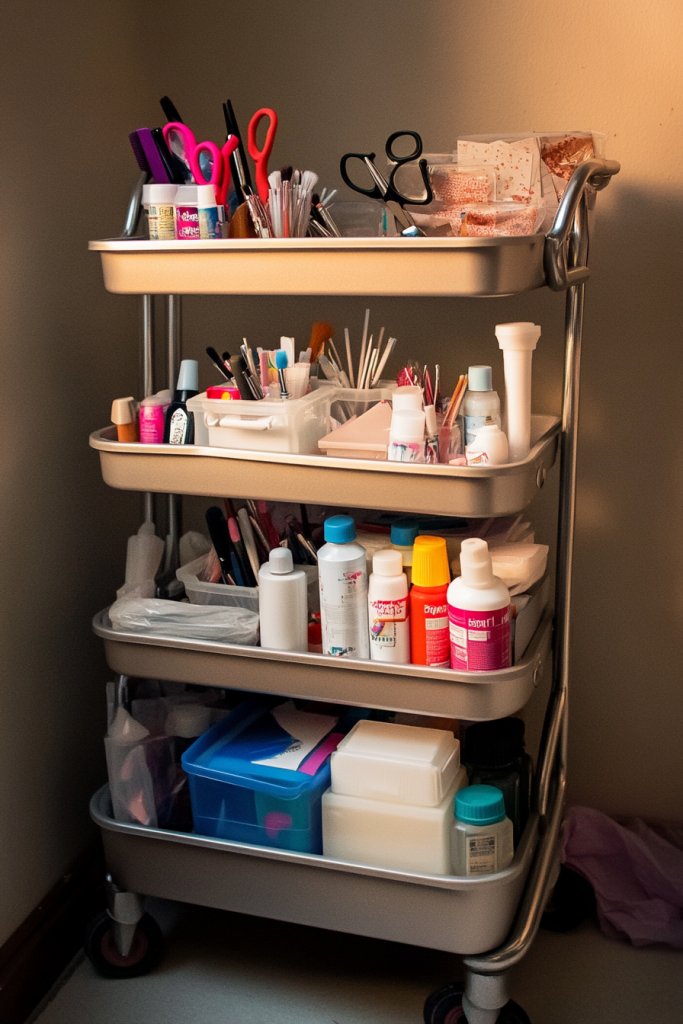
Moving from your craft closet to your workspace can be messy and inefficient. Creating a dedicated craft supply station on a portable cart allows you to bring your tools and materials exactly where you need them. It keeps everything organized, mobile, and ready for action. Plus, it’s perfect for small spaces or multi-use rooms.
Picture a sturdy wheeled cart with multiple tiers, filled with neatly arranged supplies—paints, brushes, scissors, and more. You can roll it into your workspace or tuck it away when not in use. The cart’s open shelves and drawers make everything visible and accessible. When you’re ready to craft, just wheel the station over and get to work—no more running back and forth.
Choose a cart with different-sized shelves, drawers, or baskets to customize your setup. Use containers or trays to organize smaller items within the cart. Decorate it with paint, stickers, or fabric to match your decor style. For seasonal projects, you can swap out supplies quickly. This approach works well in small apartments, craft rooms, or shared spaces.
Select a sturdy, lightweight cart with lockable wheels for safety. Fill each shelf or drawer with categorized supplies—fabric in one, paints in another. Use small containers or dividers for tiny items like pins or sequins. Label each section clearly for quick access. Store the cart near your worktable or in a corner, and wheel it away when not in use to save space. Regularly tidy and restock supplies to keep it functional.
Personalize your cart with decorative paint, decals, or fabric covers. Use color-coded containers for different media—red for paints, yellow for brushes, etc. Add small hooks or holders for tools or accessories. Incorporate a small whiteboard or clipboard for project notes. Personal touches make your mobile station both practical and fun.
A portable craft station boosts your confidence by making supplies easily accessible and organized. It encourages spontaneous creativity because you can move your workspace wherever inspiration strikes. When everything is neatly packed and ready, you’re more likely to start and finish projects. It’s a flexible, inspiring upgrade for any craft lover.
14. Hang Mesh Baskets for Loose Supplies
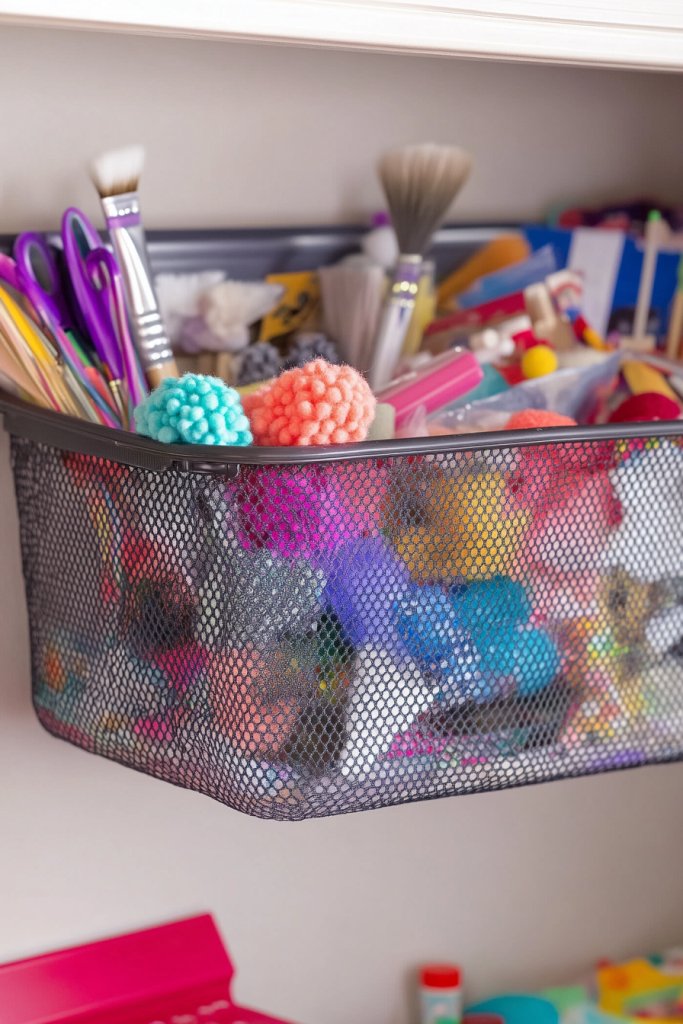
Loose craft supplies like pom-poms, fabric scraps, or brushes often create mess and clutter. Hanging mesh baskets provide a breathable, visible storage solution that keeps things accessible and tidy. They’re ideal for quick grab-and-go storage, especially when space is limited. Who doesn’t love a clutter-free craft zone?
Visualize large mesh baskets hanging from hooks or rods, filled with colorful pom-poms or fabric pieces. The see-through mesh allows you to see everything at a glance, making it easy to find what you need. The baskets sway gently when you move, adding a playful touch to your closet. They keep supplies ventilated and within reach, turning chaos into order.
Choose from different sizes and shapes—deep for bulky items or shallow for smaller supplies. Use hooks, S-clips, or rods to hang baskets securely. Incorporate decorative elements like colored ties, fabric trims, or painted accents to match your decor. You can also add labels or tags to identify contents easily. Seasonal or project-based baskets keep your storage dynamic.
Install sturdy hooks or rods at accessible heights in your closet or craft room. Hang the mesh baskets and fill them with categorized supplies—think brushes in one, fabric scraps in another. Label each basket with waterproof tags or stickers. Regularly review and reorganize to keep everything tidy. Mesh baskets are simple to install, versatile, and perfect for casual, breathable storage.
Decorate the baskets with fabric covers, paint, or decorative trims for a personalized look. Use color-coded ties or ribbons to distinguish categories. Add small charms or labels for extra flair. Personal touches turn functional storage into a charming part of your decor. The goal is to make organization effortless and inspiring.
Hanging mesh baskets make your supplies more accessible and visually appealing. They motivate you to maintain an organized space and inspire spontaneous projects. When supplies are easy to see and grab, your creative flow increases. It’s a simple, effective way to enhance your craft closet.
15. Incorporate a Fold-Out Work Surface
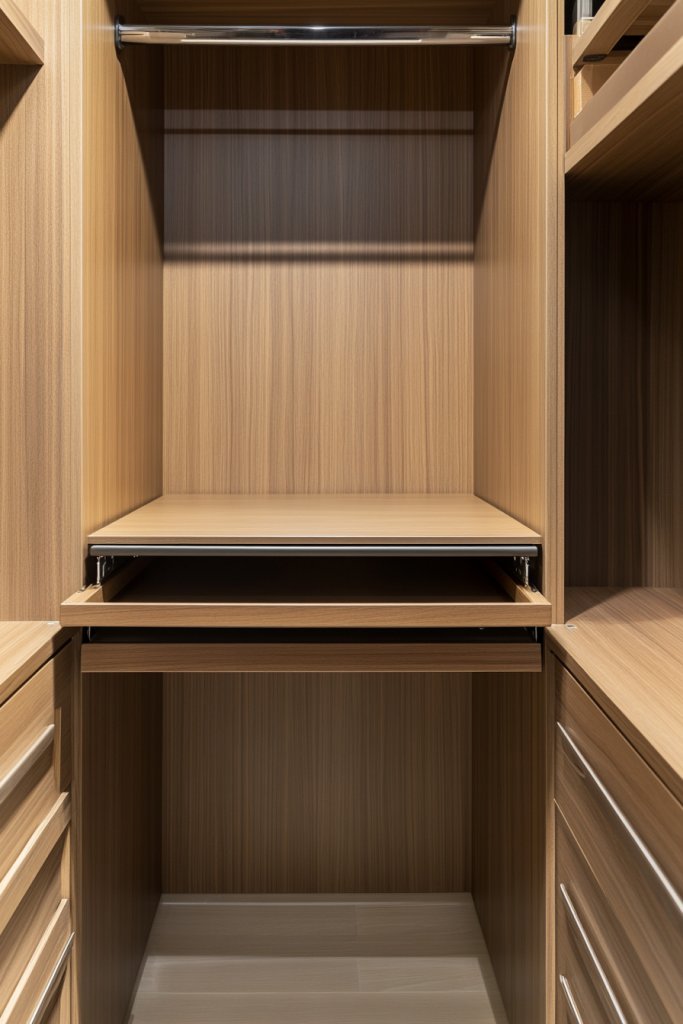
Limited table space can hamper your crafting ambitions, especially when you need a dedicated workspace. A fold-out work surface inside your closet offers a hidden, space-saving solution. It provides a sturdy area for quick projects without cluttering your main room. Who needs a full desk when your closet can double as a crafting hub?
Imagine a sturdy panel or countertop that folds down from the inside of your closet wall or door. When folded down, it forms a compact work surface, complete with storage underneath for tools and supplies. When you’re done, fold it back up to hide the mess. The surface is perfect for sewing, cutting, or assembling small projects, all tucked neatly away.
Choose a fold-down table in a durable material like wood or laminate, matching your decor. Add small storage compartments or pegboards nearby for tools and accessories. Use a lightweight design for easy operation, or a more robust one for heavier projects. Incorporate decorative touches like paint or decals for a custom look. This setup adapts to various space sizes and project needs.
Install hinges and supports to secure the fold-out panel to your closet wall or inside door. Ensure the surface is sturdy enough for your projects. Use wall anchors or screws for stability. Keep tools and supplies organized nearby with small containers or hooks. Test the mechanism regularly to ensure smooth operation. When not in use, fold it up to save space and keep your closet tidy.
Paint or decorate the fold-out surface to match your style. Add a protective top coat for durability. Incorporate small built-in storage or pockets underneath for frequently used tools. You can also add decorative accents or a custom edge trim. Personal touches make your workspace inviting and uniquely yours. It’s a secret weapon for quick, efficient crafting.
A fold-out work surface transforms your closet into a versatile crafting station. It encourages spontaneous projects and keeps your main living areas clutter-free. When you have a dedicated, hidden workspace, your confidence in tackling new ideas grows. It’s a clever way to maximize every inch of your home for creativity.
16. Use Stackable Clear Bolders for Patterned Papers
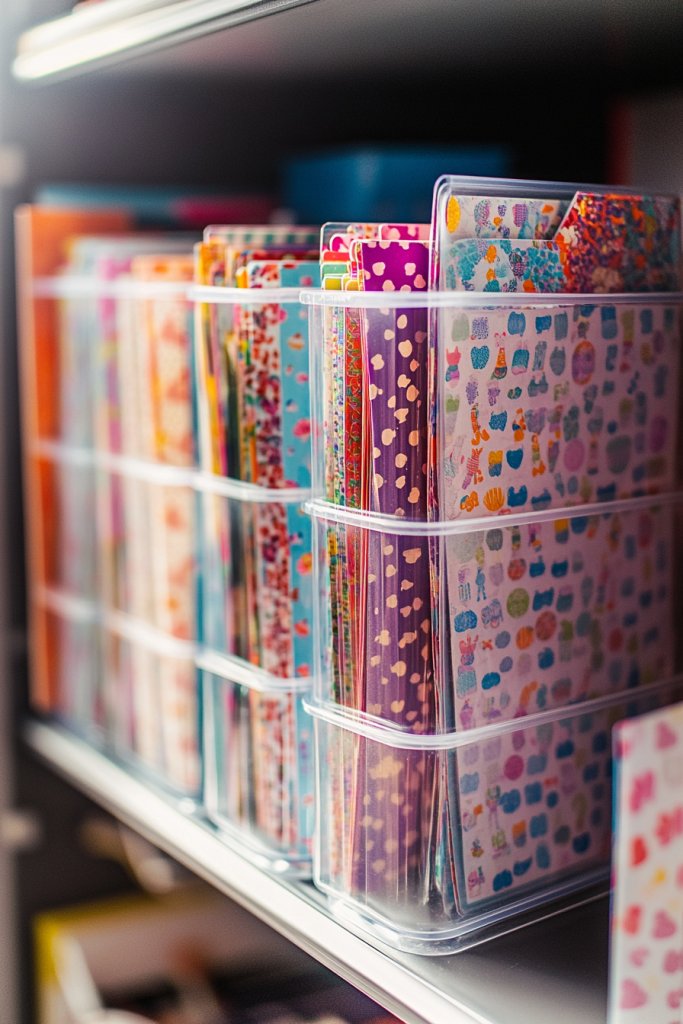
Digging through stacks of patterned papers or sticker sheets can be a real headache. Stackable clear bolders or containers keep your papers upright, visible, and easy to browse. They turn a chaotic pile into an inviting palette of colors and patterns. Who doesn’t want quick access to their favorite designs?
Imagine clear, durable containers standing upright on your shelves, each filled with different patterned papers or sticker sheets. The transparency allows you to see all your options at a glance, sparking inspiration instantly. Labels on the containers make it even easier to find the perfect paper for your current project. It’s like having a personal paper gallery right in your closet.
Choose containers with adjustable dividers or different sizes to hold various paper types. Organize by color, pattern, or theme for quick selection. You can also incorporate decorative labels or painted accents for a personalized touch. Store the containers vertically to maximize space or stack them horizontally for a different look. Seasonal or themed paper collections stay tidy and inspiring.
Select clear, stackable containers or bolders that fit your shelf height. Fill each with a specific set of patterned papers or sticker sheets. Label each container clearly with a permanent marker or printed label. Organize the papers upright or stacked, depending on your preference. Regularly review and rotate your collection to keep it fresh. This setup keeps your favorite papers at your fingertips and your space clutter-free.
Decorate the labels with doodles or themed stickers to make the system more fun. Use matching color schemes for different themes—spring, holiday, vintage, etc. Incorporate decorative tape or washi around the containers for a cohesive look. Personal touches make your storage system both functional and delightful. It encourages ongoing organization and creative flow.
Upright, clear containers for patterned papers make your supplies more accessible and visually appealing. They boost your confidence by keeping everything organized and easy to browse. When your papers are displayed beautifully, your motivation to craft increases. It’s a simple, effective way to elevate your entire creative space.
17. Add Decorative Bins for Aesthetic Appeal
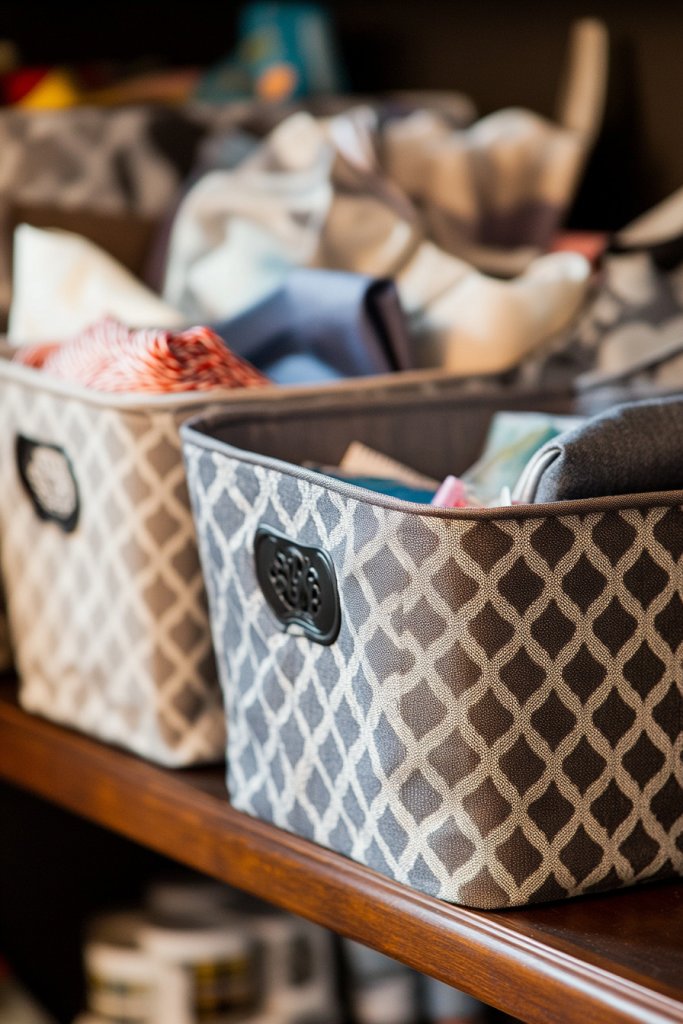
A cluttered craft closet not only hampers productivity but also kills your vibe. Decorative bins combine practicality with style, turning storage into a design feature. They help hide messy supplies while adding color and personality to your space. Who says organization can’t be beautiful?
Picture stylish bins in your favorite colors or patterns, neatly arranged on shelves or in corners. They hold your larger supplies like fabric, yarn, or craft tools out of sight but still within reach. The decorative elements—ribbons, patterns, or metallic accents—make your storage look intentional and curated. When you open your closet, it feels like stepping into a well-designed boutique.
Choose bins in materials that suit your decor—canvas, wicker, or lacquered finishes. Use different sizes and shapes for visual interest and functionality. Match or mix colors to create a vibrant or subdued palette. Incorporate labels or tags for quick identification. Seasonal or themed bins keep your organization dynamic and inspiring.
Select decorative bins that fit your shelves and storage needs. Fill them with related supplies—embellishments in one, sewing notions in another. Label or paint on the bins for clarity. Arrange them in a way that complements your space’s flow and aesthetic. Regularly declutter and rotate contents to keep everything fresh. These bins turn storage into a statement piece.
Decorate the bins with fabric, paint, or decorative trims to match your style. Use themed or color-coded labels to add a layer of organization. Incorporate small charms, stickers, or ribbons for a playful touch. Personalization makes your storage more than just functional—it’s part of your creative expression. It makes tidying up a delightful task.
Stylish, decorative bins inspire pride in your craft space. They motivate you to keep everything tidy and showcase your personality. When your storage looks good, your confidence in your organizational skills and creative abilities soars. It’s a small upgrade that makes a big impact on your overall craft environment.
18. Install Overhead Racks for Large Items
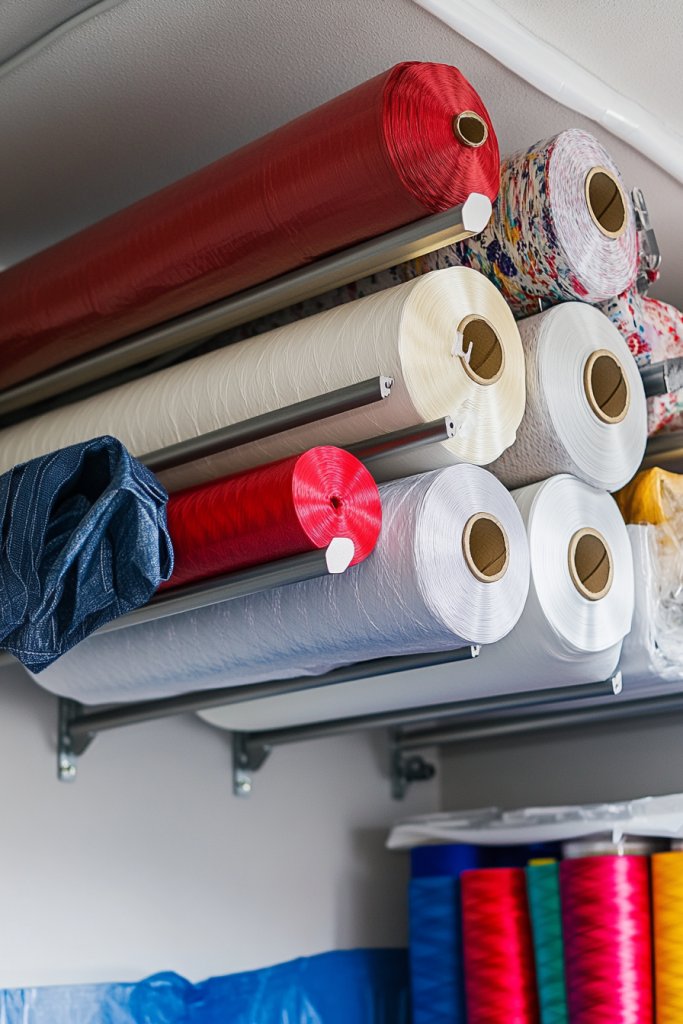
Bulky items like fabric bolts, large paper rolls, or project boxes can clutter your space and make everything feel cramped. Overhead racks utilize unused ceiling or high wall space to store large, heavy items safely out of the way. They free up valuable shelf or floor space and keep your essentials within easy reach.
Visualize sturdy overhead racks installed high on your closet ceiling or wall. Large fabric bolts or paper rolls hang neatly, supported by hooks or rods. The items are suspended above your head, creating a clean, open environment below. This setup not only maximizes space but also adds an industrial or modern touch to your organization system.
Choose adjustable or fixed racks depending on your ceiling height and weight needs. Use durable materials like metal or heavy-duty wood. Incorporate hooks or clips to hang bulky items securely. For aesthetic appeal, paint or finish the racks to match your decor. Seasonal or large project storage becomes effortless with this high-up solution.
Measure your ceiling or wall space to select appropriate rack sizes. Install securely with anchors and screws, ensuring they can handle the weight. Hang large items like fabric bolts or project boxes, supporting them with hooks or straps. Keep frequently used items lower, and store seasonal or seldom-used items higher. Regularly check for stability and reorganize as needed. This method keeps your clutter off the floor and out of sight.
Decorate racks with paint or decals matching your decor theme. Use color-coded or labeled hooks for quick access. Incorporate decorative elements like LED lighting or metallic finishes for extra flair. Personal touches make your overhead storage both functional and stylish. It’s an elegant solution to maximize vertical space.
Overhead racks transform your craft closet into a clutter-free zone. They inspire confidence by showing you how to maximize every inch of space creatively. When large items are neatly stored out of sight, your workspace feels more open and inviting. It’s a smart, efficient upgrade that elevates your craft environment.
19. Personalize with Inspirational Decor and Lighting
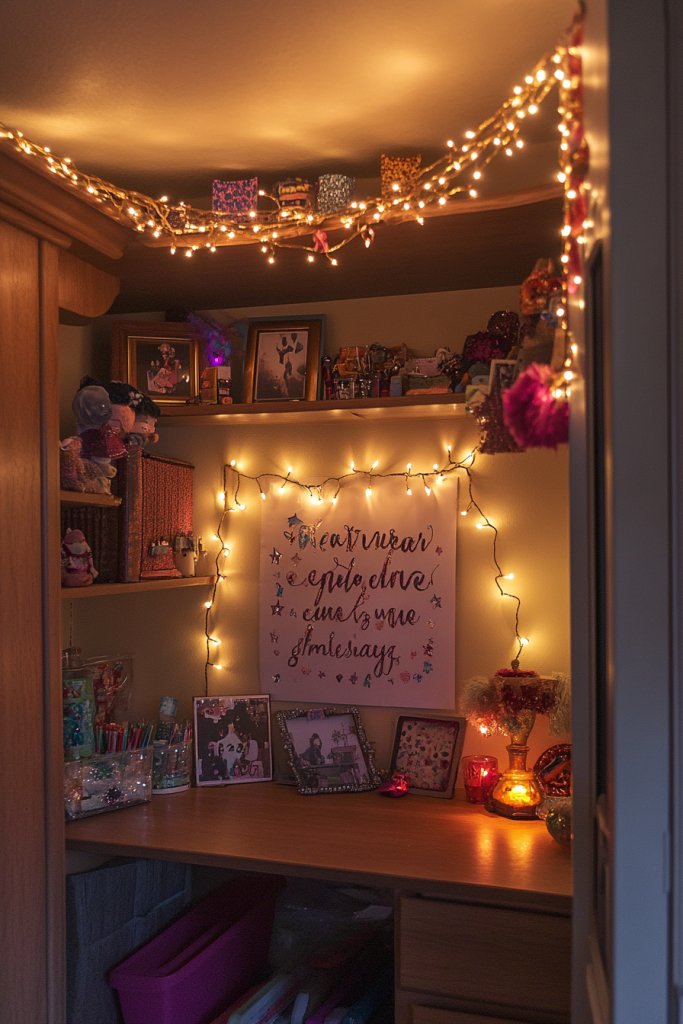
A dull, uninspiring craft closet can drain your creative energy before you even start. Adding personalized decor and soft lighting creates an inviting atmosphere that sparks inspiration. It makes your space feel more like your sanctuary, encouraging you to craft more often. Who says organization can’t be beautiful?
Imagine fairy lights or LED strips casting a warm glow over your organized supplies. Motivational quotes or inspiring wall decals adorn your closet walls, reminding you of your creative goals. Soft textiles or decorative panels add warmth and personality. The combined effect transforms your closet from a storage area into a cozy, motivating studio.
Use string lights, battery-operated LEDs, or small lamps to create ambient lighting. Decorate the walls with inspiring quotes, artwork, or themed decals—just avoid artwork categories as per restrictions. Incorporate textiles like a soft throw blanket or decorative fabric to add texture. Seasonal or mood lighting allows you to change the vibe as needed. The key is creating a space that energizes and relaxes you.
Install soft lighting options securely in your closet, ensuring access to power sources or battery compartments. Hang or mount inspirational decor in prominent spots. Use hooks, nails, or adhesive strips based on your wall surface. Arrange lighting and decor thoughtfully to avoid clutter and ensure safety. Switch out or update decor periodically to keep the space fresh and inspiring. This setup makes your craft closet a true creative haven.
Add decorative accents like fairy lights with color filters or themed banners. Personalize quotes with your handwriting or favorite fonts. Incorporate decorative storage containers or fabric panels to match your style. Use removable adhesive or command strips for easy updates. Personal touches make your craft space uniquely yours, inspiring ongoing creativity and pride.
Personalized decor and lighting turn your craft closet into a motivational retreat. They boost your confidence by making your space welcoming and inspiring. When your environment reflects your personality, your creative energy flows more freely. It’s a simple, impactful way to transform your craft area into a true sanctuary.
Conclusion
With a diverse range of craft closet organization ideas, you now have the tools to transform your space into a neat and inspiring creative sanctuary. Don’t hesitate to try out these tips and adapt them to fit your unique needs—your perfect craft space is within reach. Dive in, get organized, and let your creativity flourish in a beautifully tidy environment!
Leave a Reply