I have been, or can be if you click on a link and make a purchase, compensated via a cash payment, gift, or something else of value for writing this post. As an Amazon Associate, I earn from qualifying purchases. Please read my full Affiliate Disclosure for more information.
Have you ever wondered how a simple magnet can become a charming piece of art? Clay magnets are incredibly popular because they combine creativity, personalization, and functionality all in one! Their versatility and the endless possibilities for customization make them a favorite craft project for both beginners and seasoned artists alike.
In this article, you’ll find a delightful variety of clay magnet ideas that will inspire your next DIY project. Whether you prefer whimsical designs, nature-inspired motifs, or cute characters, there’s something here to spark your imagination and add a personal touch to your space or gifts.
1. Colorful Abstract Clay Magnet Gallery Wall
Ever feel like your space is missing that pop of personality? A bland fridge or dull metal board can make your entire kitchen or office feel uninspired. You want something lively and eye-catching without going overboard or spending a fortune. The idea is to create a focal point that sparks joy every time you see it.
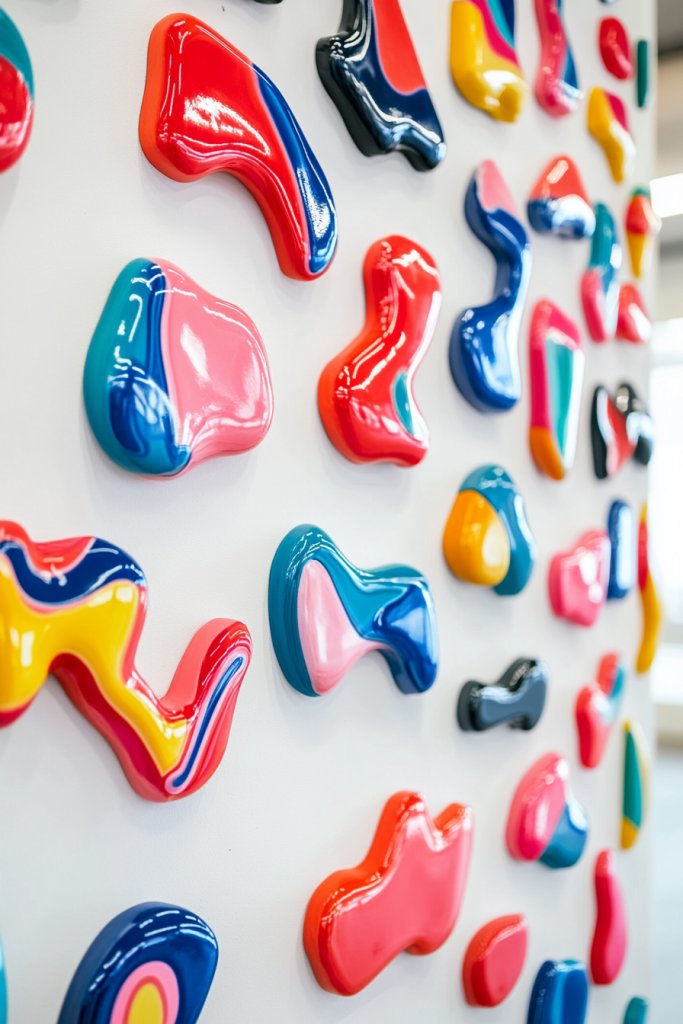
Imagine a wall filled with vibrant, abstract-shaped clay magnets in a rainbow of colors. Bold reds, electric blues, sunny yellows, and deep purples blend together in a playful mosaic. The textures vary from smooth and glossy to matte and textured, adding depth. These magnets form a cohesive pattern, turning a simple magnetic surface into an artful display that energizes the room.
You can customize this look by choosing colors that match your decor or seasonal palettes. For a more subdued vibe, opt for pastel shades or monochrome tones. Large, irregular shapes make a statement in spacious rooms, while smaller, more uniform pieces suit tighter spaces. Incorporate metallic or glitter accents for a touch of glam during festive seasons.
Start with high-quality clay, such as polymer or air-dry clay, in your chosen colors. Shape each magnet into abstract forms—squiggles, blobs, or geometric shards. Once dried or baked, apply a clear sealant for shine and durability. Attach strong magnets to the back using hot glue or adhesive strips. Arrange the magnets on a magnetic board or metal surface in a pattern that feels organic or structured, depending on your style.
Add personal touches by embedding tiny charms or textured elements into some magnets. Use metallic paints or mica powders to create shimmering effects. Mix in some glitter or metallic clay pieces for extra flair. You could even personalize some magnets with initials or small symbols to make it more meaningful.
This colorful abstract magnet gallery transforms a simple space into an artful retreat. It’s a fun, creative project that allows you to showcase your personality. Plus, it’s easy to update with new shapes or colors whenever inspiration strikes. Ready to turn your boring magnetic surface into a stunning focal point?
2. Minimalist Monochrome Clay Magnet Set
Tired of cluttered, chaotic fridge displays? Sometimes less is more, especially if you crave a clean, modern aesthetic. Monochrome clay magnets offer a sleek solution that’s understated yet impactful. They add a touch of sophistication without overwhelming your decor.
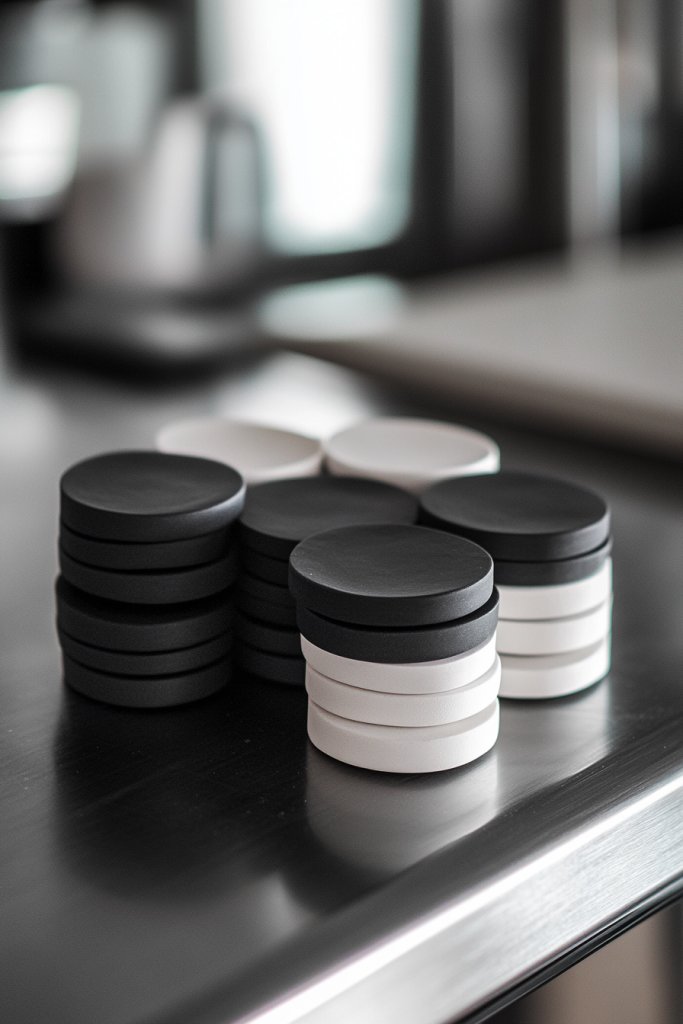
Picture a set of clay magnets shaped into simple geometric forms—circles, squares, triangles—in shades of gray, black, or white. The matte finish contrasts beautifully with metallic or glossy surfaces. Their minimalist design emphasizes form and texture, creating a calm, cohesive look that complements any contemporary space. The subtle variations in shape offer visual interest without breaking the visual harmony.
Choose a monochrome palette that matches your room’s vibe—cool grays for a Scandinavian look, deep blacks for industrial style, or soft whites for coastal themes. You can cluster different shapes together or space them out for a more sparse arrangement. Incorporate metallic painted magnets for a luxe touch or add textured clay surfaces for depth.
Select high-quality polymer or air-dry clay and mold your shapes—keeping edges clean and smooth for a polished look. Once dry, sand lightly for a refined finish. Use metallic or matte paints to coat each magnet, then seal with a clear protective layer. Attach small, powerful magnets to the back with industrial-strength glue. Arrange them on a metal surface with a focus on symmetry or asymmetry, depending on your taste.
Create variation by mixing matte and gloss finishes or adding subtle textured patterns like cross-hatching or stippling. Personalize with embossed initials or symbols pressed into the clay before drying. Use different shades within the monochrome palette to add visual interest without losing the sleek vibe. These small touches elevate the set from simple to stylish.
This set embodies modern elegance—perfect for those who prefer subtle sophistication. It’s a timeless look that can adapt to any decor upgrade. Plus, making your own set adds a personal touch that’s both rewarding and stylish. Why not try this minimalist approach and enjoy a clutter-free, chic display?
3. Nature-Inspired Leaf and Flower Clay Magnets
Ever wish your space felt more connected to nature? Bringing organic elements indoors can soften harsh environments and boost your mood. But real plants or flowers might not be practical or to your taste. Clay offers a fantastic way to craft everlasting leaves and blooms that brighten your space without any upkeep.
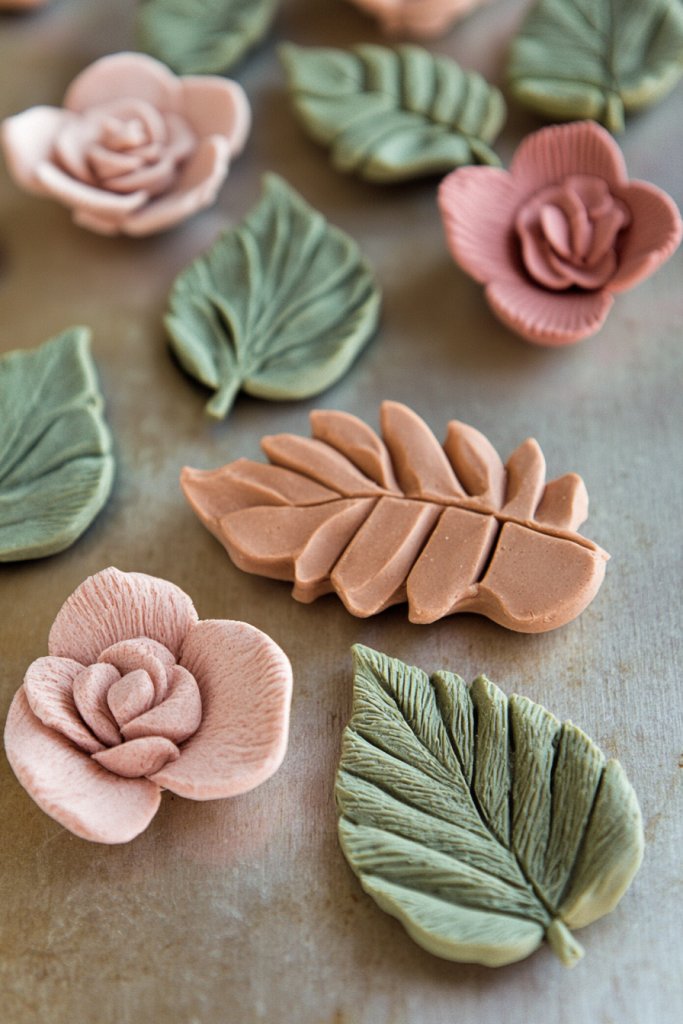
Imagine delicate clay leaves with detailed veins and soft, petal-shaped flowers in earthy hues—olive greens, warm browns, blush pinks. The textures mimic real foliage, with raised veins and smooth petal surfaces. These magnets can be arranged as a natural bouquet or scattered randomly for a whimsical forest vibe. The tactile quality invites touch and admiration, creating a calming, organic aesthetic.
You can customize by selecting different plant species—maple, eucalyptus, daisies, or wildflowers—based on your style. Seasonal themes can be achieved by switching out colors or adding tiny clay berries or seed pods. For a more stylized look, create simplified, geometric leaves and flowers that fit a modern decor. Incorporate natural textures like stippling or veining for authenticity.
Start with flexible polymer or air-dry clay. Sculpt leaves and flowers with fine tools, adding details like veins or petal lines. Once dried, paint in realistic shades—think muted greens, soft yellows, lavender—and seal with matte varnish. Attach small, strong magnets to the back using durable glue. Arrange the magnets on your metal surface to mimic a natural cluster or a flowing line, depending on your preference.
Enhance realism by adding tiny clay berries, acorns, or textured elements like bark patterns. Mix in metallic or iridescent powders for a subtle shimmer that mimics dew or sunlight. Personalize by embedding initials into some leaves or flowers for a custom touch. Use different shades for a layered, vibrant look.
Connecting with nature doesn’t require a green thumb—just a bit of clay! These magnets bring a fresh, earthy vibe that’s timeless and relaxing. They’re also a great way to showcase your love for outdoors in a durable, maintenance-free form. Ready to craft your own little garden?
4. Personalized Clay Name or Quote Magnets
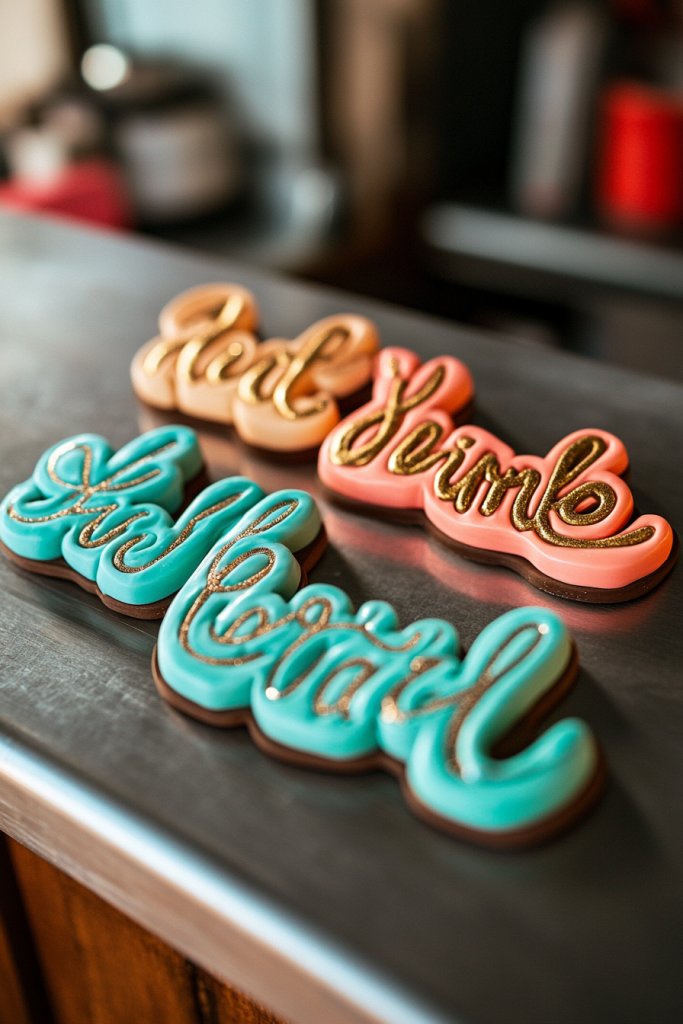
Looking for a way to add a personal touch to your space? Generic magnets can feel uninspired, and you want something that truly reflects your personality. Custom clay magnets with names or quotes turn ordinary surfaces into meaningful decor. They make great gifts and conversation starters too.
Imagine a set of clay magnets with beautifully crafted initials or inspiring words like ‘Dream,’ ‘Create,’ or ‘Smile.’ The letters are textured, perhaps with embossed patterns or hand-carved details, giving them a tactile appeal. You can choose colors that match your vibe—bold reds, soft pastels, or metallic accents. These magnets can be arranged as a word puzzle or as individual pieces on your fridge or magnetic board.
You can personalize with different font styles—script for elegance, block for modernity, or whimsical for fun. Incorporate small decorative elements like stars, hearts, or arrows to complement the words. For seasonal touches, use holiday-themed colors or add tiny clay icons related to celebrations. The size and shape of each magnet can vary, from tiny initials to larger word sculptures.
Begin by sketching your desired words or initials on paper, then transfer the design onto clay using carving tools. Carefully shape each letter or symbol, ensuring they are sturdy. Once dry, paint with your chosen hues and seal for durability. Attach strong magnets on the back with industrial glue, making sure they are centered for balance. Arrange your magnets creatively on any metal surface to showcase your personalized message.
Add textured backgrounds or embossed patterns within the letters for extra flair. Use metallic or glitter paints for a sparkling effect. Personalize further by pressing tiny charms or symbols into the clay before drying. Mix and match colors to emphasize specific words or themes. These little details make your magnets truly unique.
Custom clay magnets turn your words into art, making your space truly yours. They’re simple to create but have a big impact. Plus, they make thoughtful gifts for friends—personal, handmade, and charming. Ready to craft your own personalized magnet set?
5. Rustic Farmhouse Style Clay Magnet Farm Animals
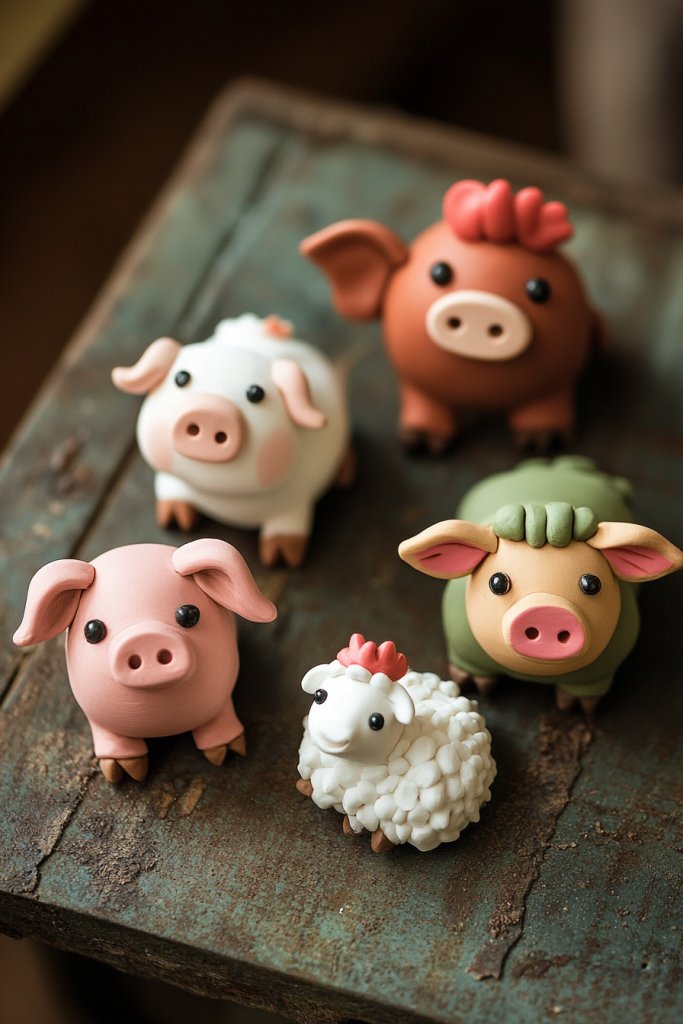
Craving a cozy, rustic vibe in your kitchen or office? Farm animal decor instantly adds charm and nostalgia, but real animals aren’t exactly practical. Clay offers a way to craft adorable farm animals that never need feeding or cleaning. They bring warmth and character to any space.
Visualize tiny clay pigs, chickens, cows, and sheep with textured bodies and painted details. The animals feature soft, earthy colors—creamy whites, browns, and blush pinks—highlighting their rustic appeal. Each piece has a handcrafted charm, with subtle imperfections that add to their authenticity. When grouped together on a wooden or metal surface, they create a playful, farmyard scene.
Select different farm animals based on your favorites or regional themes. Create a barnyard scene with a pig and cow, or a small farmyard with just chickens and sheep. For a more vintage look, incorporate distressed finishes or antiqued paint effects. Seasonal accents like tiny clay pumpkins or hay bales can enhance the farmstead feel.
Start with polymer or air-dry clay and sculpt your animals with detailed features—ears, snouts, hooves. Use textured tools or stamps to add fur or feather patterns. Once dried, paint with natural, muted colors and seal with matte varnish. Attach magnets to the back with strong glue, ensuring they are centered for stability. Arrange your farm animals on a metal surface for a charming display that’s full of personality.
Add tiny clay accessories—like a miniature barn or a cluster of hay—to create a mini farm scene. Emboss or carve names or dates onto some animals for a personal touch. Mix in rustic elements like twine or burlap textures in your background. These personalized details make the display more meaningful and fun.
Farm animal magnets give your space a warm, nostalgic feel that’s impossible to ignore. They’re perfect for country lovers or anyone wanting to add a playful touch. Making your own adds a sense of pride and customization that store-bought decor can’t match. Ready to bring the farm to your fridge?
6. Metallic Finish Clay Magnets with Gold or Silver Accents
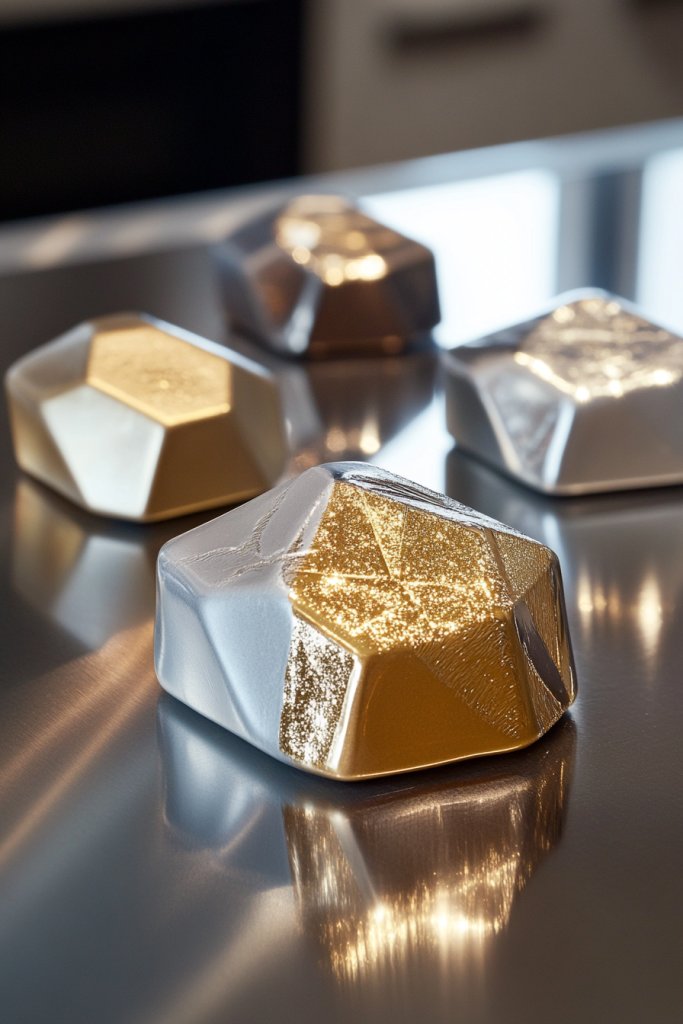
Looking to add a touch of elegance to your space without breaking the bank? Metallic accents instantly elevate simple decor into something luxe. Clay magnets with gold or silver finishes are perfect for achieving that high-end look while remaining budget-friendly and DIY-friendly. They add shimmer and sophistication to any magnetic surface.
Envision smooth clay magnets with reflective metallic surfaces—shiny gold, sleek silver, or brushed copper. The contrast between matte bases and shiny metallic overlays creates a striking visual effect. These magnets can be shaped into abstract forms, geometric patterns, or even personalized initials, all shimmering in the light. They stand out against dark or neutral backgrounds, adding glamour to your everyday routine.
Mix metallic finishes with matte or textured clay for a layered, modern aesthetic. Use different shapes—circles, hexagons, or custom designs—to create a curated, stylish collection. Incorporate metallic powders into the clay before shaping for a uniform shimmer. For seasonal themes, add hints of rose gold or bronze to match festive decor.
Shape your magnets from polymer clay, then cure or air-dry as required. Apply metallic paint or powders with a soft brush, focusing on even coverage. Use a sealing spray to lock in the metallic finish and prevent tarnishing. Attach powerful magnets with industrial glue on the back, ensuring they are aligned for balanced display. Arrange your metallic magnets on any metal surface to catch the eye.
Enhance the effect by combining different metallic shades within a single piece—like a silver base with gold accents. Emboss or carve subtle patterns or initials into the clay before finishing. Use layered techniques to create 3D metallic effects. These custom touches help your magnets look polished and professionally crafted.
Metallic clay magnets bring a chic, contemporary vibe that’s perfect for modern interiors. They show how simple techniques can produce stunning results. Plus, DIY metallic accents are a fun way to experiment with color and texture. Ready to add some shine to your collection?
7. Whimsical Cartoon Character Clay Magnets
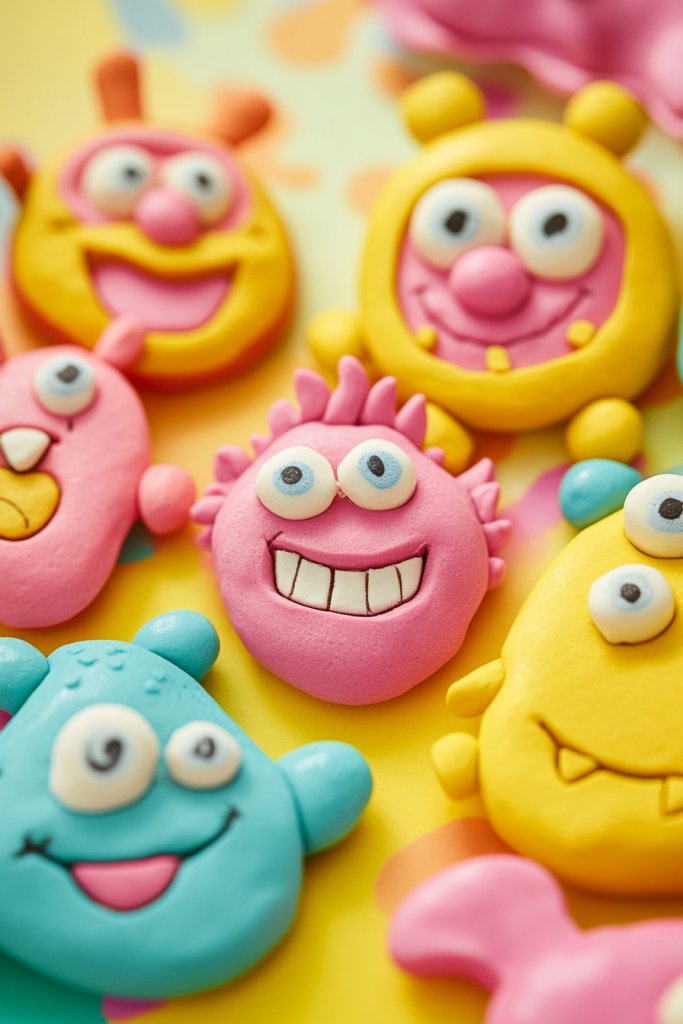
Want to inject some fun and personality into your space? Cartoon characters always bring a smile, but store-bought magnets can be generic or cheesy. Creating your own whimsical clay versions adds charm and uniqueness. They’re perfect for kids’ rooms, offices, or anyone young at heart.
Picture vibrant, playful clay characters—smiling animals, funny faces, or beloved icons—each with exaggerated features and bright colors. Think of a chubby bunny with floppy ears or a mischievous cat with big eyes. The textures are soft and inviting, with expressive eyes and cheerful smiles. These magnets can be clustered or spread out for a lively, animated display.
Create characters based on your favorite cartoons, or invent your own. Use bold colors and simple shapes for a cartoonish look, or add tiny accessories like hats or glasses for extra personality. For a themed display, pick characters from a favorite show or story. Incorporate glitter or metallic details for extra flair.
Start with air-dry or polymer clay and sculpt your characters with a focus on facial expressions and distinctive features. Use small tools or even toothpicks for fine details. Once dry, paint with vibrant acrylics and seal with a glossy finish. Attach magnets to the back with strong glue. Arrange your characters on your metal surface in a way that mimics their personalities or stories.
Add tiny accessories like bows, hats, or glasses to customize each character. Personalize with initials or tiny messages incorporated into the design. Use metallic or glitter paints to make certain features pop. You could also create a mini scene or story with multiple characters for a playful display.
Whimsical cartoon magnets turn a dull surface into a lively gallery of personality. They’re a delightful project that sparks creativity and humor. Making your own means you can craft exactly what makes you smile. Ready to bring your favorite characters to life?
8. Geometric Patterned Clay Magnet Tiles
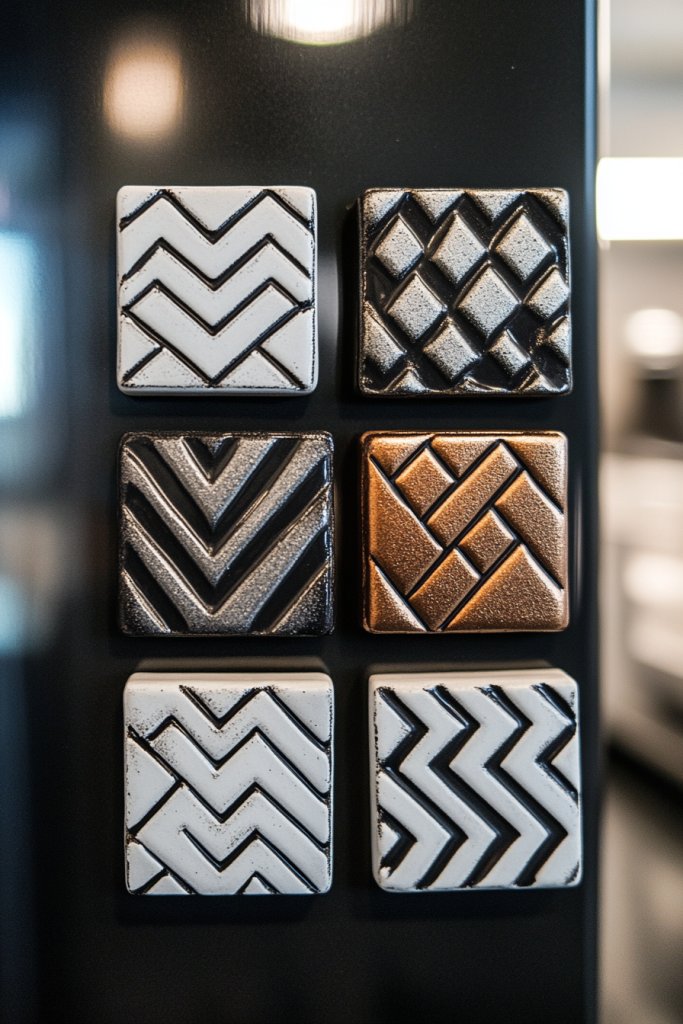
Looking for a modern, stylish way to organize your space? Geometric patterns are trending, but many decor items lack that sharp, clean look. Clay allows you to craft your own tiles with intricate patterns that turn everyday magnets into mini art pieces. These are perfect for adding structure and sophistication.
Visualize flat clay tiles carved with precise geometric patterns—triangles, hexagons, or concentric circles. The patterns can be embossed, engraved, or textured, creating visual depth. Use contrasting colors or metallic accents to highlight the designs. Arranged in grid-like formations, these magnets create a sleek, cohesive display that combines art and function.
Mix different shapes and patterns for an eclectic look or stick to a uniform style for a minimalist vibe. Play with color blocking—black and white, metallics, or bold primaries—to enhance the geometric theme. Incorporate textured surfaces like stippling or cross-hatching for added visual interest. Seasonal variations can include glitter or iridescent finishes.
Cut or mold your clay into tiles of uniform size and shape. Use carving tools or stamps to create patterns—think of stencils for precision. Once dry, paint or seal with metallic or matte finishes. Attach magnets securely on the back with industrial glue. Arrange on a metal surface in a pattern that emphasizes symmetry or asymmetry, depending on your style.
Embed tiny metallic or contrasting clay pieces into the patterns for extra dimension. Customize by adding small painted details or initials. Use different finishes—glossy, matte, or textured—to diversify the look. This approach creates a personalized, stylish magnetic display that doubles as art.
Geometric patterned magnets bring a contemporary edge to your decor, proving that simple shapes can be stunning. They encourage precision and craftsmanship, boosting your confidence in DIY projects. Ready to turn geometric art into a functional display?
9. Boho-Chic Clay Magnet Dreamcatchers or Feathers
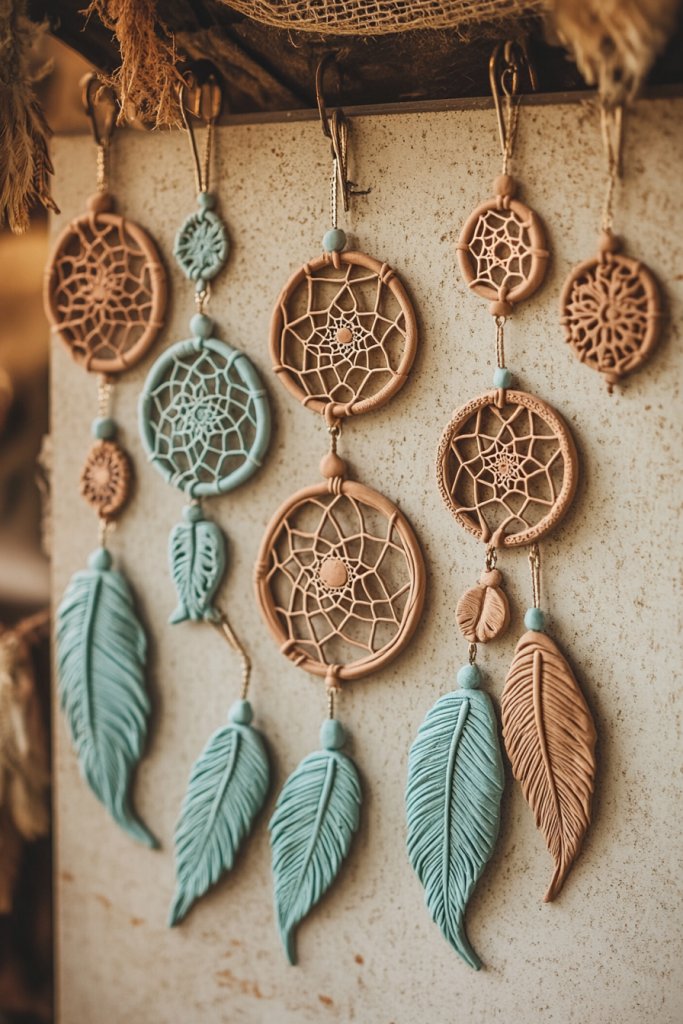
Craving a bohemian vibe that feels relaxed and free-spirited? Dreamcatchers and feathers are classic symbols, but real ones can be fragile or impractical. Clay offers a durable, customizable alternative that keeps the charm without the fragility. Perfect for adding a touch of whimsy and spirituality.
Imagine delicate clay dreamcatchers with intricate web patterns and tiny clay feathers hanging from the edges. Use earthy tones—terracotta, beige, soft pinks—or metallic accents to enhance their boho appeal. The feathers can be textured with carved lines or stippling, giving them a feathery feel. Hang or cluster these magnets for a whimsical, airy display that feels light and free.
Create different sizes and styles—simple hoops, elaborate webs, or minimalist feathers. Mix materials like textured clay with tassels or macrame for added dimension. For seasonal themes, incorporate small clay charms like stars or moons. Place on a decorative board or directly on metal surfaces for a relaxed, eclectic vibe.
Shape your clay into hoops and weave web patterns using fine tools or toothpicks. Sculpt feathers with detailed barbs and textured surfaces, then dry thoroughly. Paint in natural hues or metallic shades and seal with a matte or satin varnish. Glue strong magnets on the back, ensuring they are centered for balance. Arrange your dreamcatchers and feathers in a layered, freeform composition.
Add tiny clay beads or charms within the web for extra detail. Personalize by embedding initials or symbols into the web or feathers. Use different textures—smooth, stippled, or carved—to diversify the visual appeal. These touches make your boho magnets uniquely yours.
Boho dreamcatcher magnets evoke a sense of peace and creativity, perfect for inspiring a relaxed environment. They demonstrate how craftiness can turn simple shapes into meaningful decor. Ready to craft your own free-spirited collection?
10. Funky Retro Style Clay Magnet Shapes
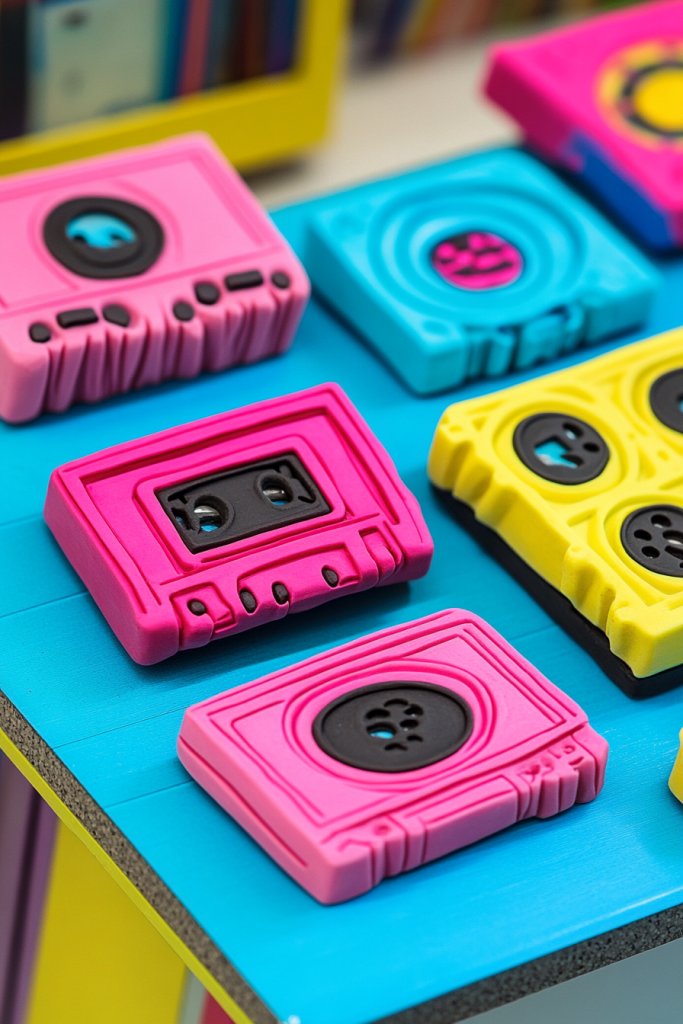
Feeling nostalgic for vintage vibes? Retro decor adds character and fun, but authentic items can be pricey or hard to find. Clay lets you recreate iconic shapes—cassette tapes, vinyl records, funky gadgets—with a playful twist. These magnets inject personality and nostalgia into your space.
Picture colorful clay magnets shaped like classic cassette tapes, with tiny labels and tape reels, or vinyl records with textured grooves. Bright, bold colors—neon pinks, electric blues, or sunshine yellows—make each piece pop. Quirky gadgets like old-school cameras or rotary phones add a quirky, fun element. They look great clustered or spaced out on a metallic surface, creating a cheerful, vintage-inspired display.
Mix and match different shapes for an eclectic look inspired by the 70s or 80s. Use metallic or glossy paints to enhance the retro feel. Incorporate textured surfaces or embossed details for realism. Seasonal variations might include glitter or holographic finishes to boost that nostalgic sparkle.
Shape your clay into iconic retro items, paying attention to details like tape reels or label text. Once dry, paint with vibrant colors and add tiny embellishments—like faux labels or metallic details. Seal with a clear varnish, then glue on powerful magnets on the back. Arrange your magnets to resemble a funky collage or a themed display.
Personalize by adding small painted labels or customizing colors to match your favorite era. Use metallic or holographic powders for extra shine. Emboss or carve small details into the clay for added texture. These personal touches make your magnets stand out with authentic personality.
Retro magnets let you relive good times while decorating with style. They’re a fun, creative way to celebrate vintage culture. Plus, making your own allows you to craft exactly what sparks your nostalgia. Ready to bring retro flair to your space?
11. Elegant Marble-Effect Clay Magnets
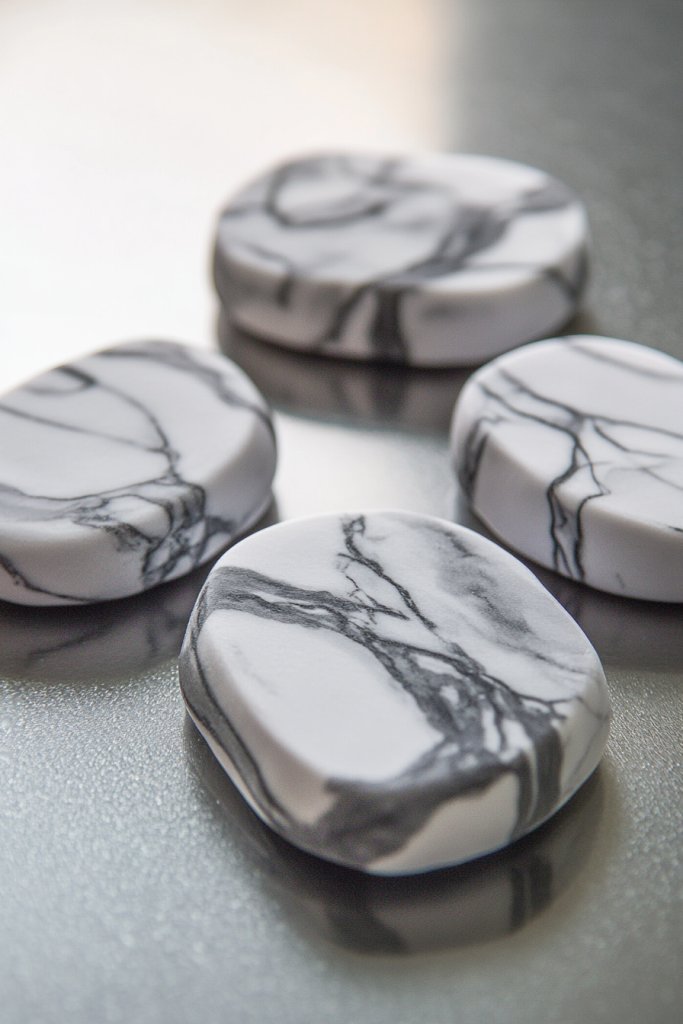
Looking to add a touch of luxury without the hefty price tag? Marble surfaces are timeless, but real marble can be costly and delicate. Clay offers a DIY way to mimic marble’s elegant veining and smooth finish. These magnets elevate your decor, making it look refined and high-end.
Visualize sleek clay magnets with swirling marble patterns—white with gray veins, deep black with gold streaks, or pastel marbles for a softer touch. The veining can be created using marbling techniques with paint or by mixing colored clays before shaping. The glossy surface reflects light beautifully, resembling real marble. They’re perfect for a sophisticated, understated display that complements minimalist or luxe interiors.
Use different shapes—rectangles, squares, or freeform blobs—to mimic marble tiles or slabs. Combine with metallic accents for a modern twist. Incorporate subtle color variations within the veins for a more natural look. Seasonal updates can include metallic or iridescent finishes for extra elegance.
Start with white or black clay as your base. Mix in colored clay or paint for veining—use a toothpick or fine brush to create swirling patterns. Once dry, apply a glossy sealant to mimic polished stone. Attach magnets with industrial glue on the back, ensuring they are firmly secured. Arrange on a surface that contrasts with the marble pattern for a striking effect.
Add gold or silver leaf accents within the veins for a luxe look. Customize by embedding initials or small symbols into the design before sealing. Use a variety of veining styles—thinner or thicker lines—to diversify your collection. These touches make your magnets both artistic and personal.
Marble-effect magnets blend sophistication with DIY charm, proving that luxury can be handmade. They’re a chic way to upgrade your space without the expense or fragility of real stone. Why not try this elegant technique and enjoy a touch of class?
12. Functional Magnetic Clip-Holder with Clay Accents
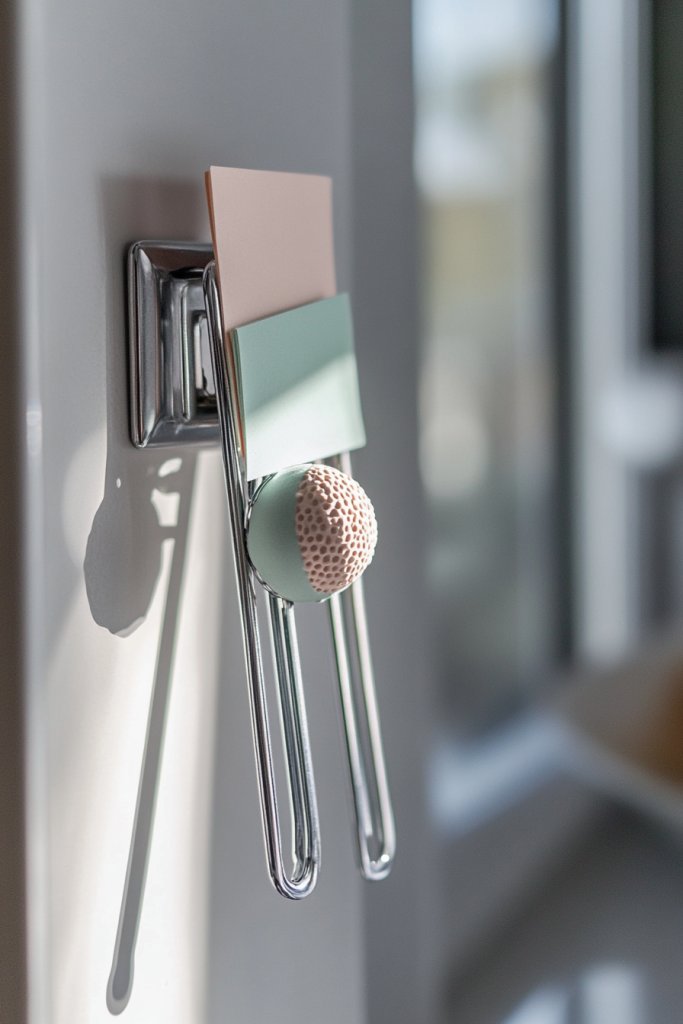
Tired of loose notes and scattered papers? You want a practical solution that’s also stylish. Magnetic clip-holders blend function with art, making organizing effortless and visually appealing. Clay accents add a handcrafted, personalized touch that elevates everyday essentials.
Picture a sturdy clay base with a built-in clip or hook, decorated with textured patterns or painted details. The clip can be shaped like a leaf, star, or geometric form, with a metallic or matte finish. The clay base is attached to a strong magnet, allowing you to hang notes, photos, or keys neatly in one spot. The combination of form and function creates a charming, organized display.
Create different clip shapes—simple clips, ornate clasps, or minimalist hooks—based on your decor style. Use contrasting colors or textured finishes to match your space. Seasonal variations could include holiday-themed clips or pastel tones for spring. Incorporate additional decorative elements like small beads or embossed patterns.
Shape your clay into a sturdy base and add a clip or hook component—either via mold or by attaching a separate piece. Once dried and painted, seal for durability. Attach a strong magnet to the back with industrial glue. Place your clip-holders on a magnetic surface, arranging them to keep your space tidy and stylish. Ensure the clips are secure and functional.
Personalize by embossing initials or small symbols into the clay base. Use metallic or glitter paints for a luxe effect. Mix textures—smooth base with rough or stippled clips—to add visual interest. These small details turn a simple organizer into a statement piece.
Magnetic clip-holders combine practicality with creativity, making organization fun and attractive. They’re a smart DIY project that adds value and style to your space. Why not craft a set that fits your needs and personality?
13. Seasonal and Holiday-Themed Clay Magnets
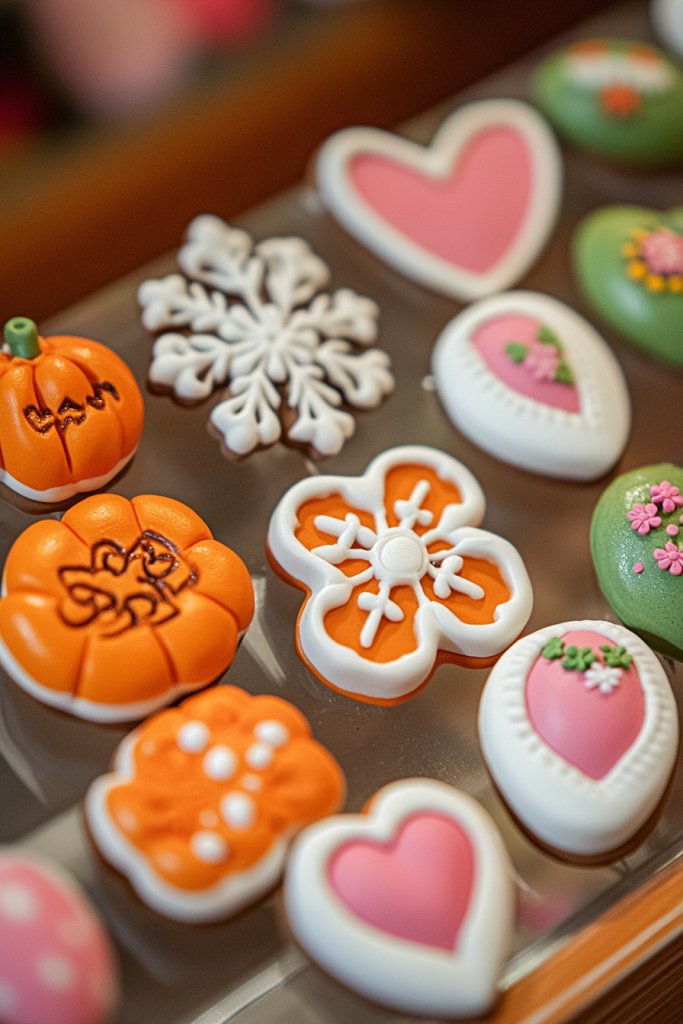
Want to keep your space festive all year round? Generic seasonal decor can feel uninspired or tacky. Custom clay magnets allow you to craft charming, themed ornaments that celebrate each holiday or season with a personal touch. They’re fun to make and even more fun to display.
Imagine tiny clay pumpkins with textured ridges for fall, delicate snowflakes with intricate cut-outs for winter, bright flowers for spring, and sun-shaped magnets for summer. The colors are vibrant—orange, white, pastel, or bold summer hues—and textures vary from smooth to embossed. These magnets can be arranged as a seasonal collage or scattered to create a festive atmosphere. They turn everyday surfaces into holiday cheer.
Use themed colors and embellishments—glitter for winter holidays, metallic accents for New Year, or bright pastels for Easter. Add tiny clay figurines or symbols like hearts, stars, or leaves to enhance each theme. For a more sophisticated look, incorporate metallic or iridescent finishes. These magnets can be updated each season for a fresh, festive look.
Shape small clay pieces into seasonal motifs—pumpkins, snowflakes, flowers, or eggs. Use tools for fine details and textures. Once dry, paint with appropriate colors and seal with a clear varnish. Glue a strong magnet on the back, ensuring it’s centered. Arrange your magnets on a magnetic board or fridge to evoke the spirit of each holiday or season, switching them out as needed.
Add tiny clay embellishments—glitter, metallic accents, or miniature charms—to heighten the festive feel. Personalize by embedding initials or small messages into each piece. Use contrasting colors or layered textures for visual depth. These touches make your seasonal magnets uniquely yours, adding warmth and cheer.
Seasonal magnets make decorating an ongoing, joyful process. They showcase your creativity and holiday spirit while keeping things personal. Crafting your own allows you to customize themes and colors, making each season special. Ready to celebrate with handmade cheer?
14. Industrial Style Clay Magnets with Raw Textures
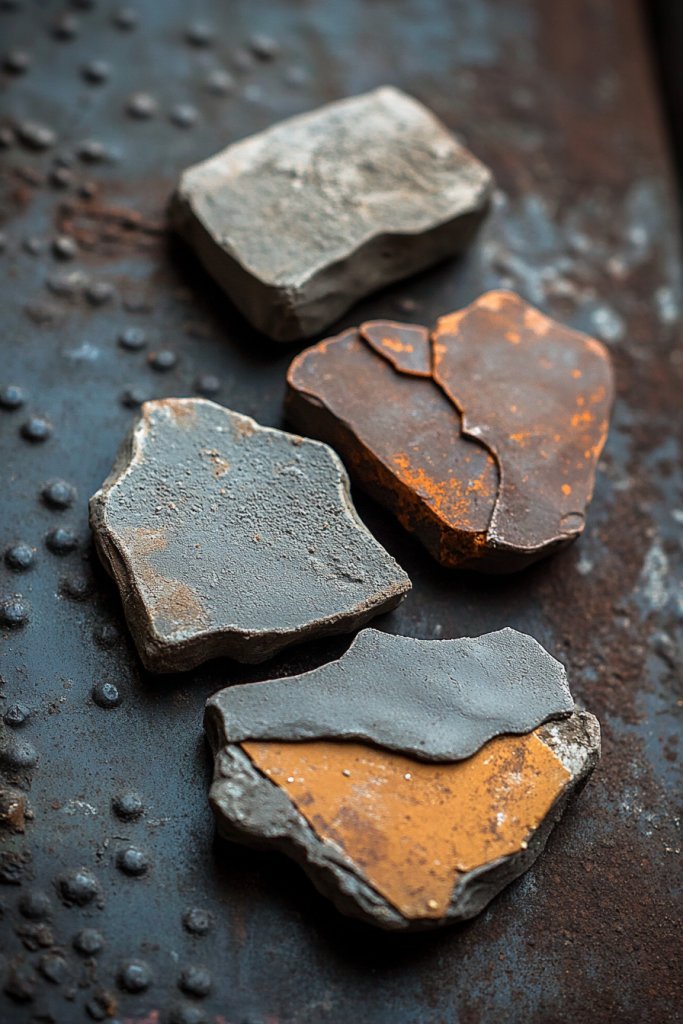
Craving a rugged, edgy look that breaks away from polished decor? Industrial style is all about raw textures and utilitarian charm. Clay can mimic these features with distressed finishes, rough surfaces, and metallic accents. These magnets add an urban, gritty vibe that’s perfect for modern lofts or man caves.
Visualize clay magnets with rough, textured surfaces resembling concrete or steel. Use tools to create stippling, scoring, or uneven edges that mimic raw materials. Metallic paints or finishes add a touch of shine, contrasting with the matte, textured base. Shapes can be geometric—rectangles, squares, or abstract forms—that look like miniature architectural elements. The overall effect is bold, industrial, and arresting.
Pair these magnets with dark, neutral backgrounds like charcoal or rust tones. Incorporate metallic hardware or exposed concrete textures for an authentic vibe. Use distressed paint or sandblasting techniques for extra roughness. Combine with other industrial elements like pipes, reclaimed wood, or metal shelving for a cohesive look.
Craft your clay into geometric or abstract shapes, then texture the surfaces with stippling or scoring tools. Use metallic paints or powders to add accents, and seal with a matte or textured varnish. Attach magnets with industrial-strength glue, ensuring they are firmly embedded. Arrange on a metal surface with a focus on raw, imperfect beauty—think uneven grids or clustered groupings. It’s all about embracing the rugged charm.
Add small metallic or hardware details—like miniature bolts or rivets—embedded into the clay. Use dark or metallic paints to emphasize the rustic look. Emboss or carve subtle patterns—like lines or grid textures—to enhance the raw feel. This approach makes each magnet feel like a piece of reclaimed or salvaged material.
Industrial clay magnets showcase how texture and finish can transform simple forms into statement decor. They’re perfect for creating a bold, masculine or minimalist aesthetic. Handcrafting these pieces boosts your confidence in working with textures and metallics. Ready to craft your own industrial-inspired collection?
15. Tiny Clay Magnet Vases for Miniature Bouquets
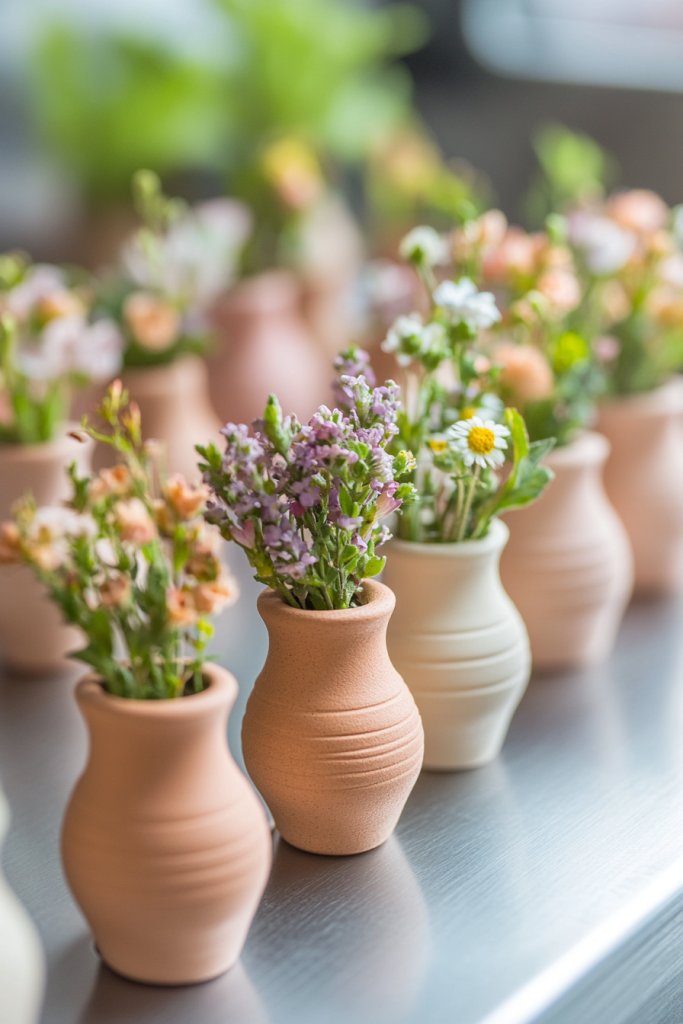
Want to add a fresh touch to your workspace or kitchen without clutter? Tiny vases or containers on magnets let you display miniature bouquets or decorative picks. They’re functional, cute, and customizable, giving you a new way to bring life into your decor. Plus, they’re surprisingly easy to make.
Imagine small clay vases with textured surfaces, painted in soft pastel or earthy tones. They hold tiny faux flowers, dried herbs, or decorative picks—think miniature roses, lavender, or sprigs of eucalyptus. The magnets keep the vessels securely attached to metal surfaces, creating a charming, garden-inspired display. Their size makes them unobtrusive yet delightful, adding a pop of color and freshness.
Create different shapes—rounded, square, or oval—to suit your aesthetic. Use textured finishes like stippling or carved lines for added interest. Seasonal variations could include small clay pumpkins, snowflakes, or holiday motifs paired with miniature festive bouquets. Mix and match colors for a lively display or keep it monochrome for a minimalist vibe.
Shape your clay into small vases or containers, adding textured details as desired. Once dried, paint with waterproof or sealing finishes—especially if you plan to use real flowers or water. Attach strong magnets on the back using industrial glue, ensuring they are centered and secure. Fill with faux or dried flowers, then place on your metal surface. Adjust spacing to create an appealing arrangement.
Add tiny clay charms or initials to your vases for a personalized touch. Use different textures—smooth, stippled, or carved—to diversify the look. Incorporate small decorative elements like faux leaves or beads. These details make each vase unique and special, perfect for gifting or personal use.
Tiny clay vases bring a fresh, handcrafted charm that brightens any space. They’re a simple project with a big visual payoff, ideal for decorating on a budget. Making your own lets you customize every detail, turning everyday objects into art. Ready to craft your miniature floral displays?
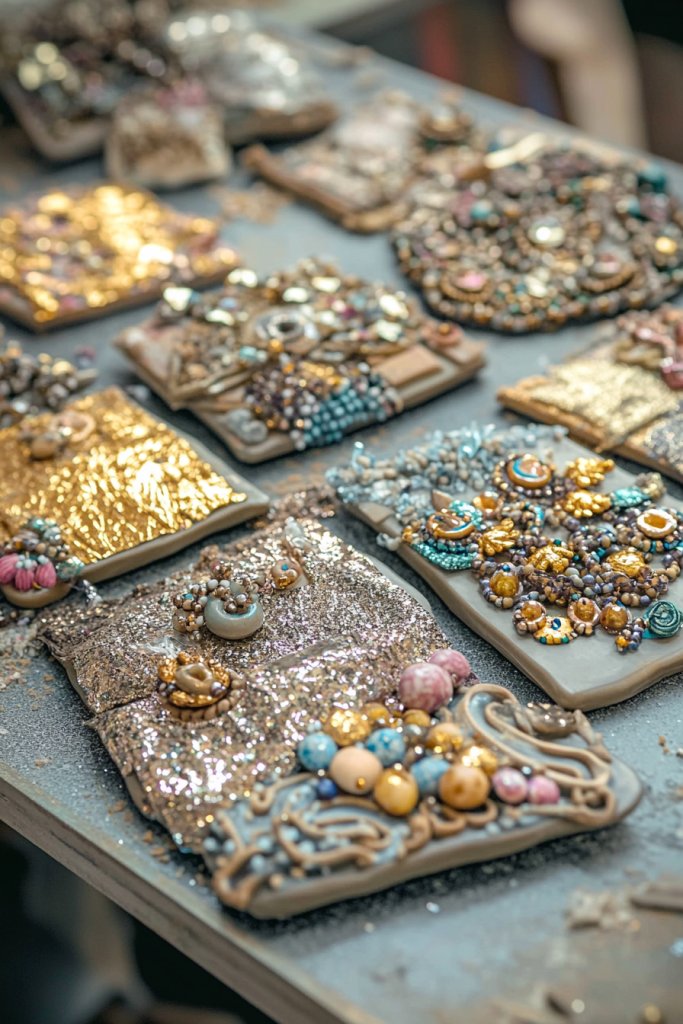
16. Artistic Mixed-Media Clay Magnet Collages
Looking to create something truly unique and textured? Flat magnets can feel a bit dull, but mixing media takes your art to the next level. Clay combined with beads, metallic foils, or fabric elements results in mini collages that serve as functional art. They’re perfect for showcasing your creativity in a bold, layered way.
Picture layered clay bases adorned with metallic foils, tiny beads, and textured fabrics. The combination creates depth and visual interest, with each element adding a different tactile quality. Use contrasting colors—metallics with matte clay, bright beads against subdued backgrounds—to emphasize the layered effect. These collages can be abstract or representational, turning a simple magnet into a mini masterpiece.
Experiment with different media—try embedding small shells, textured fabrics, or metallic leaf into the clay surface. Create themes—nature-inspired, geometric, or whimsical—by arranging materials thoughtfully. Use color schemes that match your decor or mood. Seasonal variations can include holiday-themed embellishments like tiny clay ornaments or metallic accents.
Start with a sturdy clay base, then add layers of different media—press beads into the surface, embed metallic foils, or glue small fabric pieces. Once everything dries, seal the entire piece with a glossy or matte varnish. Attach magnets with industrial glue, ensuring they are centered and strong enough to hold layered elements. Display on a metallic surface, arranging the collages for maximum impact.
Personalize by adding initials, symbols, or small painted details. Mix media colors for contrast or harmony, depending on your theme. Use metallic or iridescent powders for shimmering effects. These layered, textured magnets become meaningful art pieces that reflect your style.
Mixed-media magnets demonstrate that combining different textures and materials can produce stunning, one-of-a-kind decor. They’re a testament to creativity and patience, encouraging you to experiment. Making your own artful magnets boosts confidence and personal expression. Why not craft a collection that truly speaks to you?
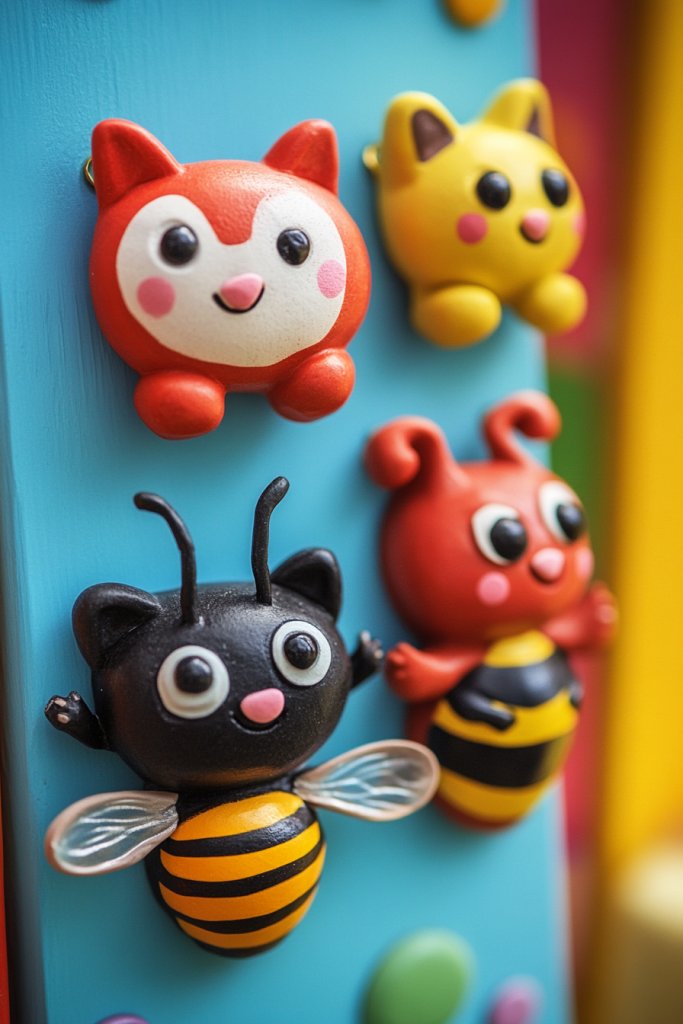
17. Playful Animal and Insect Clay Magnets
Want to make your space more fun and lively? Cute animal and insect magnets add a playful touch that’s sure to bring smiles. Store-bought options can be generic or uninspired, but handmade clay versions are charming and customizable. They’re perfect for kids’ rooms, kitchens, or anyone who loves a bit of whimsy.
Visualize tiny clay frogs, bees, ladybugs, or whales with bright colors and exaggerated features. The textures are soft and inviting, with tiny details like wings, antennae, or fins crafted with fine tools. The magnets can be grouped to create a mini animal zoo or insect scene. Their cheerful expressions and vibrant hues make any space feel lively and joyful.
Create a variety of animals or insects based on your favorite creatures or seasonal themes. Use bold, contrasting colors—like yellow and black for bees, red and black for ladybugs, or bright greens for frogs. Add tiny painted or textured details to enhance realism or cartoon-like charm. Mix in other small clay elements like flowers or leaves for a nature-inspired display.
Sculpt your animals with detailed features—eyes, wings, fins—using fine tools. Once dry, paint with vivid acrylics and seal with a glossy finish. Attach magnets with strong glue on the back, ensuring they are centered for stability. Arrange your magnets in playful clusters or a linear scene on your metal surface. Adjust spacing for visual balance.
Add tiny clay accessories—like a flower crown for a bee or a crown for a frog—to personalize your creatures. Emboss or carve tiny names or symbols into the clay for a special touch. Use glitter or metallic paints on certain features for extra sparkle. These fun magnets double as decor and conversation starters.
Animal magnets inject a sense of joy and playfulness into your environment. They prove that small, simple projects can make a big impact. Crafting your own adds a personal, heartfelt element that store-bought can’t match. Ready to create a zoo of adorable magnets?
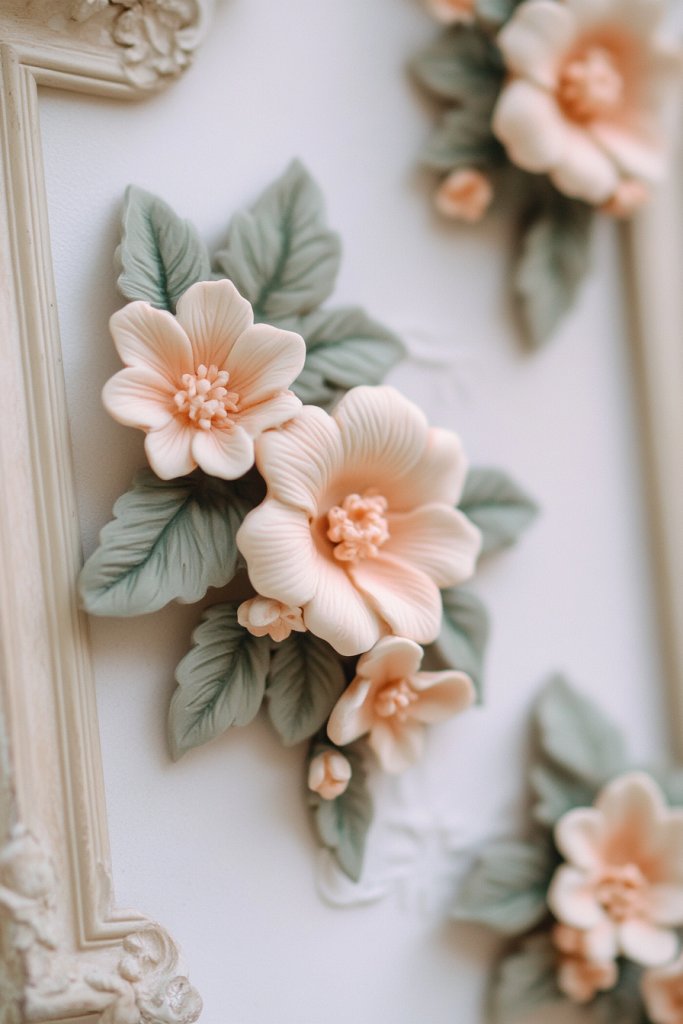
18. Elegant Floral Frame Clay Magnet Clusters
Looking for a delicate, sophisticated decor idea? Floral motifs have timeless appeal, but fresh flowers or elaborate art can be costly or fragile. Clay offers a way to craft miniature floral clusters that resemble artful bouquets or framed arrangements. They add a touch of elegance and nature’s serenity to any space.
Visualize tiny clay flowers—roses, peonies, wildflowers—arranged into small bouquets or framed clusters. Use soft, pastel colors or vibrant hues to suit your decor style. Each flower is detailed with layered petals and textured leaves, creating a realistic appearance. These clusters can be grouped as a miniature floral art piece or spread out for a delicate, airy display.
Create different flower types and color combinations—spring blooms, romantic reds, or tropical hues. Incorporate tiny clay frames or borders for a more structured look. Mix in textured leaves or small clay butterflies for added charm. Seasonal themes could include tiny holiday flowers or festive colors.
Shape your clay into small flowers and leaves, combining them into a bouquet or cluster. Use fine tools to add petal details or embossing for realism. Once dried, paint with complementary shades and seal with a matte or gloss varnish. Attach magnets to the back with strong glue, then arrange your clusters on a metallic surface, creating a mini floral display. Vary the sizes and grouping for visual interest.
Personalize by embedding initials or tiny messages within the flowers or leaves. Use different textures—smooth, stippled, or carved—to diversify each cluster. Add metallic or iridescent accents to certain flowers for a luxe effect. These handcrafted clusters become a charming, personal art piece.
Elegant floral magnets elevate your decor with subtle beauty and craftsmanship. They show how small, detailed work can produce stunning results. Making your own floral clusters boosts your confidence in working with fine details and textures. Why not create an inspiring arrangement?
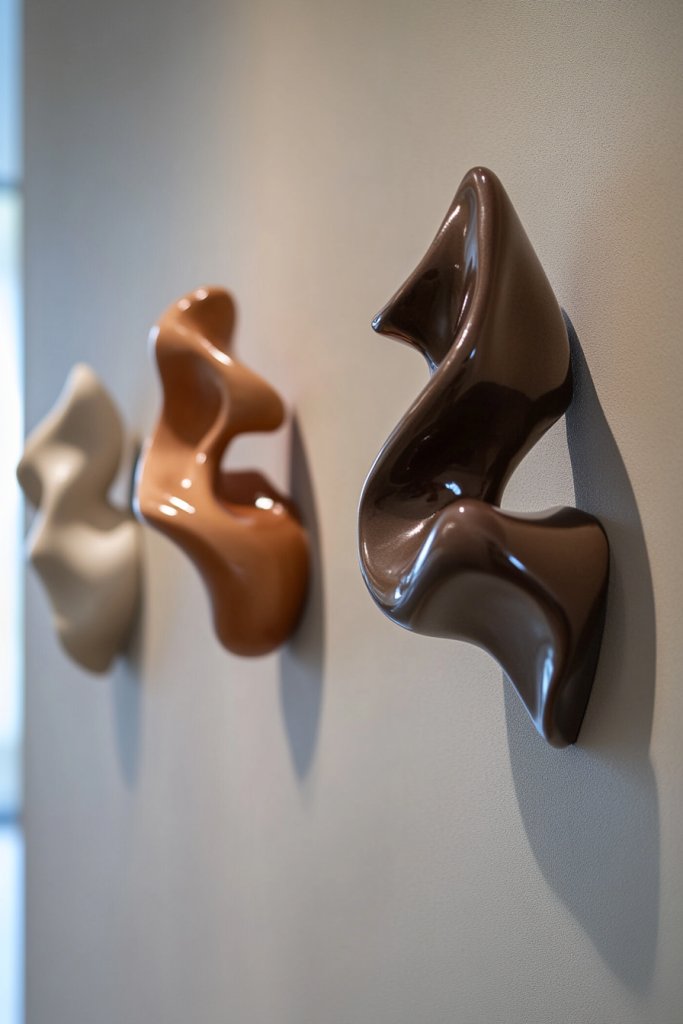
19. Modern Abstract Sculptural Clay Magnets
Craving a bold, contemporary look that’s truly eye-catching? Abstract shapes and sculptural forms turn simple magnets into statement art pieces. Clay allows you to experiment with freeform, fluid designs that challenge traditional decor norms. These magnets are perfect for adding a modern edge to any space.
Imagine flowing, organic shapes with smooth curves and asymmetrical forms—think of liquid metal or molten glass frozen in time. Use bright, contrasting colors or monochrome palettes to emphasize the sculptural quality. The surfaces can be glossy, matte, or textured, depending on your aesthetic. These magnets look like tiny sculptures that add movement and depth to your display.
Create a series of shapes inspired by nature, architecture, or pure abstraction—waves, spirals, or amorphous blobs. Play with scale—some large, some small—to create a dynamic arrangement. Incorporate metallic or iridescent finishes for extra visual punch. Use layered or cut-out techniques for complex, multi-dimensional effects.
Shape your clay into abstract forms using freehand techniques or molds. Once dry, sand and refine the surfaces, then paint or finish with gloss or matte coatings. Embellish with metallic powders or textured overlays for added interest. Attach magnets securely on the back, making sure they are flush and balanced. Arrange on a metal surface in a flowing, organic pattern that draws the eye.
Add small details—like embedded metallic shards or textured patterns—to enhance the sculptural effect. Personalize with initials or symbols carved into the forms before finishing. Use a variety of finishes—gloss, matte, textured—to diversify your collection. These custom abstract magnets serve as both decor and conversation starters.
Modern abstract magnets prove that art doesn’t have to be traditional to be beautiful. They encourage experimentation with shapes and textures, boosting your confidence in sculptural work. They’re perfect for creating a contemporary, stylish vibe that’s uniquely yours. Ready to turn clay into contemporary art?
Conclusion
From playful shapes to intricate details, these clay magnet ideas showcase the endless creativity you can bring to your home decor. Don’t hesitate to try out these ideas and make your own unique pieces that reflect your style. Get creative, have fun, and turn everyday magnets into miniature works of art that brighten your day!
Leave a Reply