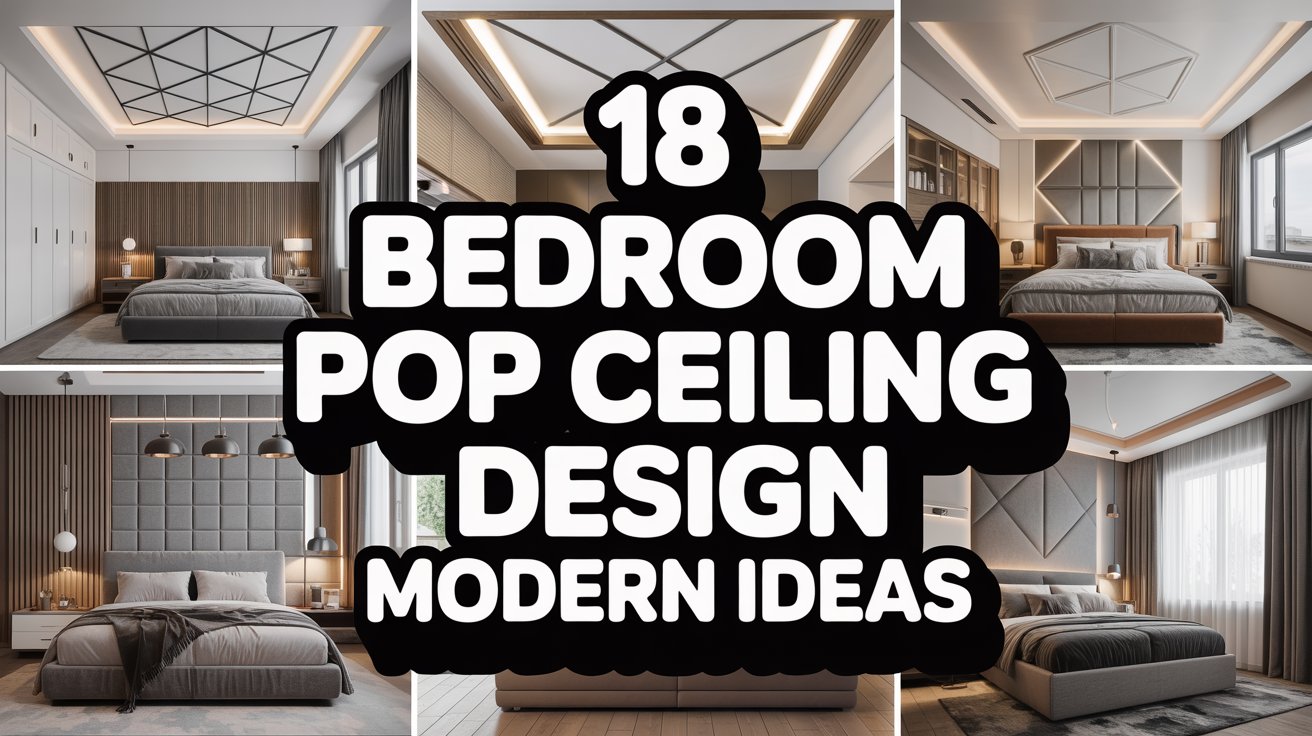
18 Bedroom Pop Ceiling Design Modern Ideas for Unique Flair
I have been, or can be if you click on a link and make a purchase, compensated via a cash payment, gift, or something else of value for writing this post. As an Amazon Associate, I earn from qualifying purchases. Please read my full Affiliate Disclosure for more information.
Looking to make your bedroom truly stand out? Modern pop ceiling designs are taking interior decor by storm, offering a fresh and playful way to elevate your space. Their popularity lies in the perfect blend of creativity and simplicity, allowing homeowners to add that unique flair without overwhelming the room. Whether it’s bold colors, innovative lighting, or textured finishes, these ideas bring personality and charm to your sanctuary.
In this article, you’ll discover a variety of inspiring modern pop ceiling design ideas that can transform your bedroom into a stylish retreat. From subtle accents to statement-making features, there’s something for every aesthetic and budget. Get ready to explore creative ways to refresh your ceiling and turn your bedroom into a personalized masterpiece!
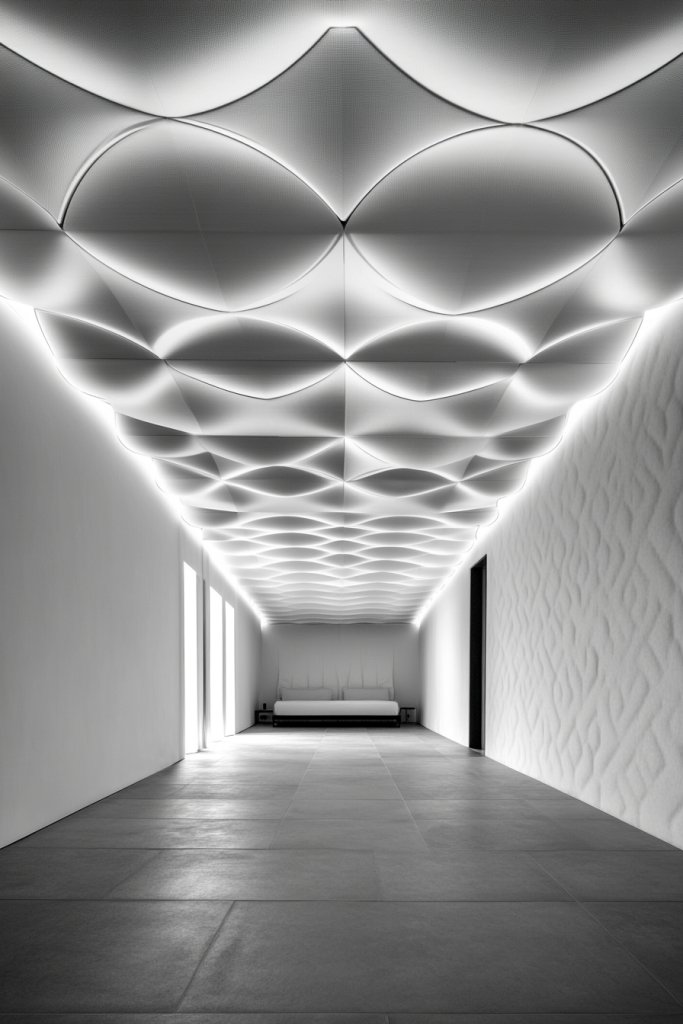
1. Geometric Acoustic Panel Ceilings with Bold Colors
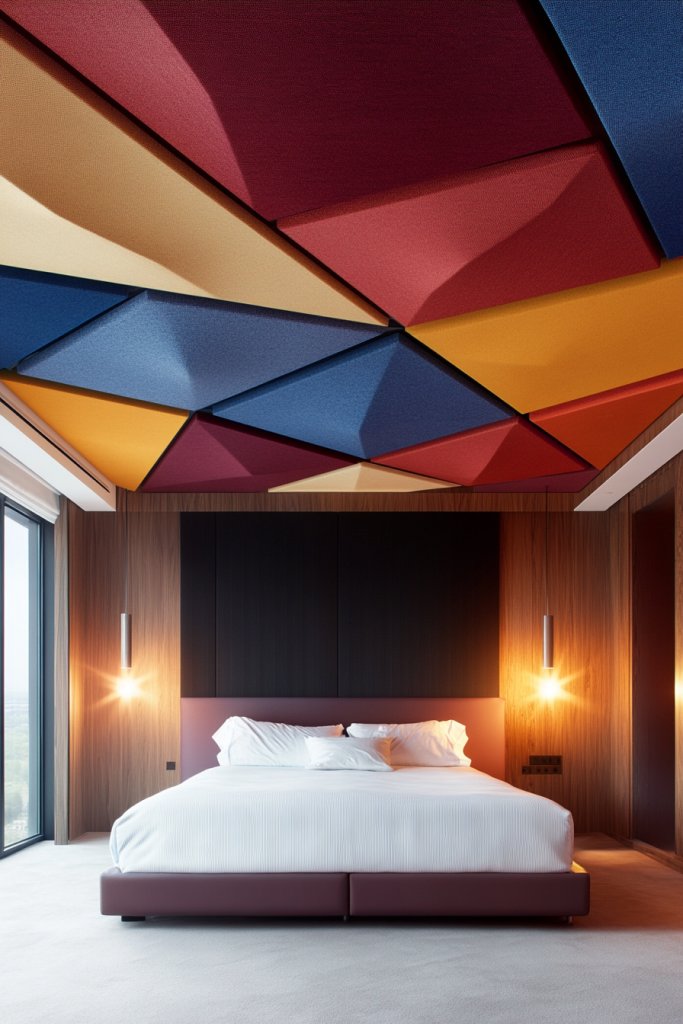
Ever feel like your bedroom ceiling is just a boring, blank space that’s crying out for personality? Maybe you’re tired of plain white or beige and want a way to inject some energy. Geometric acoustic panels in vibrant hues are the perfect solution to add visual interest while improving sound quality. It’s a win-win for anyone craving a more dynamic, stylish space.
Recommended Products to replicate this idea
| # | Preview | Product | |
|---|---|---|---|
| 1 |

|
8 Pack Large Acoustic Panels Sound Absorbing with Self-Adhesive, 47.2”*23.6”*0.36” High... | Check Latest Price |
| # | Preview | Product | |
|---|---|---|---|
| 1 |

|
KANTUTOE LED Lights for TV, 16.4ft LED Lights for 45-75 Inch TVs, RGB TV Backlight Behind, Music... | Check Latest Price |
Imagine a ceiling covered in bold, angular panels in shades of electric blue, fiery red, or neon green. The panels create a layered, three-dimensional effect that catches the eye immediately. The textured surfaces reflect light differently, giving the room depth and personality. Plus, the sharp geometric shapes add a modern, edgy vibe that’s impossible to ignore.
This concept works with almost any color scheme—think monochrome palettes with a pop of color or a rainbow of shades for a playful look. You can opt for subtle tones in muted shades or go all out with high-contrast combinations. For smaller rooms, choose smaller geometric shapes to avoid overwhelming the space. Seasonal accents, like metallic or matte finishes, also help tailor the look to your mood.
Start by selecting acoustic panels made from lightweight foam or fabric-wrapped materials. Measure your ceiling carefully to cut panels to size if needed. Use strong adhesive or mounting hardware designed for your ceiling type to secure each piece. Arrange the panels in a pattern that suits your style—grid, random, or symmetrical. For added impact, consider integrating LED backlighting behind some panels for a glow effect.
You can customize the colors to match your room’s color palette or create a gradient effect for more visual flow. Incorporate different shapes—triangles, hexagons, or irregular polygons—for a more eclectic look. For added texture, choose panels with different finishes like matte, gloss, or metallic. Mix and match sizes to create a layered, textured ceiling design that feels uniquely yours.
This bold ceiling idea transforms your space into a modern art piece that’s both functional and stylish. It’s a fun way to showcase your personality and break away from conventional designs. Remember, with a little planning and creativity, you can craft a ceiling that becomes the room’s focal point and a source of pride.
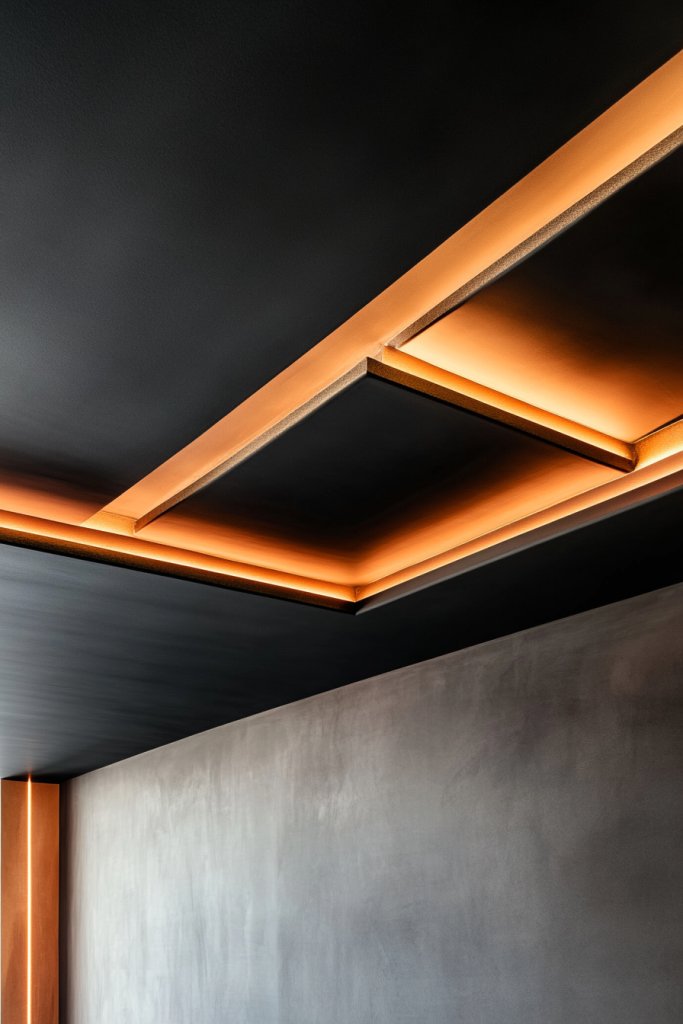
2. Metallic Finish Drop Ceilings with LED Backlighting
Feeling like your bedroom’s ceiling needs a sleek, contemporary upgrade? Maybe you want something that looks high-end but isn’t overly complicated. Metallic finish drop ceilings with hidden LED backlighting offer that luxurious, modern vibe without the hefty price tag. It’s perfect for those who crave a chic, futuristic feel.
Picture a smooth, reflective metallic surface in shades of silver, gold, or bronze that catches every bit of light. Hidden LED strips run along the edges or within recessed channels, casting a soft, ambient glow. The reflective surface amplifies the lighting, making the room feel brighter and more spacious. It’s like having a glowing, metallic sky right above your head.
Choose a finish that complements your style—matte, brushed, or glossy metallics work well. For a warmer vibe, opt for gold or bronze tones; for a cooler, sleek look, silver or chrome is ideal. You can also incorporate subtle textured patterns or keep it minimal for a clean, modern appearance. Seasonal lighting effects, such as color-changing LEDs, can further customize the ambiance.
Begin by installing a sturdy grid system that supports the weight of the metallic panels. Use panels made from lightweight composite or aluminum with a metallic finish. Attach LED strip lights along the perimeter or within recessed channels using compatible connectors and controllers. Secure the panels into the grid with clips or fasteners designed for smooth installation. Finish with dimmer switches or remote controls for adjustable lighting effects. Ensure electrical wiring complies with safety standards.
Enhance the effect by adding color-changing LED options for different moods or parties. Incorporate textured metallic panels with embossed patterns for extra visual interest. For a more personalized touch, consider integrating smart lighting controls or synchronized sound systems. Keep the design sleek and uncluttered to preserve the modern, high-end aesthetic.
This ceiling design elevates your room’s style instantly, making it look like a designer space. It’s a statement piece that combines futuristic tech with elegant materials. With a bit of DIY skills, you can achieve a stunning, luminous ceiling that impresses everyone and boosts your confidence in home upgrades.
3. Wooden Slat Ceilings with Continuous Grain Patterns

Ever wish your bedroom felt warmer and more inviting? Maybe your current ceiling is plain and uninspiring. Wooden slat ceilings with continuous grain patterns can add that cozy, natural touch while maintaining a modern vibe. It’s a simple way to bring nature inside without sacrificing style.
Recommended Products to replicate this idea
| # | Preview | Product | |
|---|---|---|---|
| 1 |

|
Art3d 4-Piece Wood Slat Acoustic Panels for Stylish Decor and Noise Reduction, 3D Textured Panel for... | Check Latest Price |
| # | Preview | Product | |
|---|---|---|---|
| 1 |

|
KSIPZE 100ft Led Strip Lights RGB Music Sync Color Changing Led Lights with Smart App Control Remote... | Check Latest Price |
Imagine long, polished wooden slats running parallel across the ceiling, their natural grain visible and flowing seamlessly. The warm hues of the wood contrast beautifully with cooler wall tones, creating a balanced, organic look. Soft lighting installed between the slats highlights the grain and adds a subtle glow. It’s a calming, earthy aesthetic that instantly makes the space feel more grounded.
Opt for light-colored woods like oak or maple for a fresh, Scandinavian feel. Darker woods such as walnut or mahogany create a richer, more luxurious atmosphere. You can run the slats horizontally or in a herringbone pattern for visual interest. For seasonal variations, add warm textiles during winter or lighter fabrics for summer to complement the natural wood tone.
Start by measuring your ceiling carefully and selecting the wood slats—prefinished or raw for staining. Use mounting channels or clips to attach the slats securely to the ceiling joists or a subframe. Leave small gaps between the slats to allow for expansion and to enhance the design. Install LED strip lighting between or behind the slats for ambient illumination. Finish with a protective sealant or oil to preserve the wood’s natural beauty.
You can stain or paint the slats in subtle shades to match your decor or create a bold contrast. Incorporate decorative elements like carved details or inlays for a personalized touch. Complement the natural wood with textiles like woven rugs or soft bedding to complete the cozy vibe. Use different wood species or finishes in sections for an eclectic, bespoke look.
Wooden slat ceilings are a timeless trend that never really goes out of style. They add warmth and texture, making your room feel more like a retreat. Plus, with DIY-friendly options, you can craft a stunning ceiling that reflects your personal taste and elevates your space effortlessly.
4. Painted Mural Accent Ceiling with Abstract Art
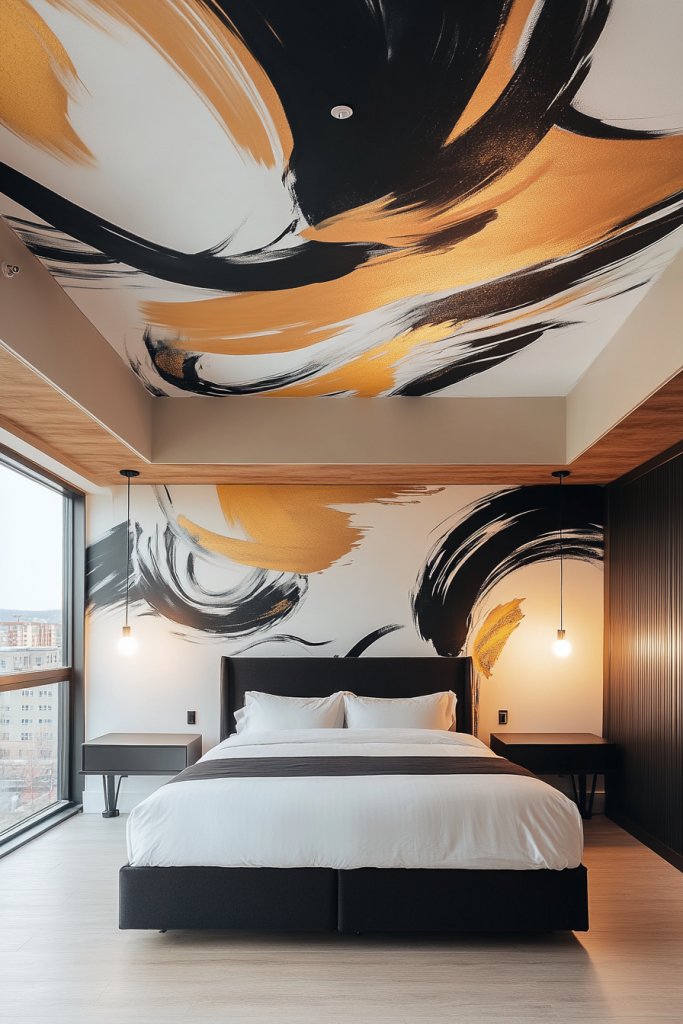
Tired of standard ceiling designs that lack personality? Maybe you want something truly unique—art that makes a statement from above. A painted mural with abstract art on your ceiling transforms it into a captivating focal point. It’s a bold move that showcases your personality and creativity.
Recommended Products to replicate this idea
| # | Preview | Product | |
|---|---|---|---|
| 1 |

|
Zinnser 03688 Covers Up Stain Sealing Ceiling Paint, White | Check Latest Price |
| # | Preview | Product | |
|---|---|---|---|
| 1 |

|
Paint Brushes Set of 24 Pieces Wooden Handles Brushes with Canvas Brush Case, Professional for Oil,... | Check Latest Price |
Visualize a ceiling splashed with swirling colors, organic shapes, and dynamic strokes that evoke emotion and movement. The mural can be a large, sweeping abstract design or a series of smaller, interconnected patterns. Bright, contrasting colors energize the room, while softer tones create a calming atmosphere. It’s like having a contemporary art piece right overhead that sparks conversation.
Choose a color palette that complements your room’s decor—vibrant hues for energetic spaces or muted tones for a sophisticated vibe. The mural can span the entire ceiling or be concentrated in a specific area for a more subtle effect. Incorporate metallic or pearl accents in the paint for added texture and shimmer. Seasonal themes or changing color schemes can refresh the look over time.
Start by sketching your design or hiring a talented mural artist. Use high-quality, ceiling-safe paints and brushes suitable for large surfaces. Prepare the ceiling by cleaning and priming it to ensure paint adhesion. Use painter’s tape and stencils for clean edges and shapes. Apply multiple thin layers for even color and allow ample drying time. Seal with a clear matte or gloss finish to protect the mural.
Add metallic or iridescent paints for extra depth and shimmer. Incorporate subtle textures by blending different paint techniques, like sponging or splattering. Personalize with meaningful symbols or motifs within the abstract design. Complement the mural with minimalist decor and lighting that highlights the artwork without stealing focus.
A mural ceiling can turn your bedroom into a personal gallery, showcasing your artistic side. It’s a conversation starter and a reflection of your creative spirit. With patience and a steady hand, you can create a stunning piece that elevates your entire space and boosts your confidence in DIY projects.
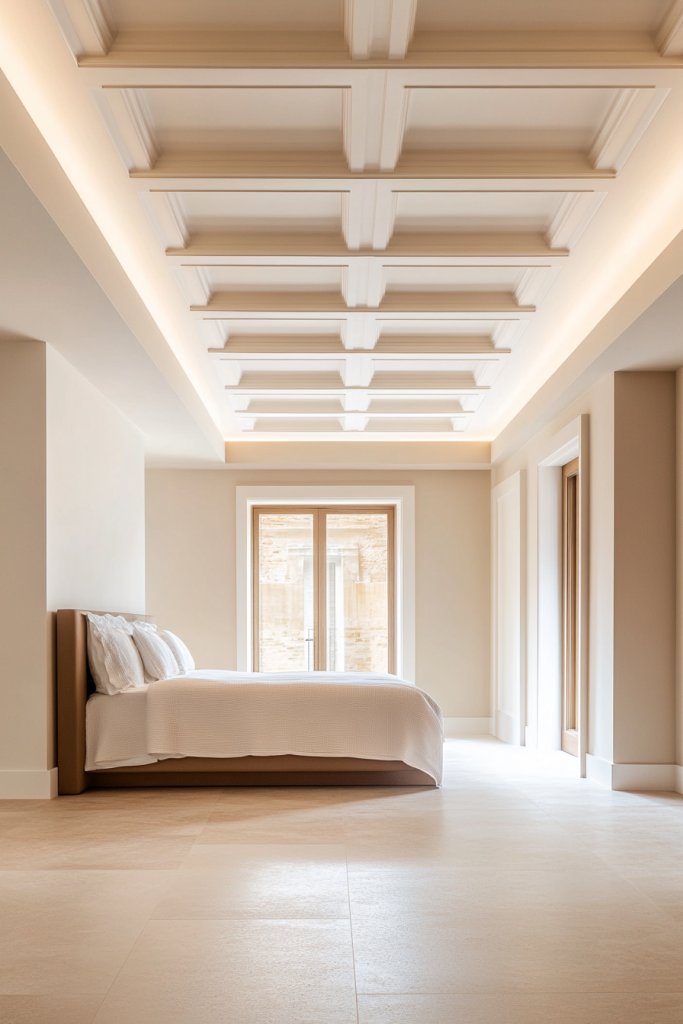
5. Coffered Ceiling with Minimalist Frame Detailing
Does your bedroom feel a bit flat or uninteresting from above? You might be craving a subtle architectural feature that adds depth without clutter. A coffered ceiling with minimalist framing introduces a refined, sophisticated look that enhances the room’s overall design. It’s like giving your ceiling a gentle upgrade that says ‘classy’.
Recommended Products to replicate this idea
| # | Preview | Product | |
|---|---|---|---|
| 1 |

|
Amico 12 Pack 6 Inch 5CCT Ultra-Thin LED Recessed Ceiling Light with Junction Box, 1050LM... | Check Latest Price |
| # | Preview | Product | |
|---|---|---|---|
| 1 |

|
Art3d Ceiling Crown Molding Trim 10-Pack 47Ft, High Impact Polystyrene Decorative Ceiling Moulding -... | Check Latest Price |
Picture a ceiling divided into clean, rectangular sections framed by thin, unobtrusive moldings. The frames are painted in a contrasting or matching color to create a subtle grid pattern. Recessed lights within each section cast soft, even illumination, emphasizing the geometric structure. The overall effect is a modern take on classic architecture, adding depth and interest without overwhelming the space.
Opt for sleek, slim frames in matte black, white, or even metallic finishes for a contemporary look. You can vary the depth of the coffers—shallow for a minimal feel or deep for a more pronounced architectural statement. Incorporate subtle lighting details or concealed cove lighting within the frames for a soft glow. This design adapts well to both small and large rooms, providing structure and elegance.
Begin by measuring and marking the layout of the coffers on your ceiling. Use a level and straightedge to ensure precision. Install thin molding or trim strips using adhesive or nails, depending on your ceiling material. For lighting, embed LED strips or spotlights within the frames before sealing them. Finish by painting or staining the frames to match your decor. Keep fixtures discreet for a minimalist effect.
Personalize with different finishes—matte, gloss, or metallic—to match your aesthetic. You can incorporate textured wall paint or wallpaper within the coffers for added visual interest. Consider using contrasting colors for the frames and the ceiling to emphasize the geometric pattern. For a softer look, add fabric panels or acoustic tiles within each section.
A coffered ceiling instantly elevates the perceived value of your bedroom. It’s a subtle, architectural detail that exudes modern elegance. With careful planning, you can create a space that feels both timeless and fresh, boosting your confidence in tackling home improvements.
6. PVC or Foam Ceiling Panels with Modern 3D Textures
Tired of dull, flat ceilings that do nothing for your decor? Want an easy way to add depth and modern flair without a major renovation? PVC or foam ceiling panels with 3D textures are your new best friends. They’re lightweight, affordable, and instantly give your ceiling a fresh, contemporary look.
Recommended Products to replicate this idea
| # | Preview | Product | |
|---|---|---|---|
| 1 |

|
Art3d Drop Ceiling Tiles, 24x48in. White (12-Pack), Polyvinyl Chloride (PVC), Glue Down | Check Latest Price |
| # | Preview | Product | |
|---|---|---|---|
| 1 |

|
Loctite Power Grab Express Heavy Duty Construction Adhesive, 9 fl oz Cartridge, 1 Pack - Versatile... | Check Latest Price |
Visualize panels with geometric patterns—hexagons, waves, or organic shapes—that pop out in relief. The textured surfaces catch shadows and light, creating a dynamic visual effect. Choose panels in neutral tones for understated elegance or bold colors for a statement. The tactile quality invites touch and adds an extra layer of sophistication.
Combine different textures and patterns for a customized look. For a subtle effect, opt for panels with fine, linear textures; for more drama, go for bold, 3D organic shapes. The panels can be installed as a full ceiling or as accents over specific areas. Seasonal color updates or layering with textiles can change the vibe effortlessly.
Begin by measuring your ceiling and choosing panels that fit your space. Prepare the surface by cleaning and priming if necessary. Use adhesive designed for PVC or foam and carefully align each panel in your chosen pattern. For added durability, secure panels with lightweight mechanical fasteners. Finish by sealing joints and edges for a seamless look. Optional lighting can be integrated behind panels for extra impact.
Select panels in different shades or textures to create contrast or visual zones. Incorporate metallic or gloss finishes for a high-end feel. You could also add custom cut-outs or motifs for a personalized touch. Pair with modern furniture and accessories to complete the sleek, textured aesthetic. Maintenance is simple—just wipe with a damp cloth.
This approach is perfect for DIY enthusiasts and design lovers alike. It’s a quick, cost-effective way to elevate your space with minimal disruption. With a little patience, you’ll have a ceiling that feels fresh, modern, and uniquely yours, giving you confidence in your home styling skills.
7. Bold Painted Ceiling with Contrasting Colors
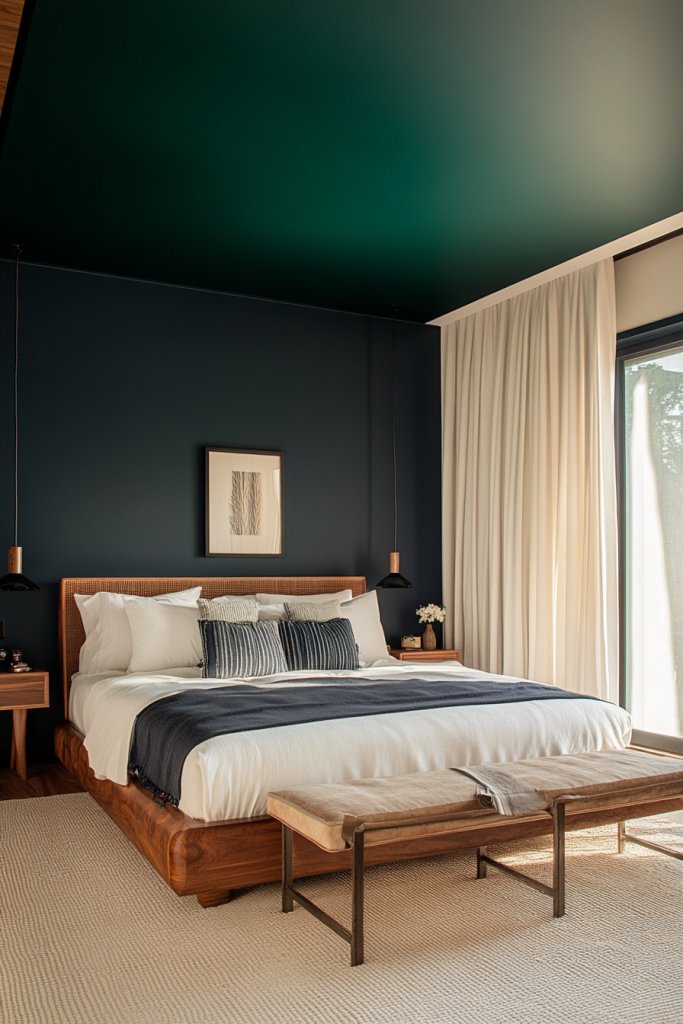
Does your bedroom ceiling fade into the background, barely noticeable? Maybe you’re craving a statement piece that commands attention from above. A boldly painted ceiling in contrasting colors can turn the entire room into a vibrant, immersive experience. It’s a daring move but one that pays off big time.
Visualize a deep navy or emerald green ceiling that instantly draws the eye. The rich color creates a cocooning effect, making the space feel cozy yet dramatic. When paired with neutral walls and furnishings, the ceiling becomes a striking focal point. The contrast intensifies the room’s depth and adds a modern, sophisticated edge.
Choose colors that reflect your personality—bright reds or yellows for energy, muted pastels for calm. You can paint the entire ceiling or create a border or geometric pattern in a contrasting hue. Seasonal updates might include adding metallic or shimmer paints for festive or night-time effects. Keep décor minimal to let the ceiling shine.
Prepare the ceiling surface by cleaning and priming to ensure even paint coverage. Use painter’s tape for sharp lines if opting for patterns. Apply multiple thin coats for vibrant, even color, allowing each coat to dry thoroughly. For a seamless look, use high-quality brushes or rollers suited for the paint type. Consider sealing with a matte or semi-gloss finish for added durability.
Add subtle metallic or pearl accents to enhance richness. Experiment with color blocking or stripes to create a dynamic effect. Match the bold ceiling with minimalist or monochrome room decor to prevent visual overload. Incorporate personalized motifs or symbols if you want a more bespoke look.
A bold ceiling is an instant upgrade that exudes confidence and style. It’s a simple yet powerful way to showcase your daring side. With some patience and a steady hand, you’ll create a space that feels fresh, modern, and totally unique—go ahead, make that ceiling pop!
8. Textured Plaster or Stucco Finish with Subtle Colors
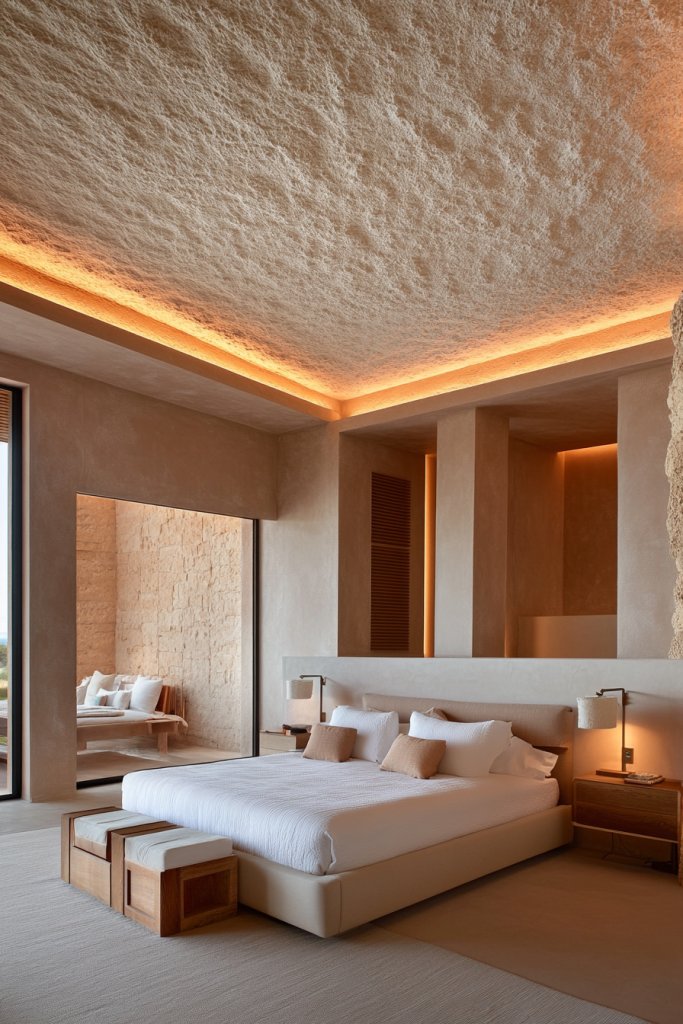
Do flat, smooth ceilings bore you? Maybe you want to add a touch of sophistication and tactile interest without overwhelming the room. A textured plaster or stucco finish with subtle colors offers a refined, elegant look that’s both timeless and modern. It’s a subtle way to elevate your bedroom’s style.
Recommended Products to replicate this idea
| # | Preview | Product | |
|---|---|---|---|
| 1 |

|
Art3d 12-Pack Stucco Texture Drop Ceiling Tiles 2x2 FT - Fire-Rated, Waterproof, Reusable - Premium... | Check Latest Price |
| # | Preview | Product | |
|---|---|---|---|
| 1 |

|
Homax 41072024181 Roll On Ceiling Texture, Popcorn White, 2 gal | Check Latest Price |
Picture a ceiling with a soft, tactile surface, featuring gentle patterns or a mottled finish in neutral shades like beige, taupe, or light gray. The textured surface catches light at different angles, creating shadows and depth. It adds warmth and richness that flat paint simply can’t achieve. The subtle color palette keeps the space feeling calm and cohesive.
Choose between various textures—knockdown, splatter, or smooth stucco—for different visual effects. Light, neutral colors make the ceiling feel airy, while darker or richer tones add drama. Pair with minimalist decor and soft textiles to enhance the tactile aesthetic. Seasonal accents like warm throws or plush rugs can complement the textured ceiling beautifully.
Start by preparing your ceiling surface—clean and patch any imperfections. Use a spray or trowel application of plaster or stucco, applying it evenly or in specific patterns. Tackle larger areas with a roller or sponge for textured effects. After drying, sand lightly if needed for smoothness or leave as-is for more texture. Finish with a clear sealant to protect the surface while maintaining the tactile feel.
Add subtle color variations or metallic pigments to the plaster for a personalized touch. Incorporate decorative borders or molding to frame the textured surface. Use complementary wall textures or fabrics to create a layered, sophisticated look. This finish pairs well with understated, elegant furnishings for a cohesive vibe.
A textured plaster or stucco ceiling adds a layer of richness and depth that elevates your entire room. It’s a subtle yet impactful upgrade that reflects craftsmanship and attention to detail. With patience and care, you can create a luxurious, tactile ceiling that boosts your confidence in DIY home improvements.
9. Patterned Drop Ceiling with Modular Tiles
Feeling like your ceiling is just a plain, boring surface? Want an easy way to add personality without a full renovation? Patterned drop ceilings with modular tiles let you create a customized, stylish look quickly. It’s a smart, flexible option for adding visual interest and personality.
Recommended Products to replicate this idea
| # | Preview | Product | |
|---|---|---|---|
| 1 |

|
Art3d Drop Ceiling Tiles 24x24 Inch (12-Pack, 48 Sq.ft) – Glue Up PVC Ceiling Tiles 2x2 Ft.,... | Check Latest Price |
| # | Preview | Product | |
|---|---|---|---|
| 1 |

|
LooYee Drop Ceiling Grid System,Complete Set Black Galvanized Steel Grid Kit Rust & Fire... | Check Latest Price |
Visualize a ceiling covered with geometric, floral, or abstract patterned tiles in various colors and finishes. The modular system allows you to mix and match tiles, creating your own unique layout. The patterns add a playful or sophisticated vibe depending on your choice. The tiles reflect light differently, adding depth and texture to your space.
Choose from a wide range of patterns—contemporary, vintage, or eclectic—to match your decor. Use bold colors for a statement look or neutral tones for subtle elegance. Combine different patterns within the grid for a more dynamic effect. Seasonal or mood-based color themes make it easy to refresh the look over time.
Start by measuring your ceiling and selecting modular tiles designed for drop ceilings. Install the grid system securely, ensuring level placement. Fit the tiles into the grid, paying attention to pattern alignment. Use the tiles’ interlocking features for a seamless appearance. For added effect, consider installing LED lighting behind or around the tiles for accent illumination. Make sure to seal or caulk seams for a tidy finish.
Customize with different tile finishes—matte, gloss, or textured—to add variety. Incorporate accent tiles with metallic or reflective surfaces for extra flair. Change out tiles seasonally or for special occasions to keep the ceiling fresh. Pair with minimalist decor and lighting to let the patterned ceiling be the star.
Patterned modular tiles transform a dull ceiling into a focal point full of personality. It’s a versatile, DIY-friendly upgrade that can be as simple or elaborate as you like. With some creative planning, you’ll create a ceiling that’s both functional and visually stunning, boosting your confidence in home decor projects.
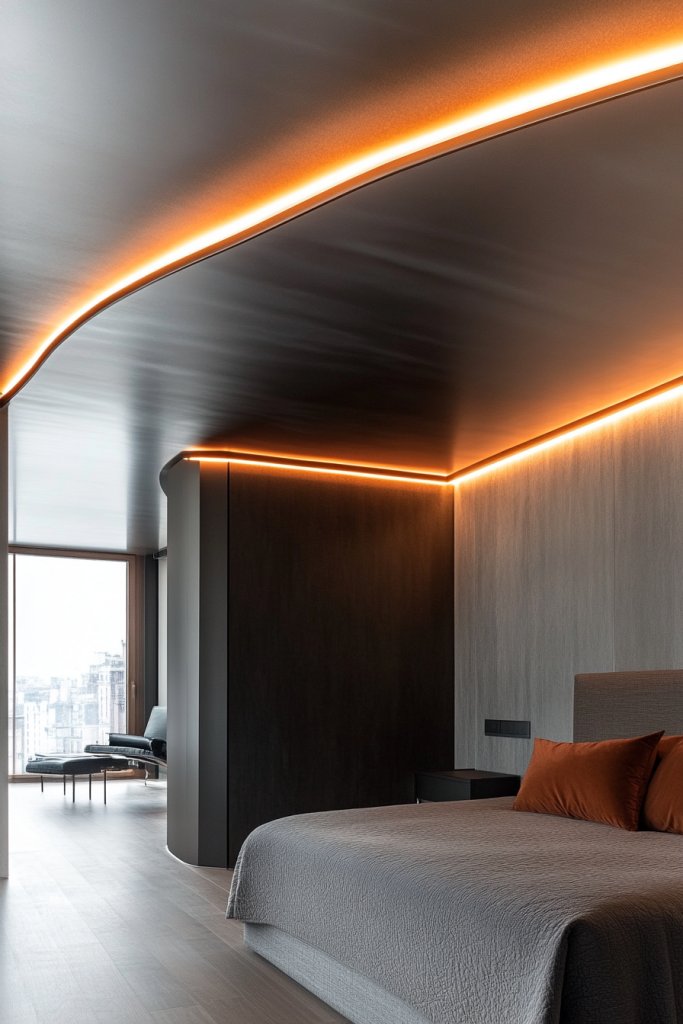
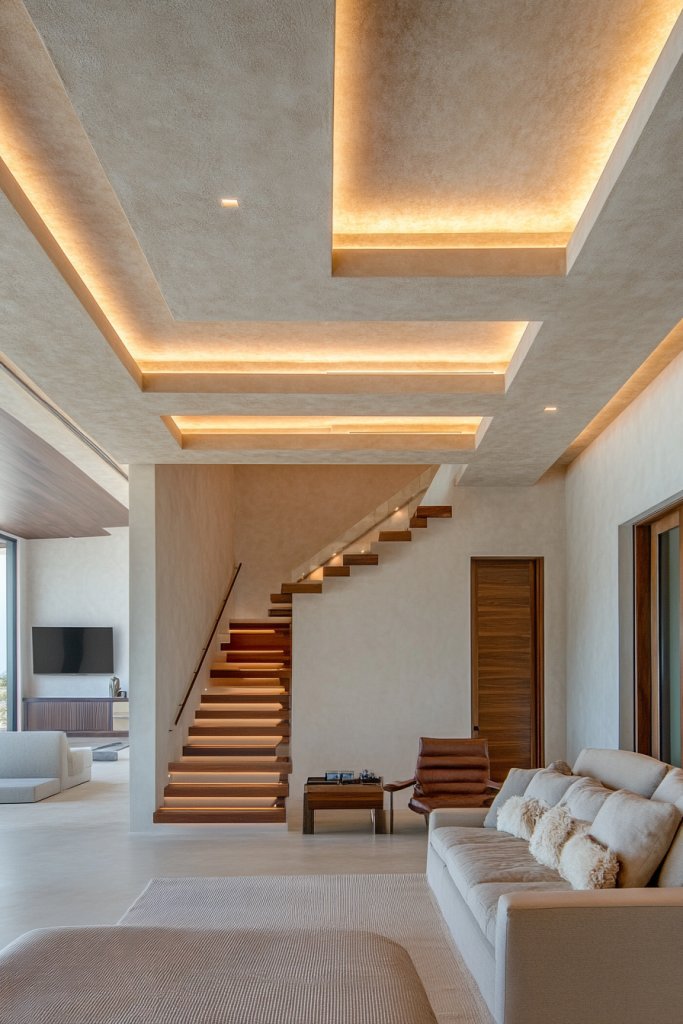
10. Minimalist Flat Ceiling with Hidden Cove Lighting
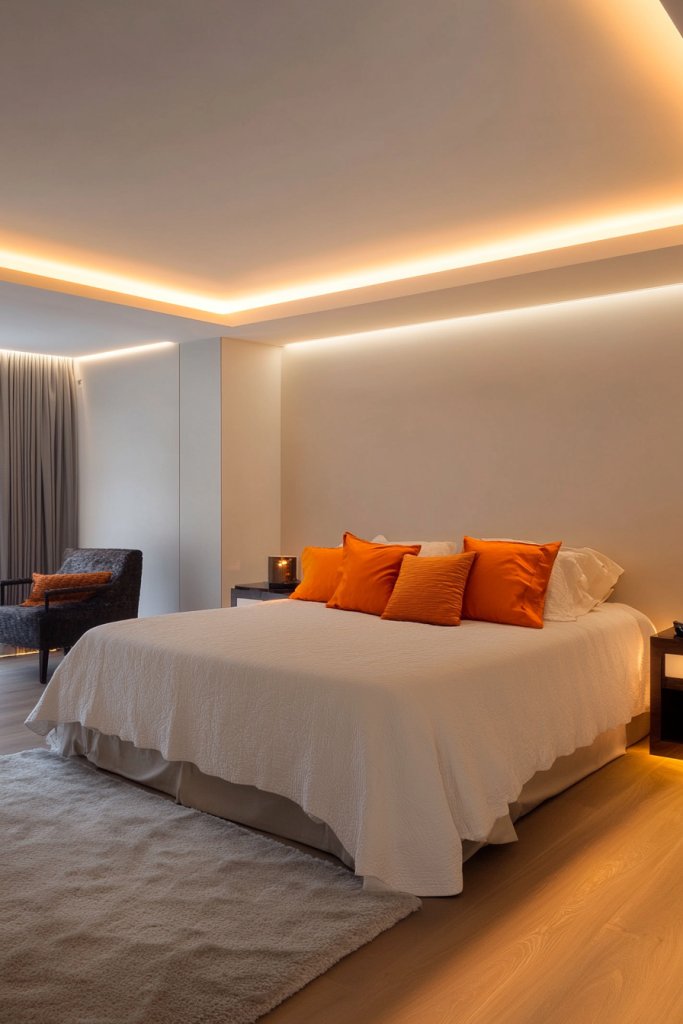
Do you prefer clean lines and clutter-free spaces? Maybe your room feels a bit stark or plain. A minimalist flat ceiling with hidden cove lighting offers a sleek, modern look that’s all about subtlety and sophistication. It’s perfect for creating a calm, luxurious ambiance without any fuss.
Recommended Products to replicate this idea
| # | Preview | Product | |
|---|---|---|---|
| 1 |
|
KSIPZE 100ft Led Strip Lights RGB Music Sync Color Changing Led Lights with Smart App Control Remote... | Check Latest Price |
| # | Preview | Product | |
|---|---|---|---|
| 1 |

|
FLEXTRIM Flexible Cove Molding - #WM93: 3/4" x 3/4" Flex Cove molding - 8' feet Long | Check Latest Price |
Imagine a smooth, unadorned ceiling with a narrow ledge or recess running around the perimeter. Hidden LED strips cast a soft, diffuse glow along the edges, eliminating harsh shadows. The indirect lighting adds warmth and depth, making the ceiling appear higher and the room more spacious. The minimalist design emphasizes simplicity and elegance.
Choose warm white or adjustable color LEDs for different moods. The cove can be painted or finished in the same color as the ceiling for a seamless look or in a contrasting hue for a subtle highlight. This design works well with modern, Scandinavian, or Zen-inspired interiors. Seasonal accents include textured textiles or soft wall colors.
Begin by installing a narrow ledge or molding around the ceiling perimeter. Affix LED strip lights within the cove, ensuring even coverage and hiding all wiring. Use compatible controllers to adjust brightness and color temperature. Finish with a smooth, painted ceiling that matches the wall color for a cohesive look. Test lighting effects and fine-tune as needed. Ensure all electrical work meets safety standards.
Add dimming controls or smart lighting for dynamic ambiance. Use textured wall finishes or soft textiles to complement the soft glow. Keep decor minimal, with sleek furniture and subtle art, to let the lighting take center stage. Seasonal changes can be achieved by adjusting lighting colors or intensities.
A minimalist cove-lit ceiling elevates your room’s style with understated elegance. It’s a testament to the power of simplicity and thoughtful design. With a little effort, you’ll craft a space that feels modern, calming, and uniquely yours, boosting your confidence in subtle but impactful upgrades.
11. Faux Skylight or Light Panel Panel with Cloud Motifs
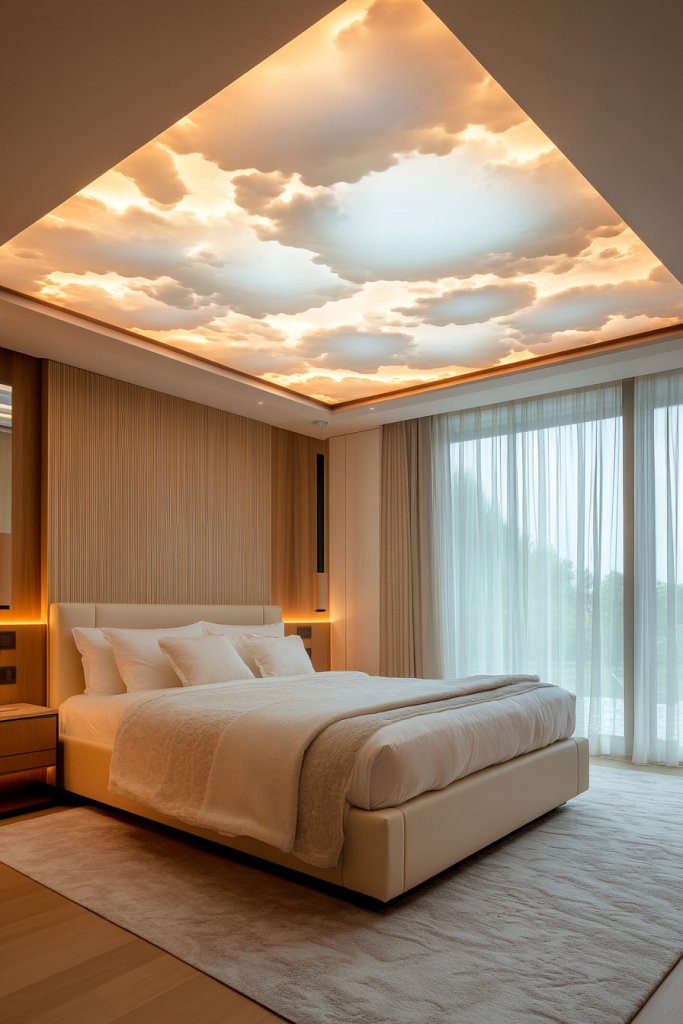
Want to bring an outdoor feel into your bedroom but lack the space or budget for real windows? A faux skylight or backlit panel with cloud motifs creates a dreamy, airy ceiling that feels like looking up at the sky. It’s a playful yet elegant way to add light and whimsy.
Recommended Products to replicate this idea
| # | Preview | Product | |
|---|---|---|---|
| 1 |
|
YPII 2x4 LED Flat Panel Light LED Drop Ceiling Light Fixture, 5 CCT 3000K-6500K Adjustable & 5... | Check Latest Price |
| # | Preview | Product | |
|---|---|---|---|
| 1 |

|
VocgoUU 6 Pack 2x4 Surface Mount Kit for 2x4 LED Flat Panel Light - Aluminum 2'x4' ft Ceiling Frame... | Check Latest Price |
Picture a backlit panel integrated into your ceiling with a soft, diffused glow that resembles a cloudy sky. The motifs can be painted or printed onto the panel, creating a layered, textured appearance. When illuminated, the clouds seem to float in an infinite sky, filling your room with a calming, natural light. It’s like having a window to the heavens.
Choose different cloud shapes—soft, billowing, or stylized—to match your decor. The panel can be framed minimally or integrated flush with the ceiling for a seamless effect. Seasonal effects include changing the backlighting color or adding subtle star patterns for nighttime magic. Pair with light, airy textiles to enhance the sky theme.
Select a suitable backlit panel with cloud motifs, or create your own with printable films or painted surfaces. Install it flush into your ceiling, ensuring proper electrical connections for the backlighting. Use remote or smart controls for adjustable brightness and color temperature. Add supplementary indirect lighting to enhance the effect. Secure the panel firmly, and finish with trim or molding for a polished look.
Customize with different sky or weather themes—sunrise, sunset, starry night—by changing lighting colors and motifs. Incorporate subtle textures or layered materials to add depth. Keep surrounding decor minimal to let the sky scene be the focal point. Seasonal or mood lighting can create different atmospheres throughout the year.
This ceiling option turns your room into a tranquil escape, inspiring serenity and wonder. It demonstrates how creative lighting and design can redefine your space. With patience, you can craft a dreamy, luminous ceiling that elevates your confidence in DIY decor projects.
12. Multi-layered Ceiling with Contrasting Textures
Feeling like your ceiling needs more dimension but don’t want a busy look? A multi-layered ceiling with contrasting textures offers depth and visual interest while keeping a modern, refined appearance. It’s a subtle way to add sophistication and style to your bedroom.
Visualize a ceiling with an upper layer finished in smooth plaster, contrasted by a lower layer with textured wood, fabric, or decorative panels. The layers can be separated by a recessed cove or a ledge, emphasizing the depth. Light plays off the different textures, creating shadows and highlights that animate the space. The result is a multi-dimensional, elegant ceiling that draws the eye upward.
Experiment with contrasting finishes—matte versus gloss, smooth versus textured. Use neutral tones for a sophisticated look or bold colors for a statement. Incorporate decorative trims or strips to delineate layers. Seasonal accents include adding textiles or drapes that complement the textures.
Begin by planning your layered layout—mark the separation lines with a level. Install the upper smooth layer or drywall, then add the textured or decorative panels below, securing with appropriate fasteners. Use lighting within the recess or along the edges to accentuate the layers. Finish with paint, veneer, or fabric coverings for each layer. Ensure all elements are securely attached and seamlessly finished.
Add metallic or iridescent paints to one layer for extra richness. Use different textures—wood grain, fabric, plaster—for variety. Incorporate custom trims or decorative strips for a tailored look. Complement the layers with matching wall treatments or textiles to unify the space.
A multi-layered ceiling creates an upscale, gallery-like feel that instantly elevates your room. It shows your eye for detail and design finesse. With some effort, you’ll craft a sophisticated, textured ceiling that boosts your confidence in creating high-end interiors.
13. Neon Light Border for a Contemporary Pop Look
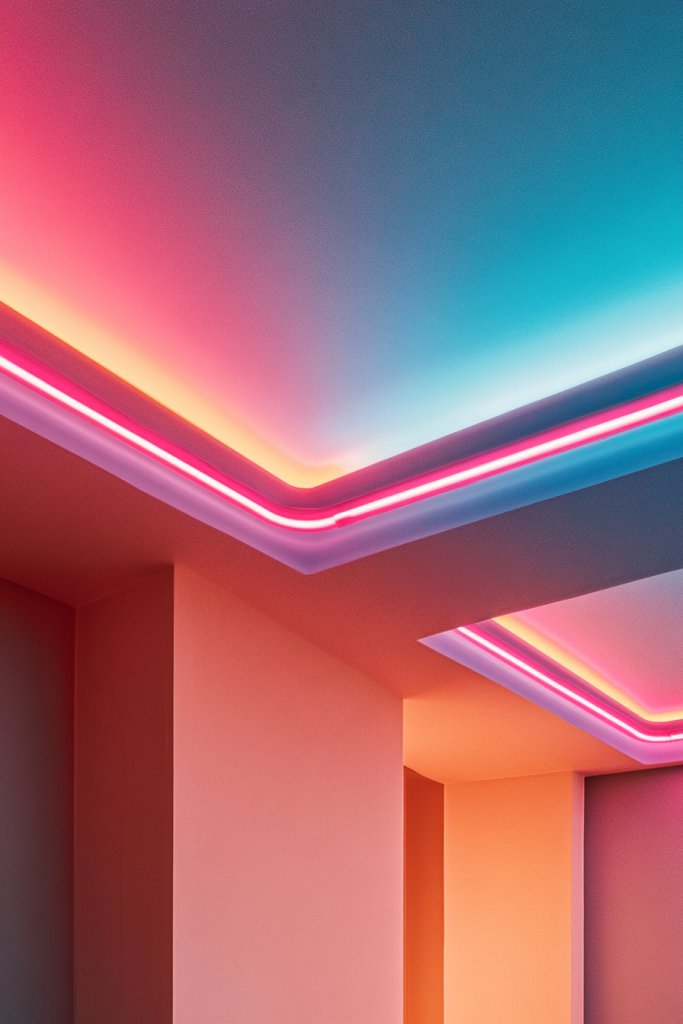
Want your bedroom to stand out with a modern, youthful vibe? A neon light border along the ceiling edge instantly adds a pop of color and energy. It’s an eye-catching feature that’s perfect for creative, fun-loving spaces seeking a bold statement. Think of it as a light-up accessory for your room.
Recommended Products to replicate this idea
| # | Preview | Product | |
|---|---|---|---|
| 1 |

|
Lamomo White Led Strip Lights, 16.4ft/5m Neon Light Strip, 12V Flex Waterproof Neon LED Strip... | Check Latest Price |
| # | Preview | Product | |
|---|---|---|---|
| 1 |

|
ALITOVE DC 12V 5A Power Supply Adapter Converter Transformer 60W AC 100-240V Input with 5.5x2.5mm DC... | Check Latest Price |
Imagine a sleek, continuous neon strip glowing in vibrant hues—pink, blue, green—around the perimeter of your ceiling. The soft glow creates a defined border that accentuates the room’s shape. When dimmed, the neon provides a lively, colorful ambiance that energizes the space. It’s like having a giant, customizable neon sign framing your bedroom.
Choose from different neon colors or opt for color-changing RGB strips for versatility. The border can be straight, curved, or shaped into patterns for more visual interest. Combine with minimalist decor to let the neon be the focal point or pair with other colorful accents. Seasonal effects include flashing or animated patterns for parties or special nights.
Install a flexible LED neon strip or tubing along the ceiling perimeter using clips or adhesive backing. Connect to a power source and synchronize with remote controls or smart systems. For safety, ensure wiring is concealed and compliant with electrical codes. The setup is straightforward but may require cutting and fitting for custom shapes. Test different lighting modes and brightness levels.
Create custom shapes or words with flexible neon or LED strips for a personalized touch. Pair with minimalist furniture and neutral wall colors to maximize the neon’s impact. Incorporate dimming controls or voice commands for ease of use. Seasonal or event-specific lighting effects can keep the room lively year-round.
A neon border transforms your bedroom into a vibrant, youthful sanctuary that reflects your personality. It’s a fun, DIY-friendly upgrade that makes a big impact with minimal effort. With some planning, you’ll have a space that’s lively, modern, and confidently you.
14. Acrylic or Glass Ceiling Inserts with Embedded LED Art

Looking for a ceiling feature that’s sleek, modern, and a little futuristic? Acrylic or glass inserts with embedded LED art turn your ceiling into a stunning visual focal point. It’s an innovative way to combine lighting, art, and architecture, elevating your space instantly.
Recommended Products to replicate this idea
| # | Preview | Product | |
|---|---|---|---|
| 1 |

|
Lithonia Lighting CPANL 1x4 LED Flat Panel Light, 1 Ft. x 4 Ft. LED Light Panel, Ceiling Lighting... | Check Latest Price |
| # | Preview | Product | |
|---|---|---|---|
| 1 |
|
7 Pack 8"×10" Clear Transparent Plexiglass Sheets, 1/25” (1mm) Thick Plexiglass Sheets, Extrusion... | Check Latest Price |
Picture a transparent acrylic or glass panel embedded flush into your ceiling, with intricate LED patterns or images behind it. The LEDs can animate, change color, or sync with music for a mesmerizing effect. When lit, the panel appears to glow from within, creating a layered, luminous artwork that’s both functional and decorative. It’s like a floating, ever-changing canvas.
Choose from different embedded images—abstract designs, cityscapes, or custom graphics—that suit your personality. The panel can be clear or frosted, with images or patterns printed or etched onto the surface. Combine multiple panels or layers for a complex, textured look. Seasonal or mood lighting options allow for flexible ambiance.
Select a suitable acrylic or glass panel with embedded LED features or prepare a custom one. Mount it flush into the ceiling using a frame or support system that conceals edges. Connect LED wiring to compatible controllers, and program effects as desired. Seal edges with trim or molding for a finished look. Ensure electrical safety and stability during installation.
Customize with your favorite images or patterns, or even video loops if your LED system supports it. Add subtle backlighting to enhance the embedded art’s glow. Pair with minimalist furnishings and neutral walls to keep the focus on the ceiling feature. Regular updates or changes keep the effect fresh.
This high-tech ceiling feature turns your room into a personal gallery and conversation starter. It showcases your love for innovation and design. With patience and some technical know-how, you can create a stunning, futuristic centerpiece that boosts your confidence in DIY and home upgrades.
15. Artistic Tape or Wall Wraps for a DIY Pop Effect
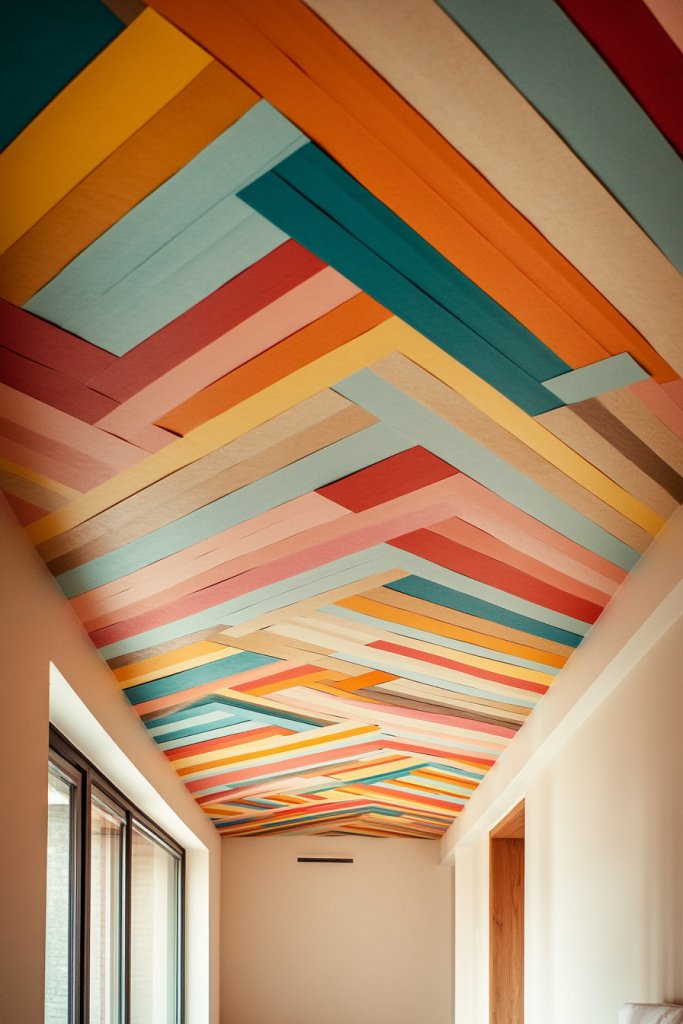
Want to add a splash of personality to your ceiling without breaking the bank? Perhaps you’re into DIY projects and love customizing your space. Artistic tape or wall wraps offer an easy, affordable way to create bold patterns or murals directly on the ceiling. It’s a fun, temporary solution perfect for renters or those who like changing things up.
Recommended Products to replicate this idea
| # | Preview | Product | |
|---|---|---|---|
| 1 |

|
Scotch Wall-Safe Tape, 1 Dispenser Roll, Removable Wall Safe Tape, for Hanging Photos, Art, Décor,... | Check Latest Price |
| # | Preview | Product | |
|---|---|---|---|
| 1 |

|
AEBORN Metallic Glitter Washi Tape - 24 Rolls Thin Colored Masking Tape Set, 6mm/10mm Decorative... | Check Latest Price |
Visualize a ceiling covered in striking geometric or abstract patterns created with bold adhesive tapes or removable wall wraps. The designs can be minimalist lines, intricate motifs, or playful shapes—whatever suits your style. Bright colors or metallic finishes make the patterns pop, adding a youthful, energetic vibe. The textured tape or wraps catch light and create visual contrast with the ceiling’s surface.
Mix and match tapes or wraps in different colors, widths, and patterns for a personalized mosaic. Use painter’s tape or removable adhesive for easy application and removal. Seasonal themes or special event motifs allow you to refresh the look regularly. Keep the surrounding decor simple to let the patterns be the focal point.
Start by cleaning the ceiling surface thoroughly. Plan your design layout with painter’s tape or stencils. Apply the tape or wraps carefully, smoothing out air bubbles and ensuring sharp edges. For larger areas, work in sections to maintain precision. Finish by sealing edges with clear adhesive or spray for extra durability. Remove or replace the wraps easily when desired.
Incorporate metallic or textured tapes for added dimension. Use patterns that reflect your personality—stripes, chevrons, or abstract art. Combine with glow-in-the-dark or reflective materials for night-time effects. Keep the design flexible so you can update it as your style evolves.
This DIY approach lets you create a bold, artistic ceiling that’s entirely your own. It’s a playful, budget-friendly way to express your personality and improve your space. With some creativity, you’ll craft a ceiling that’s uniquely yours and boosts your confidence in DIY decor.
16. Black Matte Ceiling with Metallic Accents
Feeling like your bedroom is missing that modern, luxe touch? Maybe your ceiling looks flat and uninspiring. A black matte ceiling with metallic accents instantly adds drama, sophistication, and a contemporary edge. It’s a bold choice that elevates your entire room’s aesthetic.
Recommended Products to replicate this idea
| # | Preview | Product | |
|---|---|---|---|
| 1 |

|
4 Pack Wavy Champagne Gold Metallic Tinsel Foil Fringe Curtains Backdrop - 3.3X6.6ft Foil Fringe... | Check Latest Price |
| # | Preview | Product | |
|---|---|---|---|
| 1 |

|
COLOR CARE Metallic Paint – Satin Warm Silver, 1 Quart (Pack of 1) | Water-Based Low-Odor Paint... | Check Latest Price |
Imagine a deep, matte black ceiling that absorbs light, creating a cozy, intimate atmosphere. Accents of gold, silver, or copper in trim or small decorative elements contrast beautifully against the dark background. Subtle metallic streaks or geometric shapes catch the light and add texture, giving the ceiling a layered, high-end look. The muted matte finish keeps the space elegant and understated.
Use metallic accents sparingly—think trim, inlays, or small decorative panels—to add focal points. Alternatively, create a pattern with metallic paint or foil to enhance visual interest. This design pairs well with monochrome, industrial, or glam decor styles. Seasonal tweaks include adding warm textiles or accent lighting for different moods.
Prepare the ceiling by cleaning and sanding for a smooth surface. Apply a matte black paint or coating, ensuring even coverage. Use painter’s tape or stencils to add metallic accents precisely. For metallic details, consider foil, metallic paint, or adhesive-backed metal sheets. Finish with a clear matte or semi-gloss protective coating. Install subtle lighting to highlight the accents.
Add personalized metallic shapes, initials, or motifs for a bespoke look. Incorporate textured or patterned metallic finishes for extra richness. Use lighting to cast reflections and emphasize the accents. Combine with neutral walls and sleek furniture for a refined, modern aesthetic. Seasonal lighting effects can further enhance the luxe feel.
A black matte ceiling with metallic accents exudes confidence and style. It’s a daring choice that instantly transforms your space into a chic retreat. With some patience and attention to detail, you’ll craft a sophisticated ceiling that impresses and boosts your home styling confidence.
17. Modular Floating Panels with Color Blocking
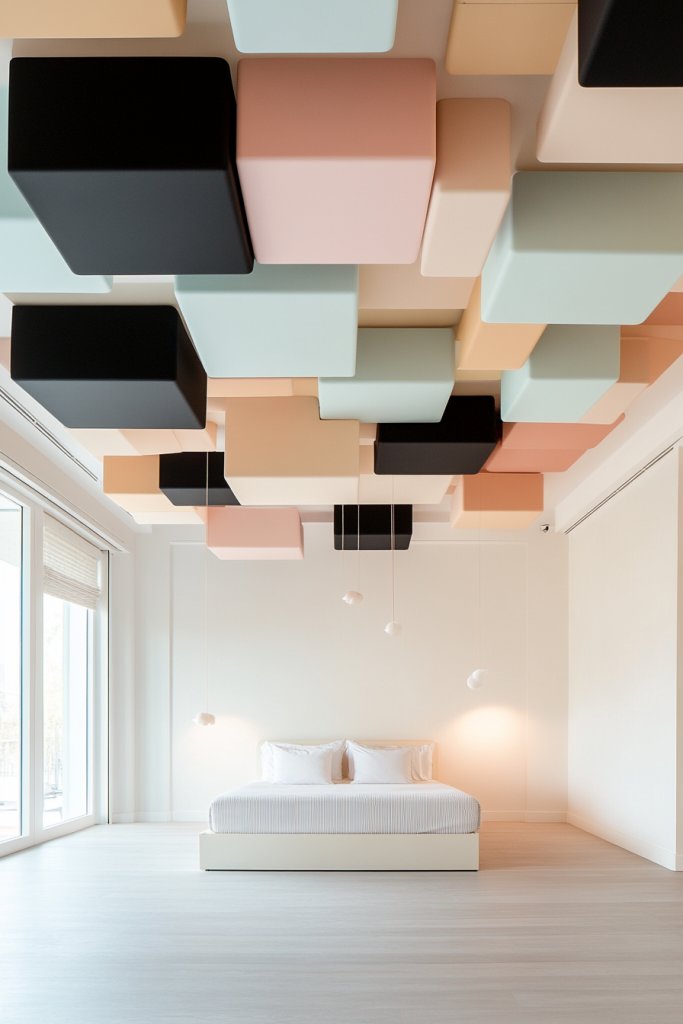
Want to make your ceiling playful and modern but don’t want to commit to one look? Modular floating panels in contrasting colors or finishes give you flexibility and a fun, dynamic vibe. It’s a creative way to add personality and visual interest without overwhelming the space.
Recommended Products to replicate this idea
| # | Preview | Product | |
|---|---|---|---|
| 1 |
|
Art3d Drop Ceiling Tiles, 24x48in. White (12-Pack), Polyvinyl Chloride (PVC), Glue Down | Check Latest Price |
| # | Preview | Product | |
|---|---|---|---|
| 1 |

|
VALIKIY 4-Pack LED Backlight Sheet 24V 36W 6000K White, 19.3X9.6 inches Each Unit, Dimmable Flexible... | Check Latest Price |
Imagine a ceiling composed of square or rectangular panels that seem to float, arranged in a bold color block layout. The panels can be in bright, contrasting hues or different textures—matte, gloss, or even patterned. The layered arrangement creates depth, with shadows and highlights adding visual complexity. It’s like a piece of abstract art suspended overhead.
Mix solid colors with textured or patterned panels for variety. Use different finishes—matte, shiny, or metallic—to enrich the design. Arrange panels in geometric patterns or asymmetrical layouts for a more eclectic look. Seasonal or mood-based color schemes make it easy to update the room’s vibe. Keep the surrounding decor simple to let the ceiling stand out.
Start by measuring your ceiling and designing your panel layout. Install a lightweight support framework or directly attach panels with strong adhesive or mechanical fasteners. Use spacers to create gaps for a floating effect. Secure each panel firmly, ensuring level placement. Finish with paint or finish that matches or contrasts with the room decor, and consider adding LED backlighting behind panels for extra flair.
Create custom color schemes or patterns that reflect your personality. Incorporate metallic or textured panels to add richness. Use smart lighting controls to change the mood or highlight specific sections. Pair with minimalist furniture and neutral wall colors to keep the focus on the ceiling’s playful layout. Seasonal updates keep the look fresh.
Modular floating panels with color blocking turn your ceiling into a modern, playful art piece. It’s a DIY project that demonstrates your creativity and style confidence. With some planning and a steady hand, you’ll craft a ceiling that’s both functional and visually striking, making your space truly unique.
18. Integrated Sound-Absorbing Panels with Artistic Shapes
Is noise pollution making your bedroom less peaceful? Want a ceiling that improves acoustics while also looking stylish? Sound-absorbing panels with artistic shapes offer a sleek, functional upgrade that enhances both sound quality and design. It’s perfect for creating a calm, serene retreat.
Recommended Products to replicate this idea
| # | Preview | Product | |
|---|---|---|---|
| 1 |

|
Focusound 52 Pack Acoustic Foam Panels 1" x 12" x 12" Sound Proof Foam Panles Soundproofing Noise... | Check Latest Price |
| # | Preview | Product | |
|---|---|---|---|
| 1 |

|
EZVALO Spotlights Indoor with Remote, 5500mAh Rechargeable Picture Lights, Wireless LED Uplighting... | Check Latest Price |
Imagine panels in organic or geometric shapes—waves, circles, or abstract forms—mounted on the ceiling in a pattern that complements your decor. The panels are made from materials like perforated wood, fabric, or foam with a decorative finish. They absorb sound waves, reducing echoes and noise while adding a sculptural element. When lit subtly, they cast intriguing shadows, blending function with art.
Choose shapes and sizes that suit your room’s proportions—large, bold shapes for a statement or smaller, subtle forms for a refined look. Incorporate different textures—smooth, perforated, or textured finishes—to create visual interest. Mix with other acoustic treatments or keep it minimalist for a sleek, modern vibe. Seasonal accents include adding textiles or soft lighting to enhance the calming effect.
Begin by selecting panels made from acoustic-friendly materials with artistic shapes. Mount them securely with appropriate hardware, spacing them to optimize sound absorption. Arrange in a pattern that balances aesthetics and function, considering symmetry or asymmetry. Integrate subtle LED lighting or spotlights to highlight shapes and textures. Seal joints and edges for a polished look, ensuring easy maintenance.
Customize with different finishes or colors to match your decor. Incorporate shapes that have personal meaning or artistic appeal. Use lighting effects to create mood or emphasize the sculptural elements. Pair with minimalist or modern furniture to keep focus on the ceiling art and acoustics. Regularly update or rearrange panels for variety.
This combination of function and art demonstrates your thoughtful approach to home design. It creates a peaceful, stylish space that’s both visually appealing and acoustically optimized. With patience, you can craft a ceiling that not only looks great but also boosts your confidence in transforming your space into a personal sanctuary.
Conclusion
Explore the diverse range of modern pop ceiling design ideas shared here and imagine how they could elevate your own bedroom decor. Don’t be afraid to experiment and put your personal touch on these concepts—your dream space is within reach. Embrace the boldness of these ideas and start transforming your bedroom today; your perfect sanctuary awaits!