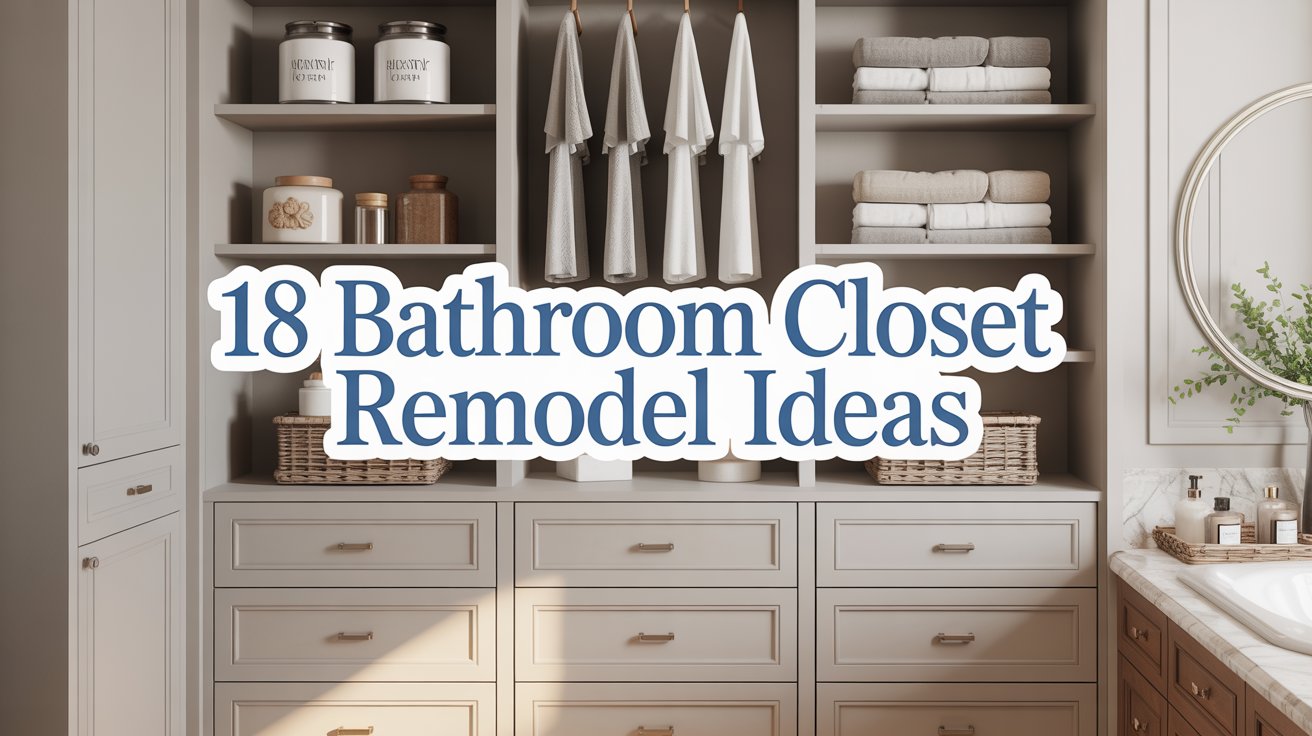
18 Bathroom Closet Remodel Ideas to Streamline Storage
I have been, or can be if you click on a link and make a purchase, compensated via a cash payment, gift, or something else of value for writing this post. As an Amazon Associate, I earn from qualifying purchases. Please read my full Affiliate Disclosure for more information.
A well-organized bathroom closet can transform your daily routine and add a touch of luxury to your space. As homeowners seek smarter storage solutions, bathroom closet remodel ideas have gained immense popularity for their ability to maximize space and boost functionality.
In this article, you’ll explore a variety of creative and practical ideas designed to streamline your bathroom storage. From innovative shelving to clever organizational hacks, these tips will inspire you to craft a clutter-free, stylish oasis tailored to your needs.
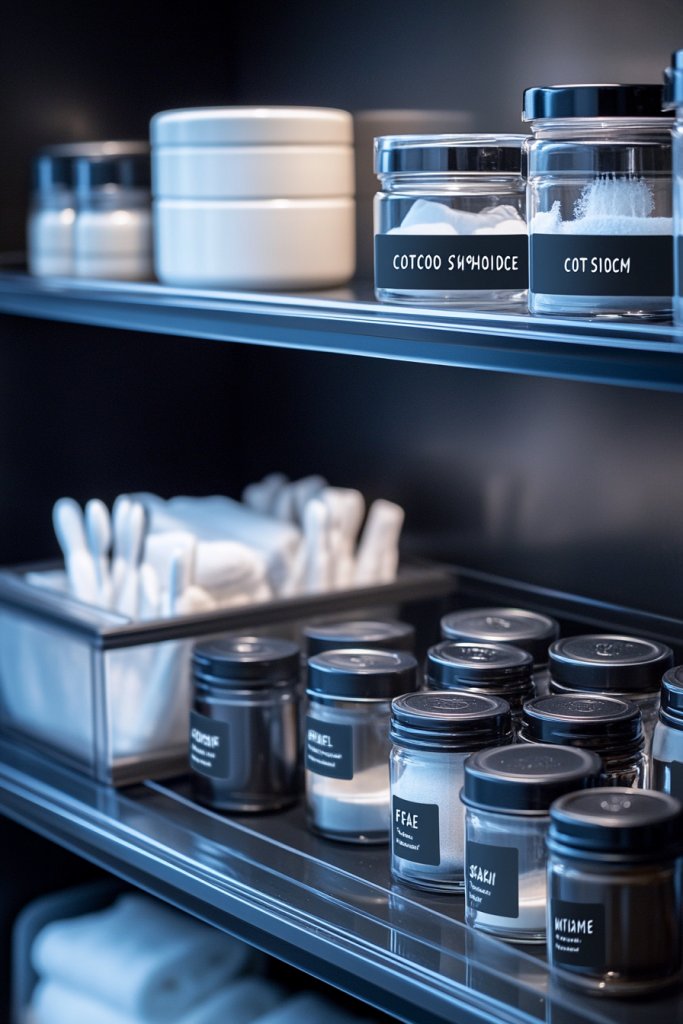
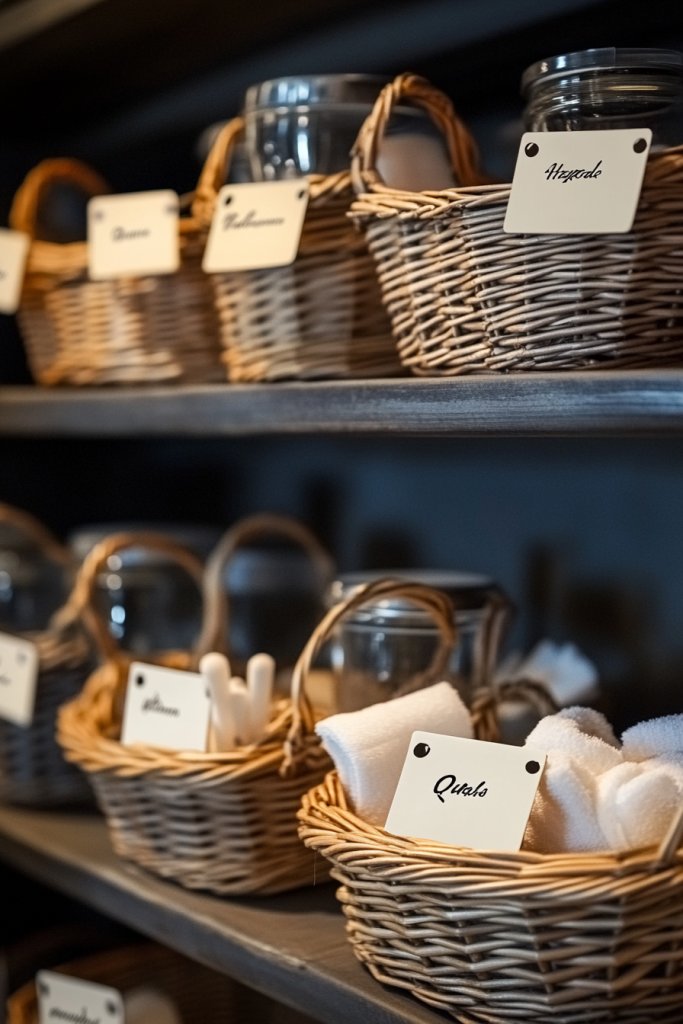
1. Install Open Shelving for Easy Access and Visual Appeal
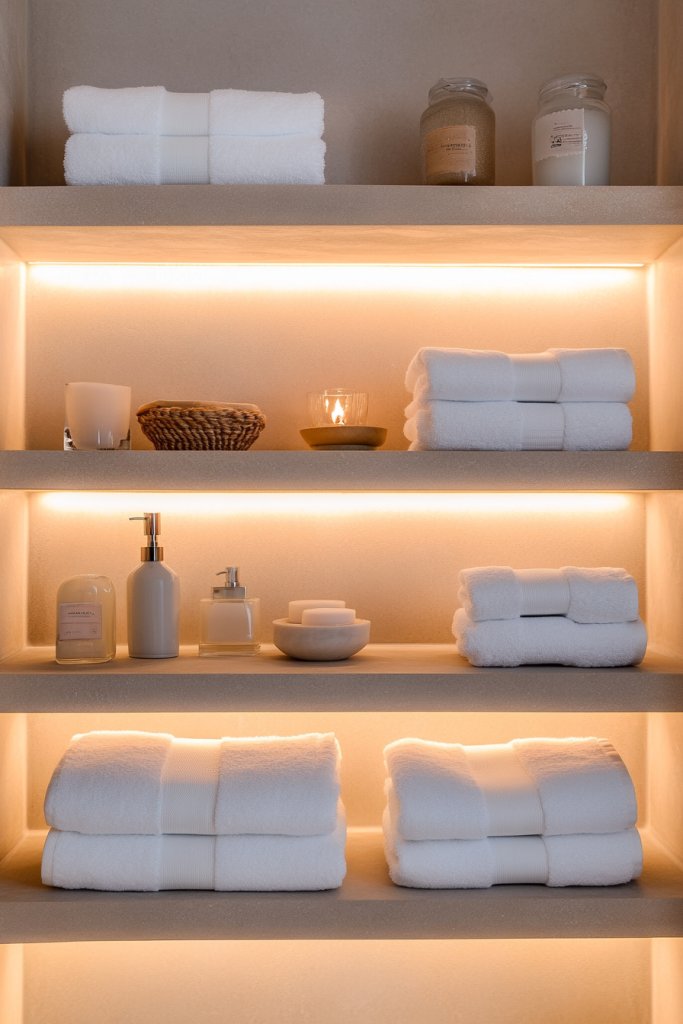
Ever struggled with finding a neat way to store towels, toiletries, or accessories without your bathroom looking cluttered? Open shelving offers a simple yet stylish solution to keep essentials within reach while maintaining an airy feel. It addresses the desire for quick access and visual organization that doesn’t sacrifice style. Plus, who doesn’t love the charm of an exposed, curated display?
Imagine sleek wooden shelves mounted on a soft-colored wall, lined with plush towels, glass jars filled with cotton balls, and baskets holding extra toiletries. The textures of the materials contrast beautifully with the smooth wall, creating a cozy yet modern vibe. Soft, warm lighting highlights each shelf’s contents, making everything look inviting. It’s like turning your bathroom into a boutique spa with just a few shelves.
Open shelving can be customized from rustic wood planks to glossy lacquered units, fitting any style. In small bathrooms, floating shelves maximize space without bulk. Seasonal decor like colorful towels or decorative bowls can rotate easily to match your mood or festivities. For a minimalist look, keep only essentials and opt for monochrome palettes. Alternatively, add baskets or boxes for a tidy, uniform appearance.
Start by selecting durable materials suited for humidity, like sealed wood or metal. Measure your wall space and decide on the number of shelves needed. Use appropriate anchors and brackets to secure the shelves firmly—don’t skimp here, or you might end up with a Pinterest fail. Arrange items by size and function, keeping everyday essentials at eye level. Finish with a thorough clean and arrange your display for aesthetic appeal.
Personalize your open shelves with decorative textiles, like a linen runner or a soft cloth, to add warmth. Incorporate color-coordinated accessories or themed jars to reflect your personality. Add small sculptural pieces or vintage finds for a unique touch. Rotating decorative elements can keep the look fresh and engaging over time. Remember, the key is balance between beauty and practicality.
Open shelving makes your bathroom feel more inviting and less cramped. It also gives you a chance to showcase your style with curated accessories. With a bit of planning, you can create a space that’s both functional and Instagram-worthy. Ready to ditch the cabinet doors and embrace the open shelf trend? Your bathroom’s new look awaits!
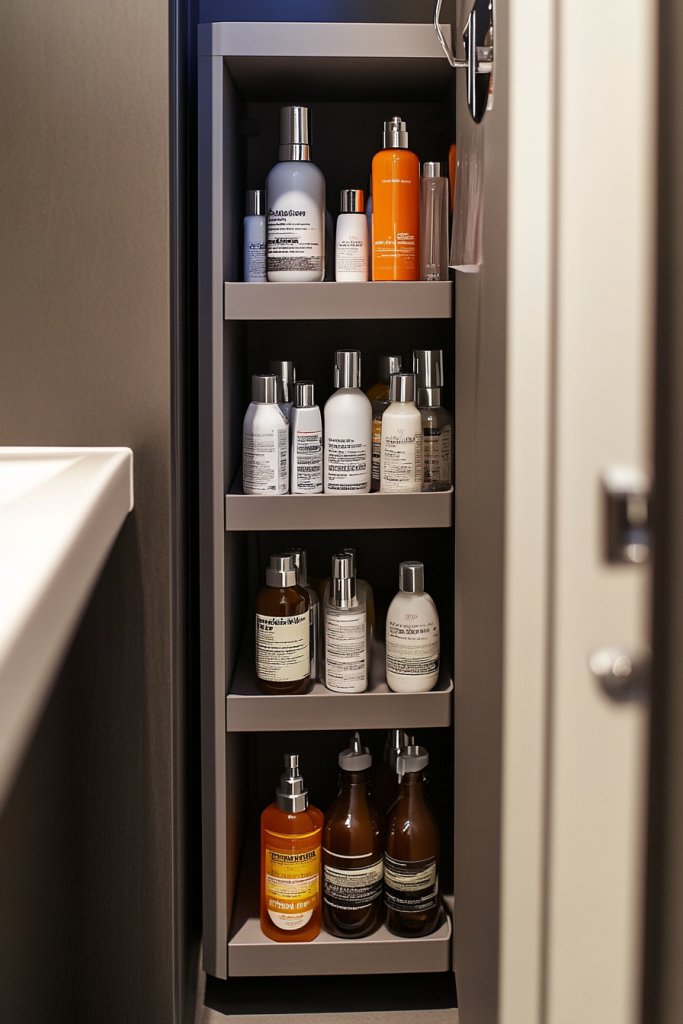
2. Incorporate Built-In Drawer Cabinets for Hidden Storage
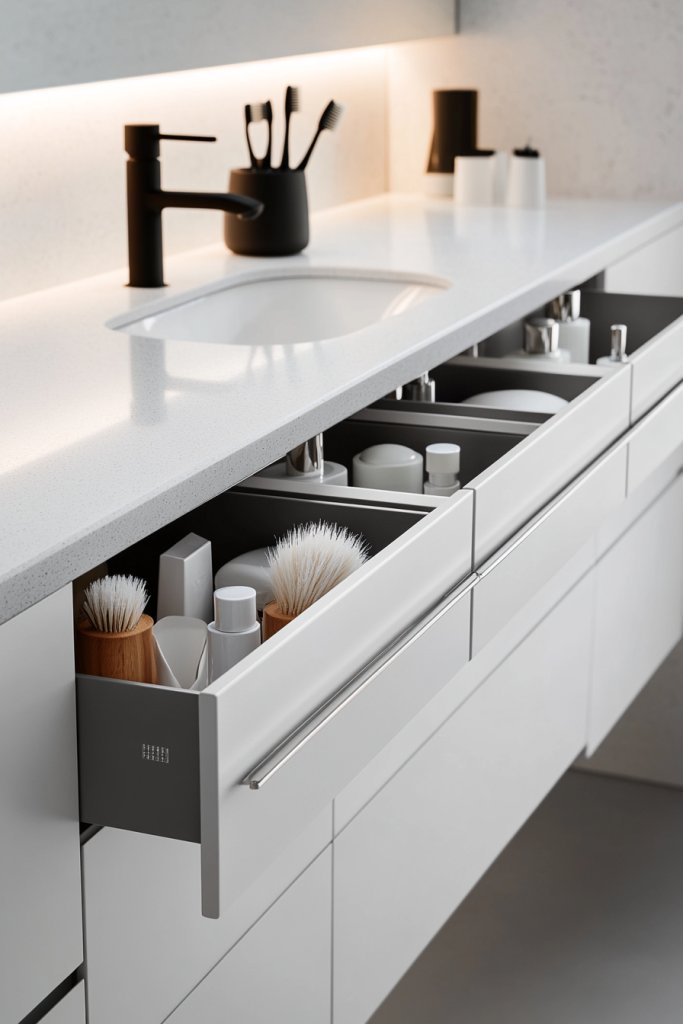
Tired of your cluttered countertops and overflowing cabinets? Built-in drawer cabinets hide away toiletries, brushes, and miscellaneous items, creating a sleek, streamlined space. They solve the frustration of searching through piles of stuff and make daily routines smoother. Who doesn’t want a tidy bathroom that looks organized without sacrificing style?
Visualize custom drawers seamlessly integrated into your bathroom wall, with soft-close mechanisms and sleek fronts matching your vanity. Inside, dividers keep small items sorted, while deeper drawers store bulkier products. The finish is smooth, with no protruding handles disrupting the clean lines. When closed, the space looks minimalistic, almost like a high-end hotel suite.
Choose from various finishes—matte, gloss, wood veneer—to match your overall decor. For smaller bathrooms, vertical narrow drawers work best, while larger spaces can feature wide, multi-layered units. Incorporate soft-close or push-to-open mechanisms for a modern touch. Seasonal accessories or color-coded dividers can help keep things fresh and personalized.
Start with precise measurements of your existing space or new cabinetry area. Work with a carpenter or custom cabinetry shop to design drawers that fit your needs. Opt for moisture-resistant materials like marine-grade plywood or MDF with a sealed finish. Installation involves anchoring the units securely into the wall studs—don’t forget to level everything. Organize contents with small trays or dividers for easy retrieval.
Add labels to drawers for quick identification or color-code them based on item categories. Incorporate soft, cushioned liners to prevent items from slipping. Consider installing a small, hidden safe inside for valuables. Personal touches like engraved handles or custom finishes can elevate the look further. Functionality and style go hand-in-hand with well-designed built-in drawers.
Built-in drawer cabinets elevate your bathroom’s aesthetic while keeping clutter out of sight. They add a custom, high-end feel that’s hard to beat with off-the-shelf solutions. When properly planned, they offer a lifetime of organized ease. Time to say goodbye to chaos and hello to sleek storage solutions!
3. Use Clear Acrylic Bins for Small Items
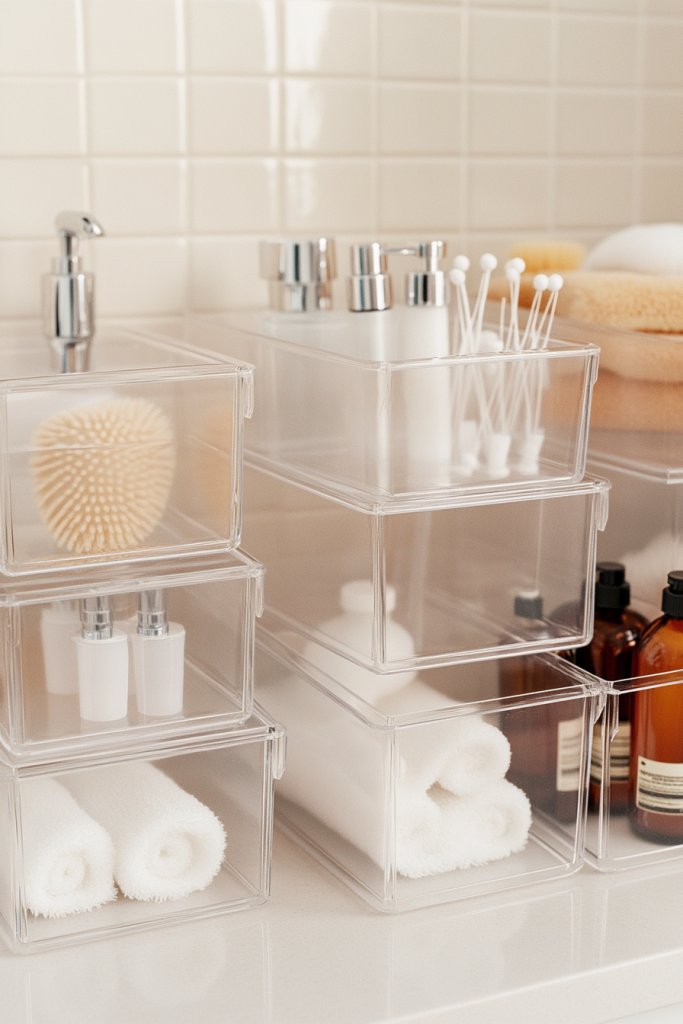
Ever feel overwhelmed by tiny bottles, brushes, or accessories cluttering your bathroom? Clear acrylic bins provide a transparent, organized way to store small items, making everything easy to find. They eliminate the frustration of rummaging through opaque containers or piles of loose products. Who doesn’t want a beauty station that’s both functional and visually tidy?
Picture a row of sleek, crystal-clear bins lining a shelf or inside a cabinet. Each bin contains different categories—cotton swabs, hair ties, skincare samples—visible at a glance. The transparency showcases your collection, encouraging you to be more organized. Brightly colored or matching lids add a pop of color and uniformity, elevating the look. The clean lines and simplicity make your space feel fresh and modern.
Use small acrylic containers for cosmetics, larger bins for toiletries, or tiered trays for added dimension. Stackable options maximize vertical space, ideal for tiny bathrooms. For a luxe vibe, opt for frosted or tinted acrylic in pastel shades or bold colors. Incorporate labels or decorative stickers for added personality. These bins work well with minimalist or eclectic styles alike.
Select high-quality acrylic that’s shatter-resistant and easy to clean. Measure your shelf or cabinet space and choose bins that fit snugly without overcrowding. Use a label maker or decorative tags to identify contents easily. Group similar items together for quick access and avoid overstuffing. Regularly declutter and wipe down the bins to keep everything pristine. They’re a simple, low-cost upgrade that makes a big impact.
Personalize with colored lids or custom labels to match your bathroom decor. Use decorative washi tape or stickers to add flair. Incorporate small scoops or tongs inside for hygienic dispensing. Consider stacking clear bins with different heights for a tiered display. This approach encourages tidiness while adding a playful or elegant touch.
Clear acrylic bins turn chaos into calm, making your daily routines smoother. Their transparency invites you to see all your products at once, reducing clutter and waste. Plus, they’re versatile enough to grow with your collection. Get ready to enjoy a bathroom that looks as good as it functions!
4. Add Over-the-Door Hooks and Racks for Extra Storage
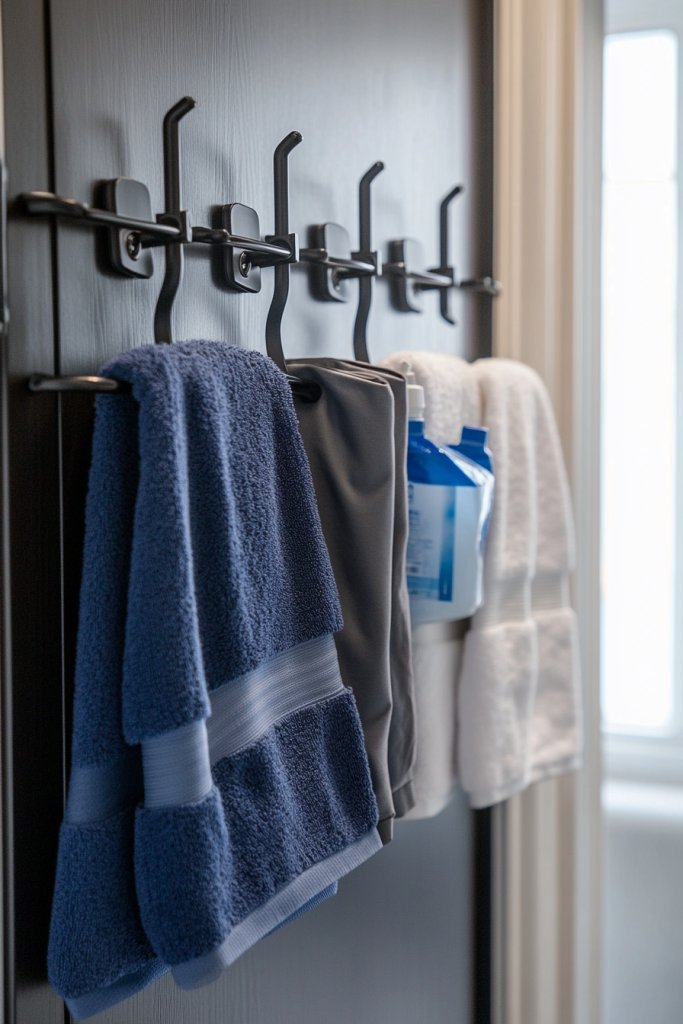
Is your bathroom running out of space for towels, robes, or reusable bags? Over-the-door hooks and racks are an easy, budget-friendly way to add instant storage without drilling into walls. They free up precious shelf and hook space inside the room, making your bathroom more organized and less cluttered. Who knew the back of a door could be so productive?
Envision a sturdy metal rack hanging over your bathroom door, holding fluffy towels, soft robes, or even a few stylish tote bags. The hooks are evenly spaced, keeping everything accessible and tidy. The door’s surface is fully utilized, adding a layer of practicality to your decor. When not in use, they blend seamlessly, almost invisible, yet insanely functional. It’s like giving your door a hidden storage upgrade.
Choose from various materials—metal, wood, or plastic—to match your aesthetic. Slim, minimalist hooks suit contemporary spaces, while ornate wrought iron fits vintage or boho styles. Adjustable racks can hold multiple items or be customized for different sizes. Seasonal accessories like patterned fabric covers or decorative decals can personalize the look further. They work well in small bathrooms, shared spaces, or even closets.
Select a durable, rust-resistant material suitable for humid environments. Measure your door thickness and width to ensure a proper fit. Install the hooks with minimal tools—most just hang over the top edge and clamp into place. Distribute weight evenly to avoid warping or slipping. Use the hooks for towels, robes, or accessories, and keep frequently used items at the front for easy grab-and-go convenience.
Add decorative elements like fabric covers, colorful tapes, or themed hooks to match your decor. Group similar items on each hook for quick identification. Use the rack to hang small baskets or pouches for toiletries or accessories. Seasonal swaps of hooks or racks can keep the look fresh and suited to your style changes. They’re a simple way to maximize vertical space creatively.
Over-the-door hooks instantly boost storage capacity without permanent modifications. They’re perfect for renters or anyone who wants flexibility. When used wisely, they turn an overlooked space into a functional feature. Your bathroom will be more organized, efficient, and stylish—ready for everyday life or guest visits!
5. Incorporate a Tension Rod for Flexible Hanging Space
Limited hanging space in your bathroom can turn your daily routine into a puzzle. A tension rod offers a quick, adaptable solution to add extra hanging room for towels, small baskets, or folded linens. It’s ideal for renters or anyone hesitant to drill holes. Want a versatile, no-fuss way to organize? This is your answer.
Imagine a sleek metal tension rod stretched across a narrow corner or inside a cabinet. Hanging from it are neatly folded towels, small mesh baskets with toiletries, or even a few hanging organizers. The rod’s adjustable tension keeps it firmly in place without hardware, and it blends seamlessly into your space. It’s a simple, effective way to create a layered, accessible storage zone that feels almost invisible.
Opt for coated or matte-finish rods for a modern vibe, or shiny chrome for a more polished look. Use multiple rods at different heights to maximize vertical storage. Combine with fabric or mesh baskets for added versatility. In small spaces, position the rod under a shelf or countertop for quick access. Seasonal items like extra towels or laundry bags can hang here, freeing up other areas.
Measure the space carefully before selecting a tension rod. Install by extending it until it’s tight enough to stay in place—no tools needed. Adjust the tension as needed to avoid slipping. Hang lightweight items first and gradually add more weight, ensuring stability. Regularly check and tighten if needed, especially in humid environments where metal may slightly loosen over time.
Decorate the rod with colorful or patterned cloth covers to add a pop of style. Use small hooks or clips for hanging accessories or beauty tools. Combine with decorative bins or storage pouches underneath for additional organization. Seasonal swaps of the items hanging from the rod keep things fresh and functional. It’s a flexible solution that adapts to your evolving needs.
A tension rod is a low-cost, DIY hero for space-starved bathrooms. It provides extra hanging capacity without damage or complicated installation. When used creatively, it turns a basic space into an organized oasis. You’ll wonder how you ever lived without this simple, effective upgrade!
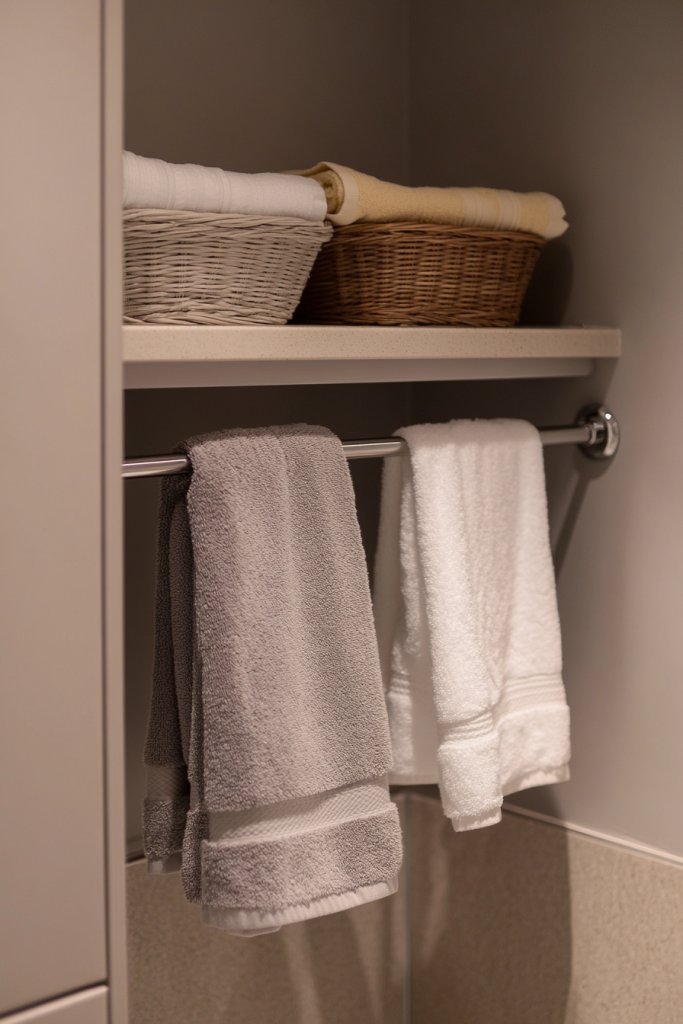
6. Use Stackable Baskets for Categorized Storage
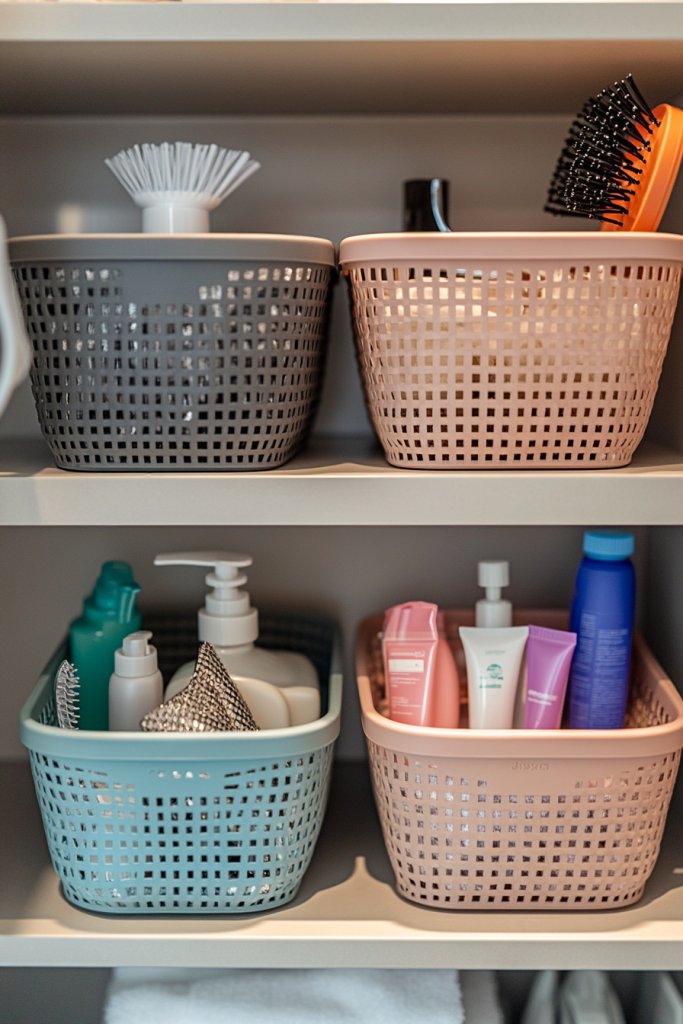
Cluttered countertops and messy shelves make your bathroom look chaotic and chaotic. Stackable baskets help you categorize and contain items neatly, turning disorder into order. They’re perfect for separating hair tools, skincare, or linens, making everything easier to find and access. Want a tidy, visually appealing space? This is your new best friend.
Picture a series of woven or plastic baskets stacked vertically on a shelf or inside a cabinet. Each basket holds a different category: one for hair accessories, another for lotions, and a third for cleaning supplies. Labels or color-coding can help identify contents instantly. The uniformity and stacking create a clean, organized look that feels both functional and stylish. It’s like having a mini storage closet at your fingertips.
Choose from materials like woven wicker for a cozy vibe or sleek plastic for a modern aesthetic. Use different sizes to accommodate various items, stacking larger baskets at the bottom and smaller ones on top. Incorporate decorative fabric liners or lids for a polished finish. These baskets work well in both open shelves and concealed cabinets, adapting easily to your space constraints.
Start by assessing your storage needs and measuring available space. Select stackable baskets that fit your area and are easy to lift and clean. Label each basket for quick identification. Organize items by frequency of use—daily essentials at the top, seasonal or rarely used items at the bottom. Regularly review and declutter to keep the system functional. Stack neatly for maximum efficiency and visual harmony.
Add decorative tags, stickers, or custom labels to each basket for a personalized touch. Use colorful liners or patterned baskets to match your bathroom decor. Incorporate small, decorative objects on top of stacks for visual interest. You can also mix and match basket styles for a layered, eclectic look. The goal is to make storage both practical and pretty.
Stackable baskets turn chaos into calm, making your bathroom feel more spacious and inviting. They’re a versatile, budget-friendly solution that can evolve with your needs. When everything has a designated place, you’ll enjoy stress-free mornings and easier cleanups. Ready to organize your space with style and purpose?
7. Install a Mirror with Built-In Shelves
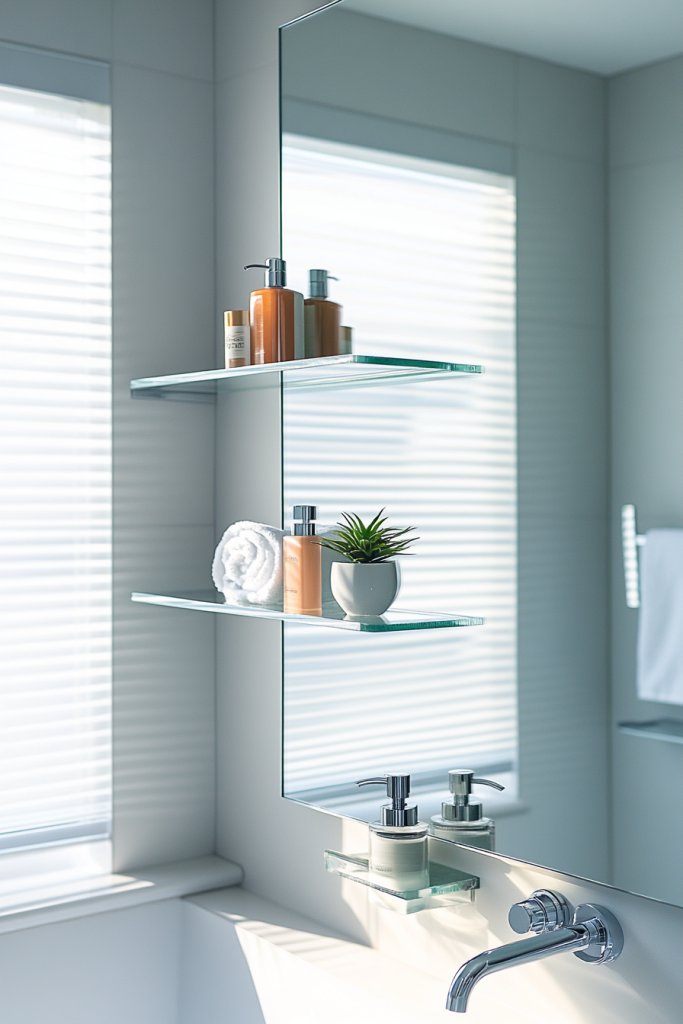
Ever wished your bathroom was more functional without sacrificing style? A mirror with built-in shelves offers both a reflective surface and extra storage in one sleek piece. It saves space and keeps your essentials close at hand. Plus, it adds a touch of sophistication that elevates your entire decor.
Imagine a large, frameless mirror mounted above your sink, with narrow shelves embedded along the edges. The shelves hold your daily skincare products, small decorative items, or a few neatly rolled towels. The mirror’s surface reflects light, making the room appear larger and brighter. The combination of reflection and storage creates a clean, modern look that’s both practical and stylish.
Choose from various designs—metal, wood, or acrylic frames—to match your decor. Shelves can be open or have glass doors for a more polished appearance. Adjustable shelves provide flexibility for different-sized items. In small bathrooms, opt for a compact, corner-mounted version. Seasonal accessories or decorative touches can personalize it further.
Measure the wall space carefully and select a mirror with appropriate dimensions. Securely mount the mirror at eye level, using anchors suitable for your wall type. Arrange your items on the shelves in a functional order—daily essentials in easy reach, decorative pieces for visual appeal. Regularly clean the mirror and dust the shelves for a pristine look. Consider professional installation if necessary.
Add small decorative objects like scented candles, textured containers, or elegant trays on the shelves. Use matching or contrasting colors to complement your bathroom palette. Incorporate personalized labels or tags for a cohesive look. Change items seasonally to keep the display fresh and interesting. This combo of mirror and shelves creates a customized, polished space.
A mirror with built-in shelves is a game-changer for small or cluttered bathrooms. It combines utility with aesthetics, making your daily routine more efficient. When well-chosen and styled, it becomes a focal point that boosts your bathroom’s overall vibe. Ready to reflect your style while organizing effortlessly?
8. Opt for Minimalist Labeling to Keep Organized
Cluttered storage can become a nightmare, especially when you can’t remember what’s inside a jar or box. Minimalist labeling offers a simple, elegant way to keep everything in order without visual chaos. It makes maintaining your organization routine effortless and adds a cohesive aesthetic. Who doesn’t want a clutter-free, Instagram-worthy bathroom?
Envision sleek, matte black or clear labels affixed to your baskets, jars, or drawers. The labels feature simple sans-serif fonts or subtle icons, providing clarity without distraction. When you glance at your storage, everything looks unified and curated—like a professional organizer designed it. The neat labels elevate the overall decor, making your space feel polished yet personal.
Choose label materials that match your style—wood veneer, metallic foil, or waterproof vinyl. Use hand-lettered tags or printed labels for a clean look. Incorporate labels into existing decor by matching colors or fonts to your overall palette. For seasonal changes, swap out labels with themed designs or different fonts for variety. The key is consistency for a harmonious appearance.
Decide what categories need labeling—baskets, jars, drawers, or containers. Use a label maker or print labels on adhesive paper for precision. Attach labels at eye level for easy reading, ensuring they are straight and secure. Regularly update labels when you change contents or organize new items. Keep the design minimal and functional to avoid cluttering your aesthetic.
Add decorative elements like metallic accents or textured papers behind labels for a luxe feel. Personalize with handwritten notes or initials for a charming touch. Use different label shapes—round, rectangular, or custom-cut—to add visual interest. Incorporate color coding to quickly identify categories at a glance. Labels transform your storage into a stylish organizational statement.
Minimalist labeling simplifies your routine and enhances your decor’s cohesion. It’s a small detail that makes a big difference in maintaining order. When everything is clearly labeled, frustration drops and efficiency rises. It’s a smart, stylish upgrade that keeps your bathroom looking neat and intentional.
9. Choose a Cohesive Color Palette for a Calm Atmosphere
Clashing colors and chaotic decor can make your bathroom feel hectic instead of relaxing. A cohesive color palette creates a calming environment that promotes peace and clarity. It’s an easy way to upgrade your space from cluttered to Zen. Want a bathroom that feels like a retreat? Color harmony is your secret weapon.
Visualize soft, neutral tones—beige, blush, or cool greys—applied consistently across storage units, towels, and accessories. This creates a seamless, soothing environment that’s easy on the eyes. Incorporate matching containers, baskets, and even wall paint to reinforce the harmony. The overall effect is a serene, cohesive space that invites relaxation.
Pick a base palette—monochrome or analogous shades—and add accent colors for variety. Change the shades seasonally or for special occasions while maintaining the core hues. Use paint, textiles, and accessories to tie everything together. For a spa-like vibe, stick to soft pastels and natural textures. For a bold look, choose contrasting but complementary shades.
Start by selecting your primary colors and secondary accents. Use color samples to test how they look together in your space. Choose storage solutions in matching tones or neutral shades to keep the look unified. Keep patterns minimal and stick to solid colors or subtle textures. Regularly audit your accessories to maintain visual consistency. The result will be a space that feels balanced and peaceful.
Add personal touches like monogrammed towels, decorative textiles, or painted accent walls. Use color-coordinated labels and containers to reinforce the palette. Incorporate natural materials like wood or stone for a grounding effect. Seasonal updates with new accessories or textiles keep the space fresh and inviting without breaking the harmony.
A cohesive color palette transforms your bathroom into a sanctuary of calm. It enhances your decor’s visual flow and makes organization more intuitive. When everything matches seamlessly, you’ll feel more relaxed and in control. Ready to create a tranquil, stylish retreat? Start with the colors and enjoy the payoff!
10. Incorporate a Slim Vertical Storage Tower
Limited space in your bathroom can turn storage into a nightmare, especially when you have lots of small products. A slim vertical storage tower offers a tall, narrow solution that fits into tight spots. It keeps your toiletries organized and easily accessible without taking up much room. Want a clutter-free, efficient setup? This is your answer.
Picture a sleek, matte-black tower standing in the corner or beside your vanity. Multiple narrow shelves hold bottles, jars, and tools, all visible at a glance. The tall design maximizes vertical space, creating a streamlined silhouette that doesn’t overwhelm the room. It’s both functional and stylish—perfect for small bathrooms or narrow alcoves.
Choose from materials like metal, resin, or lacquered MDF to match your style. Shelves can be open or have doors for a cleaner look. Add small baskets or jars on the shelves for extra organization. Coordinate with your overall decor by choosing colors or finishes that blend seamlessly. These towers adapt easily to various spaces and aesthetic preferences.
Measure the available space carefully before purchasing. Assemble your tower according to instructions, securing it firmly to the wall if necessary for stability. Organize your products by type or frequency of use, placing everyday items at eye level. Keep heavier items at the bottom for stability. Regularly evaluate and tidy to maintain an efficient system.
Decorate the shelves with decorative stickers, labels, or small accents to add personality. Use matching or contrasting colors to enhance visual appeal. Incorporate a few curated decorative pieces like a textured container or a small sculpture. Seasonal updates can refresh the look without much effort. The tower becomes both a storage solution and a style statement.
Vertical storage towers turn tight spaces into highly functional zones. They help you keep your bathroom clutter-free and stylish. When your products are organized vertically, your routine becomes smoother and more enjoyable. It’s a smart upgrade that makes the most of every inch—perfect for modern living.
11. Utilize Under-Shelf Baskets for Additional Storage
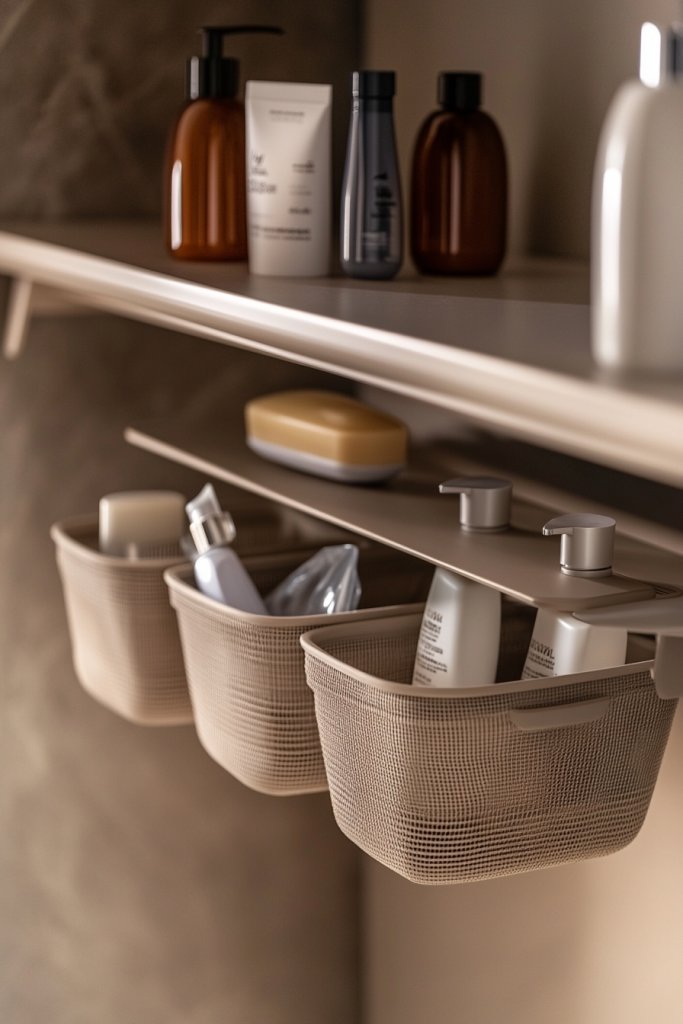
Sometimes, shelves just aren’t enough for all your bathroom essentials. Under-shelf baskets hang beneath existing shelves, providing extra storage without cluttering the space. They’re perfect for small items like razors, brushes, or travel-sized products. Want to maximize every inch? This trick is a game-changer.
Imagine a sturdy wire basket suspended beneath a wooden shelf, filled with neatly organized toiletries or small towels. The basket adds dimension and function, making use of otherwise wasted space. When filled, it looks tidy and intentional rather than cluttered. The open design allows quick access and easy visibility—no more digging through piles.
Select baskets in materials like metal, wicker, or coated plastic, depending on your decor. Mount baskets with hooks or clips that attach securely underneath shelves. Use different sizes for various needs—small for tiny items, larger for bulkier products. Coordinate with your existing storage for a seamless look.
Measure the space beneath your shelves to select appropriately sized baskets. Attach mounting hardware securely to support weight, ensuring stability over time. Organize items logically—daily essentials in easy-to-reach baskets, less-used items higher or lower. Regularly declutter and wipe the baskets clean to maintain hygiene and appearance. It’s a simple, effective way to add storage.
Decorate baskets with labels, fabric liners, or colorful accents to match your style. Use small hooks or clips to hang additional tools or accessories inside the baskets. Swap out contents seasonally or as your needs change. This added layer of organization keeps your bathroom looking neat and fresh.
Under-shelf baskets optimize your vertical space and keep your essentials easily accessible. They turn underutilized areas into valuable storage zones, making your routine more efficient. With a bit of planning, your bathroom becomes a well-organized haven. Ready to add extra storage without the clutter?
12. Add Decorative Labels and Tags for Style and Function
Messy baskets and jars can make your bathroom look chaotic, even if everything’s stored away. Decorative labels and tags add a touch of style while keeping you organized. They help you quickly identify contents and add a personalized, finished look. Want your storage to look curated and intentional? Labels are your best friend.
Envision elegant tags made of wood, metal, or thick cardstock, attached with twine or adhesive. Labels feature sleek fonts or hand-lettered scripts, detailing what’s inside each container. When placed on jars, baskets, or drawers, they create a cohesive, polished aesthetic. The labels elevate basic storage into a decorative feature that complements your overall decor.
Select labels that match your style—minimalist, vintage, or playful. Use different shapes—round, rectangular, or custom cut—to add visual interest. Incorporate themed labels for holidays or special occasions. Combine with color-coordinated containers for a uniform look or mix textures for an eclectic vibe. Labels can be swapped easily for seasonal updates.
Choose durable, moisture-resistant materials for labels—vinyl, laminated paper, or engraved wood. Use a label maker or print custom labels for a precise look. Attach labels with adhesive, twine, or small clips, ensuring they stay secure. Organize your items first, then add labels for a clean, finished appearance. Regularly update labels to match your changing collection.
Decorate labels with decorative borders, stickers, or embellishments to reflect your personality. Use hand-lettering or calligraphy for a personal touch. Incorporate color themes or metallic accents for added elegance. Labels can be a fun DIY project that personalizes your space. They’re small details that make a big visual impact.
Decorative labels make organization effortless and beautiful. When everything is clearly marked, you spend less time searching and more time enjoying your space. They add a professional, polished look that boosts your confidence in your organizational skills. Your bathroom will feel more styled, serene, and functional—ready for anything.
13. Incorporate a Small Lazy Susan for Corner Items
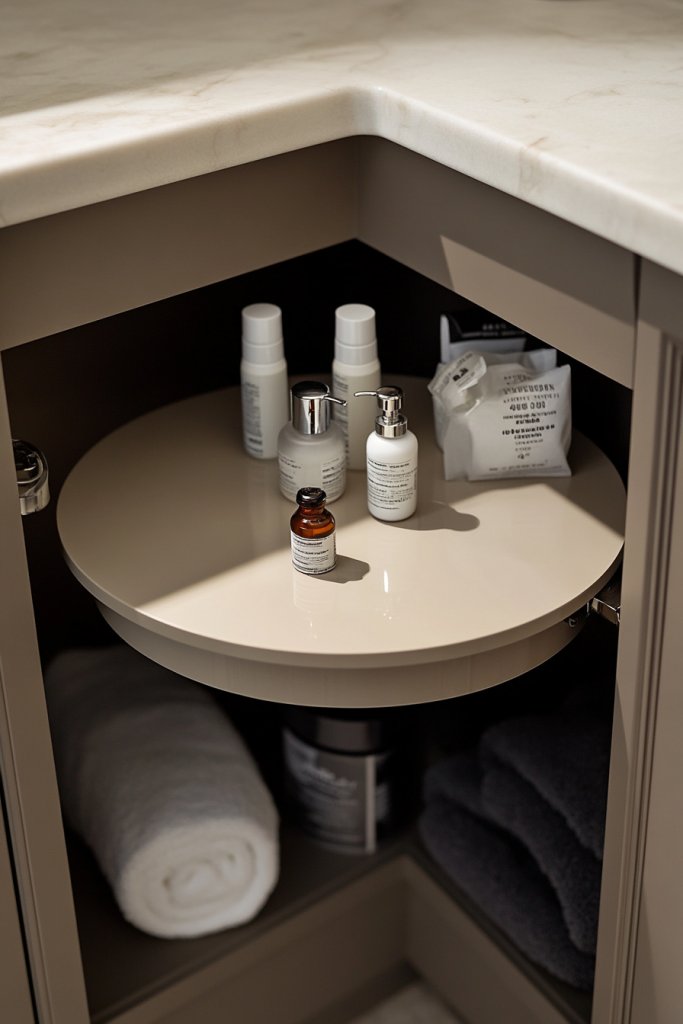
Corner cabinets often become black holes where items go to hide forever, causing frustration and wasted space. A small Lazy Susan turns this underused corner into an accessible storage hub. It makes retrieving toiletries and grooming supplies effortless, saving you time and energy. Want to make your bathroom more efficient? This little trick is a gem.
Picture a sleek, rotating tray in a corner cabinet filled with skincare products, small tools, or even decorative accents. The Lazy Susan spins smoothly, giving you instant access to everything without moving other items around. Its compact size fits snugly into tight corners, while the polished surface adds a touch of elegance. It’s the perfect blend of function and style.
Choose from materials like bamboo, glass, or stainless steel for durability and style. Some models have raised edges or textured surfaces to prevent slipping. Use multiple Lazy Susans for larger corners or different tiers for added capacity. Decorate with small baskets or containers on the tray for a more organized look. It’s adaptable for various sizes and aesthetic themes.
Measure your corner space accurately to select the right-sized Lazy Susan. Install in a cabinet or on a countertop, ensuring it spins freely without obstruction. Organize items by frequency of use—daily essentials in the front, duplicates or backups in the back. Keep the surface clean and free of excess moisture. Regularly tidy and rotate items to keep everything accessible.
Add decorative elements like textured mats or colorful liners inside the tray. Use small labels or tags for different sections or products. Incorporate decorative accents around the Lazy Susan to match your decor. Seasonal updates or rearrangements keep the space feeling fresh. It’s a clever way to maximize corner storage with a personal touch.
A Lazy Susan turns a tricky corner into a highly functional area. It simplifies your routine, making everyday tasks easier and more enjoyable. When you can access everything effortlessly, your bathroom feels more organized and inviting. Small upgrades like this boost your confidence in creating a stylish, efficient space.
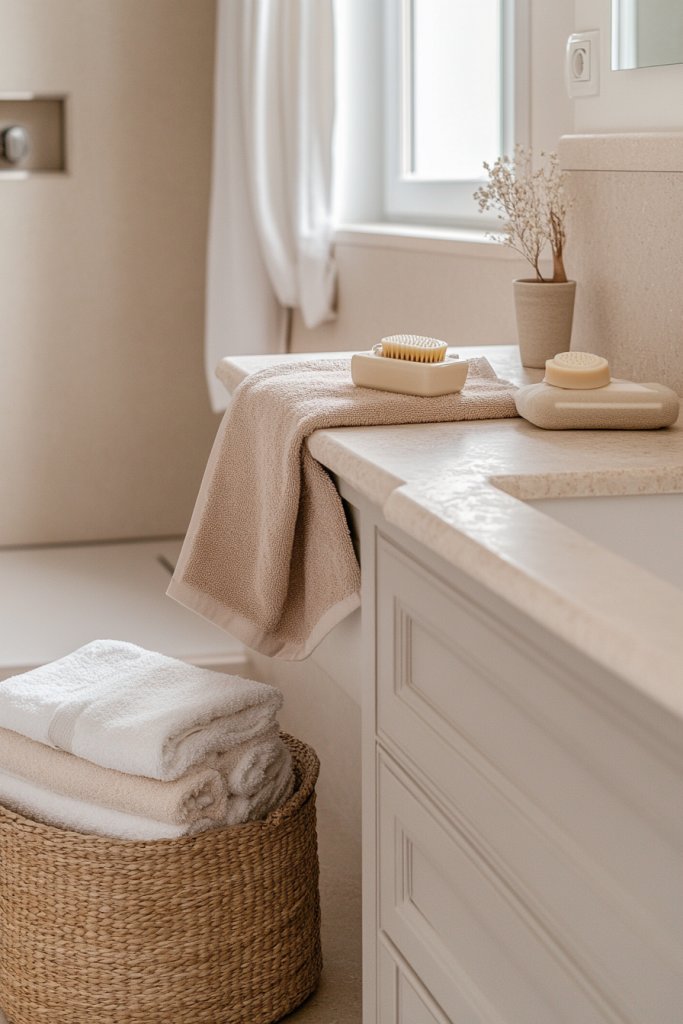
14. Use Decorative Trays to Corral Items on Surfaces
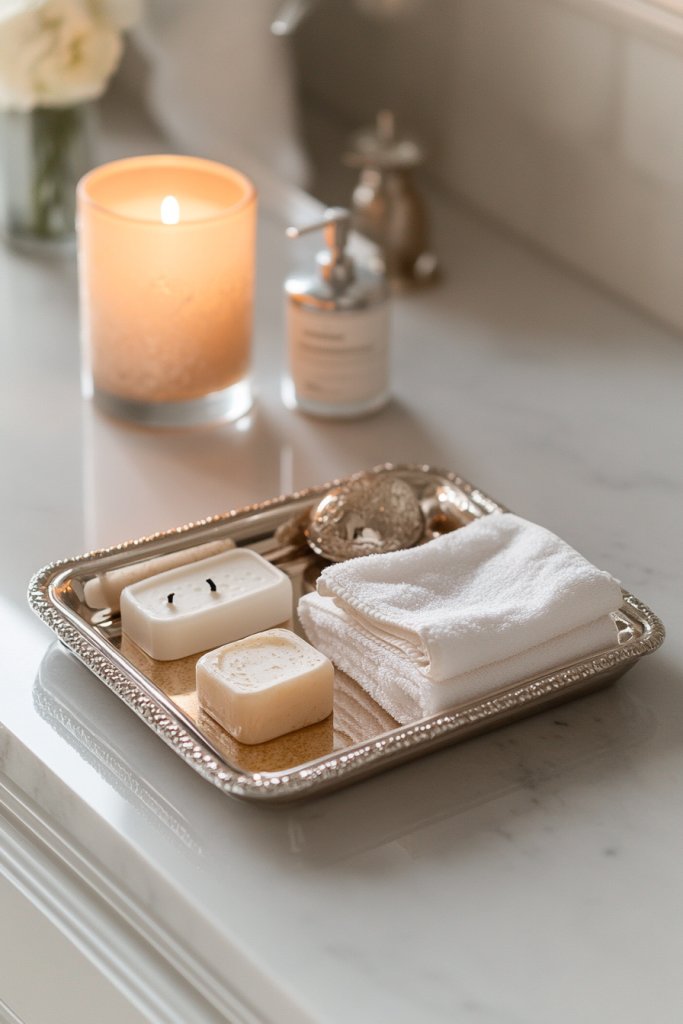
Cluttered countertops can ruin the aesthetic of your bathroom, making it feel chaotic and uninviting. Decorative trays help organize and contain your daily essentials in one stylish spot. They add a layer of sophistication and keep everything within reach. Want to elevate your everyday routine? Trays are the way to go.
Imagine a beautifully crafted marble or woven tray placed on your vanity or shelf. Inside, you keep your favorite perfume bottles, skincare products, or a small candle. The tray’s design complements your decor—minimalist, boho, or luxe—and creates a curated display. When everything is grouped, the space feels intentional and tidy.
Choose from materials like metal, wood, rattan, or acrylic to match your style. Use different shapes—rectangular, oval, or round—for visual interest. Layer multiple trays for a layered, textured look, or keep it simple with one statement piece. Incorporate small decorative objects or plants to personalize the setup further. They work beautifully in open or closed storage spaces.
Select a tray that fits your surface area and style. Arrange your frequently used items in a way that’s both functional and attractive. Regularly clean and refresh the tray’s contents, removing clutter or replacing items for variety. Use small, decorative containers or cups within the tray for tiny essentials. This simple step elevates your organization game instantly.
Decorate trays with seasonal accents, engraved tags, or textured fabrics underneath. Personalize with favorite small objects or meaningful keepsakes. Mix materials—metal with glass, wood with fabric—to create contrast. You can also add a few decorative stones or shells for a natural touch. The key is to make it both practical and beautiful.
Using decorative trays transforms clutter into a styled vignette, making your bathroom more inviting. It’s a quick, easy way to add personality and elevate your decor. When everything has a designated, attractive spot, maintaining organization becomes effortless. Your space will look polished, intentional, and ready for action!
15. Install Sliding Doors to Save Space
Swinging bathroom doors can eat up space and cause clearance issues, especially in tight areas. Sliding doors offer a sleek, space-saving alternative that makes your bathroom feel more open and accessible. They’re the perfect upgrade for small or awkwardly shaped rooms. Want a seamless, modern look that maximizes every inch? Sliding is the answer.
Picture smooth, glass or wood-sliding doors gliding effortlessly along a track. When open, they reveal your storage or closet area without swinging into other fixtures. When closed, they create clean, uninterrupted lines that add to a minimalist aesthetic. The doors can be wall-mounted or pocket-style, disappearing into the wall for a sleek finish. It’s both functional and stylish.
Choose from frosted or clear glass, textured panels, or painted finishes to match your decor. Pocket doors hide within the wall for a truly seamless look, while barn-style sliding doors add rustic charm. Hardware can be minimalist or decorative, depending on your style. Use them for bathroom closets, linen cabinets, or even as room dividers—adaptability is key.
Measure your opening carefully and select a sliding door system compatible with your space. Hire a professional if needed for precise installation, especially for pocket doors. Ensure the track is level and the doors slide smoothly without obstruction. Maintain the hardware with regular checks and lubrication. Consider adding soft-close or locking mechanisms for added functionality.
Decorate the doors with decals, stained glass, or painted accents for a personalized touch. Add handles or pulls that complement your overall decor. Incorporate contrasting colors or textures to create focal points. Seasonal or themed hardware swaps can keep your look fresh. Sliding doors combine style and practicality effortlessly.
Sliding doors streamline your space, making it more functional and visually appealing. They’re an investment in both style and convenience that pays off immediately. When your doors glide smoothly and look great, your entire bathroom feels more modern and organized. Ready to slide into a smarter storage solution?
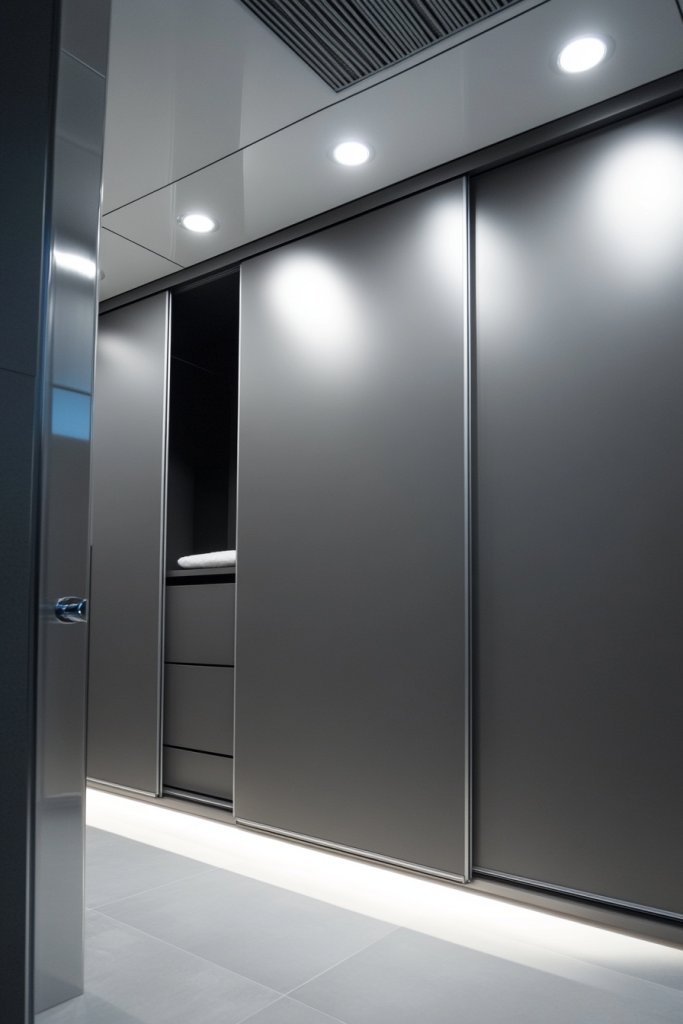
16. Incorporate a Hidden Closet with Pocket Doors

A cluttered, exposed closet can ruin the look of your bathroom and make organization a challenge. Hidden closets with pocket doors hide your storage behind sleek, retractable panels, creating a seamless appearance. It’s a smart way to keep your space tidy and stylish, especially if you prefer a minimalist aesthetic. Want a neat, uncluttered vibe? This is it.
Imagine a set of flush, pocket doors blending into your wall, sliding open to reveal an organized closet with shelves, drawers, or hanging space. When closed, the space appears smooth and uninterrupted, enhancing the room’s flow. The hidden feature adds a high-end touch, making your bathroom look cleaner and more modern. It’s like having a secret storage compartment that’s always ready.
Choose doors in finishes that match your wall or cabinetry—painted, wood veneer, or mirrored. You can incorporate decorative panels or subtle hardware for added style. The interior can be customized with adjustable shelves, hooks, or drawers tailored to your needs. For smaller bathrooms, a compact, hidden closet keeps things out of sight while maximizing space. Adaptability is key.
Work with a contractor or handyman to measure wall thickness and door fit. Install the pocket door mechanism securely within the wall cavity, ensuring smooth operation. Organize your contents with adjustable shelving or baskets for flexibility. Regular maintenance includes checking door tracks and cleaning dust or debris. This upgrade requires some effort but results in a sleek, clutter-free look.
Decorate the interior with matching storage bins, labels, or color schemes that blend with your decor. Add a small mirror or decorative trim on the doors for a personalized touch. Keep the interior organized with custom drawers or dividers for maximum efficiency. Seasonal updates with different accessories can keep the space feeling fresh. It’s a hidden gem for a tidy, stylish bathroom.
A hidden closet with pocket doors elevates your bathroom’s design and organization game. It makes your space feel more open and less cluttered, boosting your confidence in your styling skills. When everything is neatly tucked away, your daily routine becomes more enjoyable. It’s a smart, sophisticated upgrade that transforms your bathroom into a sleek retreat.
17. Use Slimline Hangers for a Uniform Look
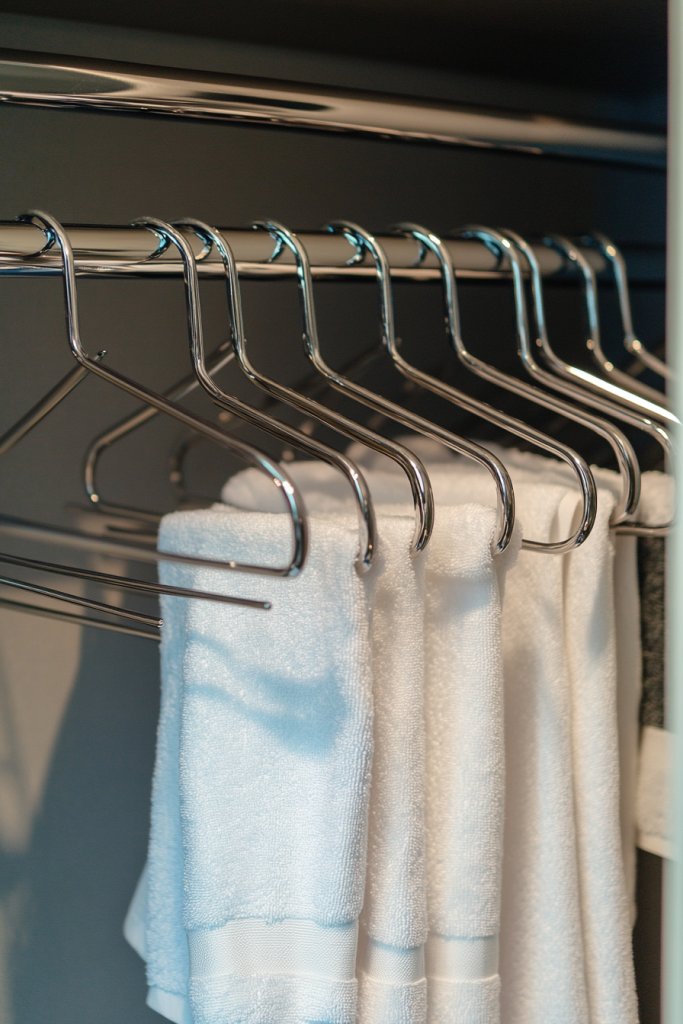
Bulky, mismatched hangers can make your closet or bathroom look messy and disorganized. Slimline hangers streamline your hanging space, creating a tidy, uniform look while maximizing capacity. They’re perfect for reducing visual clutter and making everything easier to browse through. Want a sleek, clutter-free wardrobe? Slim hangers are your secret.
Picture a row of matching, slender hangers holding your robes, towels, or clothes. The uniformity of the hangers creates a clean, cohesive appearance, visually expanding the space. The thin profiles save room, allowing you to hang more items without overcrowding. When your hangers match perfectly, your space instantly feels more organized and stylish.
Choose from materials like plastic, velvet, or wood—each providing a different aesthetic. Velvet-coated hangers prevent slipping, ideal for delicate fabrics, while wood adds a natural touch. Use slimline hangers for all types of clothing, from heavy robes to lightweight towels. Color-coordinated sets can add an extra layer of style or function. They work well in closets, open shelves, or bathroom hooks.
Remove old, bulky hangers and replace with slim profiles. Organize your garments by type, color, or frequency of use for maximum efficiency. Ensure each hanger is sturdy enough to support the weight of your items. Regularly check for wear and replace damaged hangers promptly. A uniform hanger collection makes your entire space look more professional and intentional.
Mix textures or finishes for a curated look—matte, glossy, or textured. Add small decorative accessories like engraved tags or painted tips. Use color coding or labels to indicate seasons or outfit types. Incorporate matching hooks or clips for accessories to create a cohesive organizational system. Small details like this make a big visual impact.
Slimline hangers transform your space into a sleek, organized haven. They help you see your wardrobe clearly, making dressing easier and faster. When everything hangs uniformly, your closet instantly looks more polished. It’s a simple upgrade that boosts your confidence and style sense—ready to conquer your day.
18. Add a Vertical Jewelry or Accessory Organizer
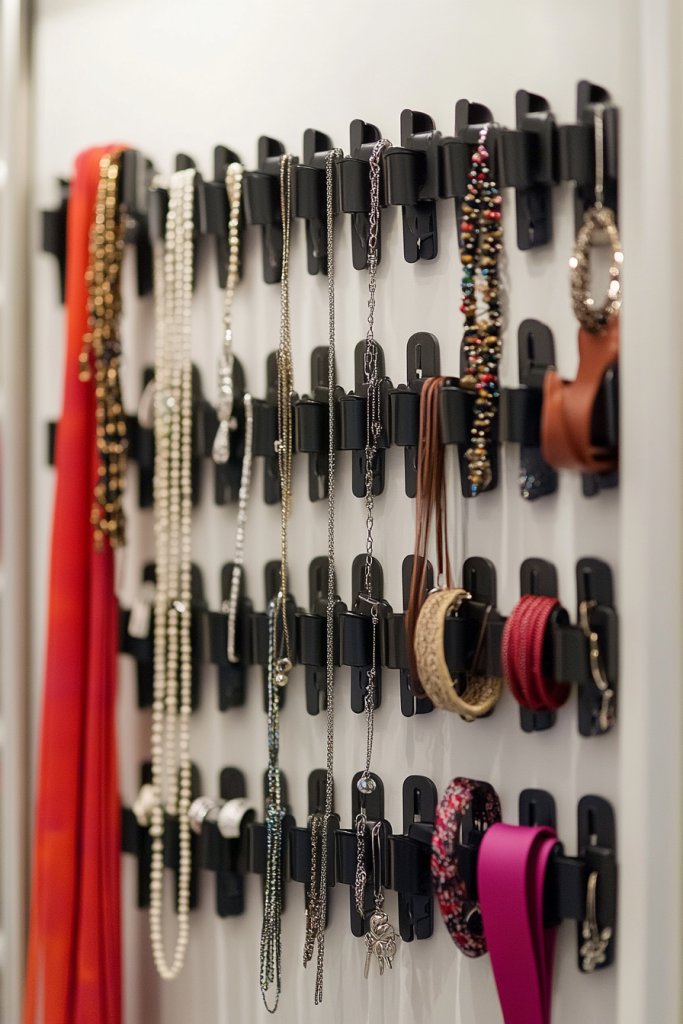
Tangled necklaces, misplaced scarves, and lost belts make accessorizing a chore. A vertical organizer keeps your jewelry and accessories visible, tidy, and easy to access. It saves space and prevents frustrating knotting or hunting around. Want a clutter-free way to showcase your collection? This is your solution.
Imagine a slim, wall-mounted panel with hooks, rods, or compartments designed for necklaces, bracelets, and scarves. The vertical layout keeps everything in plain sight, making it quick to choose the perfect accessory. Decorative elements like textured panels or painted backgrounds add personality. When filled neatly, it becomes a functional art piece that elevates your space.
Select from materials like wood, metal, or acrylic to match your decor. Use different compartments for different accessory types—hooks for necklaces, slots for bracelets, loops for scarves. Incorporate decorative elements like beads or textured finishes to enhance style. Mount it at a height that’s accessible and visually pleasing. It adapts easily to your collection size and aesthetic preferences.
Measure your wall space and choose an organizer that fits comfortably. Install securely into studs or with appropriate anchors. Arrange your accessories in a way that’s both practical and decorative—grouping similar items or color schemes. Regularly declutter and reorganize to keep it functional. Clean the surface periodically to maintain its appearance. The result is a tidy, eye-catching display.
Decorate with themed beads, charms, or painted backgrounds to reflect your personality. Add labels or tags for quick identification. Incorporate complementary items like small decorative trays or jars nearby. Seasonal or style updates can keep the display fresh and inspired. It’s a fun, practical way to keep your accessories organized and stylish.
A vertical jewelry organizer declutters your space and simplifies styling your outfits. It encourages you to wear more of your collection, boosting confidence and creativity. When everything is beautifully displayed, you’re inspired to accessorize more thoughtfully. It’s a small upgrade with a big impact on your daily look and mood.
Conclusion
With a diverse array of bathroom closet remodel ideas, you have all the tools to transform your space into an organized haven. Whether you choose sleek shelving, smart storage solutions, or personalized touches, these ideas empower you to create a bathroom that’s both functional and beautiful. Take the plunge today and turn your closet into the perfect sanctuary for your essentials!